sweet man! as usual, looks great!
all i can say is damn son.. i dont know were u got all the money to do this but i bet i coast an arm and a leg.. and u know every lil detail about that car to the last bolt,, MAD FUCKing PROPS.. +1
updates, I'm waiting damn it![]()
Thanks for all the props guys!! It's awesome to read the comments you guys leave![]()
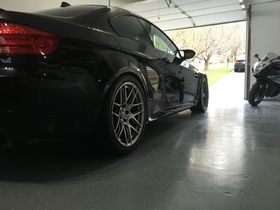
The car should be painted in 2 weeks. Definitely the engine bay and interior. There is a good chance the exterior will be shot as well. Fingers are crossed![]()
Educational post![]()
Picture 1:
A: Coolant outlet /inlet to heater
B:
C: Clutch line
D: Tranny ground
E: Main engine harness
F: Oil Filter
G: Coolant drain bolt
H:
I:
J:
K:
L: Crank pulley
M: Vtec Solenoid
N:
O:
P:
Q: VTC oil control solenoid valve
R: Vin plate
S: Exhaust manifold heat shield
T: Header
U: Charge harness
Close up of Picture 1:
Picture 2:
H:
I:
J:
K:
L: Crank pulley
M: Vtec Solenoid
N:
Q: VTC oil control solenoid valve
W: Alternator
X: A/C compressor
Y:
Z:
1:
2: A/C compressor harness
3:
Another close up:
M: Vtec solenoid
N:
One more close up:
PS <> If I have something labeled wrong, feel free to let me know and I will correct it.
Nopi Drag Racing NHRA Atlanta Dragway March 29/30! > HERE!
omg vtak!!!
lol jk... cant wait for more pics!
the harness goes from the engine bay through the firewall to what? do you just unplugg it from the inside under the dash?
Love the diagrams, man.+1
im just tuning into this thread and all i can really say is wow...
omg man, every day must feel like christmas
that car is going to be cleaner than when it rolled of the assembly line
Seriously xD But how long have you been saving to do all this? Either that, or what kind of job do you have? Because I need to get into whatever business you're doingOriginally Posted by imbosile
Dude reading all the updates you've posted since I've last read really started my day off right.
BTW TRDwasiq the pic in your sig is fucking hilarious!!
Last edited by spacelion; 06-05-2007 at 10:53 AM.
][STREETLOVE][
Thanks guys for all the props. The motor will remain stock until I boost it :boobies:
More parts arrived:![]()
Nicely packed:
Don't know much about welding, but looks good from my view![]()
12" fan:
Thanks for looking![]()
Nopi Drag Racing NHRA Atlanta Dragway March 29/30! > HERE!
I like it man!![]()
Man you are doing the shit that everyone else dreams about. I cannot wait to see the outcome of this project. Are you going to build the k before dropping it in or going to leave it stock?
nice it will be a great run. homeboy with the k20 verus him lol
I love Boost!
I work at the airport and just turned 29Originally Posted by 97accordjdm
![]()
I never had the intention of removing everything and painting. I saw a build which did so and I just followed it..... Yeah, the powder coat will probably hold up better in the long run. But, there should not be much touching the suspension parts. Thanks for the propsOriginally Posted by SLOWR/T
![]()
Session 029:
Prepping the side skirt area for undercoat spraying:
Taped off and ready to go:
Wrong seats arrived![]()
![]()
![]()
Just so happened when I looked at my Helms this was the page showing:
So....
Thanks for looking![]()
Nopi Drag Racing NHRA Atlanta Dragway March 29/30! > HERE!
Session 030:
Anyone know if the HASport mount looks to be located correctly for drilling?
I'm surprised no one mentioned about the hood latch clip error. I said & posted pics that the hod latch was removed by pulling back a thin sheet cover inside the top fender well. Well, that is true to remove the piece, but the piece removed that way is the windshield washer line clip that sits on top of the drivers shock tower. My mistake![]()
![]()
I present to you the proper way to remove the hood prop plastic clip:
I read before that the interior wiring can be a PITA reinstalling if removed from the vehicle. Well, I took a look and after a couple minutes and a little poking I decided it can't be too difficult. So, I started removing it:
3 harnesses @ the steering wheel (stalks)
Another view:
There are quite a few of these annoying clips holding the interior dash wiring in place:
You can see 2 more here:
Labeled all the bolts and clips. Should of used this method from the beginning:
And after about 5 minutes the harness was out:
Nothing to it, huh?
All that $hit in the driveway is pretty much 4 sale (minus the dash harness & Accord):
Thanks for looking and paint should be happening tomorrow night![]()
![]()
![]()
Nopi Drag Racing NHRA Atlanta Dragway March 29/30! > HERE!
Very nice build.
I believe "J/K" are coolant lines and "I" is a crank sensor. Just trying to lend a helping hand.
G/L with the rest of the build.
92 EH2 - Current "We will build him, better, stronger, faster."
98 EJ8 - Stolen (Thieves)
WOW all this work you are doing and your painting the suspension parts and cross member. why?? you would be better off powder coating them. they would look 10x better and would last longer than paint. i mean as much time and money your putting in this whats a couple hundred more for powder coating. just my thought. cars going to look kick ass when your done forsure though. i give you props.
i hate you .. so jealous .. good work man +1
VTECH ... Making phones since 1994.
Looking for Integra Sedan (DB7/8) parts <--clickable
Q:Nitrous on stock LS high mileage. Too risky?
A:IMO nos is like steroids and giving steroids to a grandma doesnt sound all that good to me!
EVERY LAST NUT AND BOLT MUST BE REMOVED...LOL..
After removing the dash wiring today......I can now say that :boobies:Originally Posted by Hektik
![]()
Nopi Drag Racing NHRA Atlanta Dragway March 29/30! > HERE!
theres way too many props to be given out for this type of build...hope to do this someday...
dang...awesome, bro. *takes notes on labeling method*
i knew accord drivers had something going on between each other...Originally Posted by 97accordjdm
u are gonna not be able to find so many buts and bolts.......
just spray it already for i break into your garage and rattle can that shit 1970 funky green
LMAO! Will be painted tomorrow night or Sunday morningOriginally Posted by thinkskater
![]()
Session 031:
First thing was to try and get the roof braces back in place with the roof. The sealer had a drying time of 2 hours so we wanted to get this out of the way.
Mixing the sealer:
Applying the sealer:
Held in place:
While the sealer cured, we started on the engine bay. I started sanding down the high studs from drilling:
Jason using the HF welder to fill a couple holes from the intake bracket:
A date I found on the drivers side where the a/c condensor used to be:
Putting the radiator in place:
Then it was time to take care of the last 2 roof braces. The nozzle is only good for one session. With only one nozzle left we had to take of them together:
Putting the sealer on the radiator brackets:
In place:
The original plan was just to lay a couple spot welds down and allow the sealer to do it's job. But, he put more than enough weld down to hold the the brackets alone:
Radiator in place:
Another view:
The assembly Jason came up with to hold the last 2 braces![]()
Laying the filler down:
Bare:
Filler applied:
And we finished up the day sanding the engine bay:
Tomorrow we will be sanding the interior, welding a couple small holes shut, and removing a couple of brackets that are not needed.
Thanks for looking![]()
Nopi Drag Racing NHRA Atlanta Dragway March 29/30! > HERE!
nice! finally, some more updates!![]()
i cant fucking wait till this is done ...
u r the man homie..![]()
GECKO SQUAD MEMBER
MSS RACING REPRESENTA.....
the saga continues....
WOW +1 for a crazy project