This is how i did my wheels... Great write up from 2point2 (H-T member).
Things you'll need.
Gloves - buy a 100 pack at the drug store, if you dont use gloves get ready to have black hands for a week.
Sandpaper 150*, 220, 320, 400, 600, 800, 1500
2 cans of mothers polish
6" Buffer
Small palm sander
A few rolls of that blue paper towel stuff from Canadian tire..
* Be carefull with 150 grit..use only to sand down curb scrapes or really bad areas.. you'll need to speed 3 x time with 220 grit to get rid of the sanding marks that the 150 will leave behind.
Step 1: strip rims with heavy duty paint stripper - follow the instructions exactly, do not do it on a humid or cold day or expect to do it agian!
SKIP TO STEP 4-8 if rims are smooth after stripping - use your own judgement. Sir rims and many other OEM rims have concentric machined rings that need to be sanded off so you need to start off with 220 grit
Step 2: Sand down with 220 BY HAND use a wood block for flat parts. take your time and make sure you dont see anything but the sanding marks that the 220 will leave behind. I sand dry with 220. this step will take the most time! do a good job.
Step 3:
Use 320 with the palm sander along with lots of water.
Palm sand as much as the rim as you can but be carefull not to let the sanders lip hit anything! let the sander to the sanding and use lots of water.
clean with clean rags and water.
hand sand areas you cant get at with the palm sander
sand again with the palm sander and fresh sand paper.
Step 4: (same as step 3 with 400 grit)
Step 5: (same as step 3 with 600 grit)
Step 6: Hand sand with 800 grit - take your time and get everything! I used this maroon colored paper from home hardware - it didn't last long using lots of water but it worked so well. buy 4 sheets of this stuff! Thumb Up I did 2 good passes with this stuff.
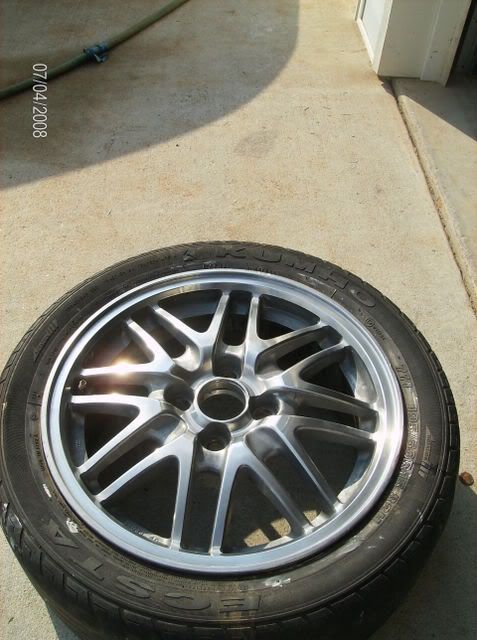
Step 7: Do the same with 1500 grit. the rim will look very smooth and very DULL. if it looks even and dull than you did a good job.
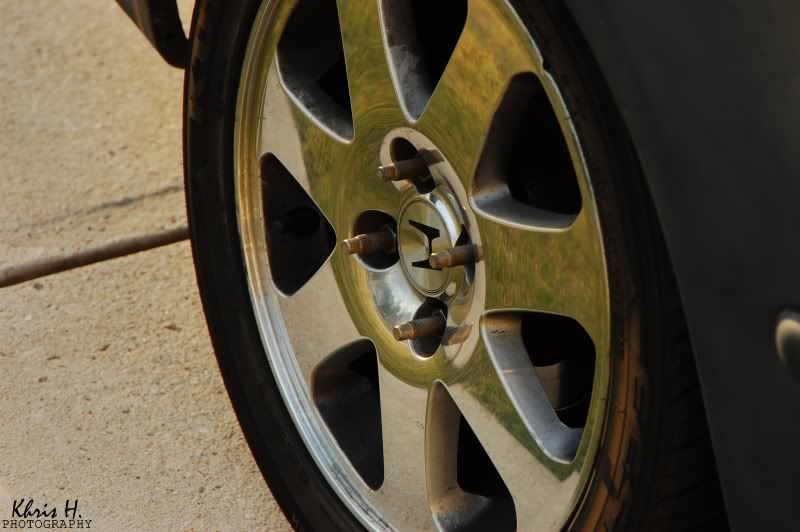
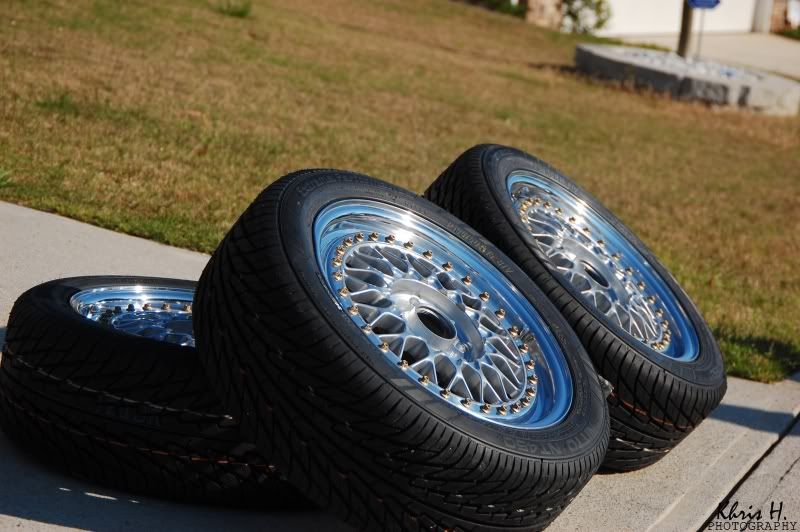
Step 8: Smear a decent amount of mothers on the whole rim. WITH A NEW CLEAN bonnet buff until you start to see circles/haze - you'll see the rim start to get very shiny but will leave a buffing pattern. keep doing this but dont let it get completely dry.. hard to explain but you cant really screw anything up at this point, just might have to do it over. turn the bonnet inside out for the next 'step 8' that you do.
Step 9: WITH A NEW CLEAN bonnet buff the rim. If you did the buffing part right the rim will look like a mirror in seconds. if it still looks hazy than keep experimenting with step 8. you will surprise yourself
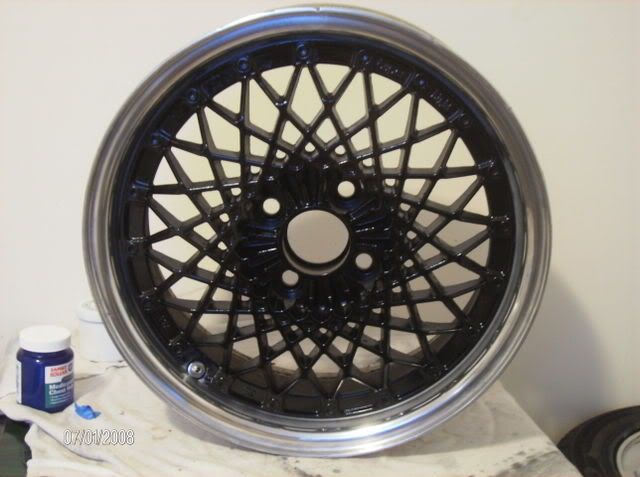
I will not share any info on how i painted between the spokes and got the clean lines between the painted and polished parts. ya'll can figure it out if you want..
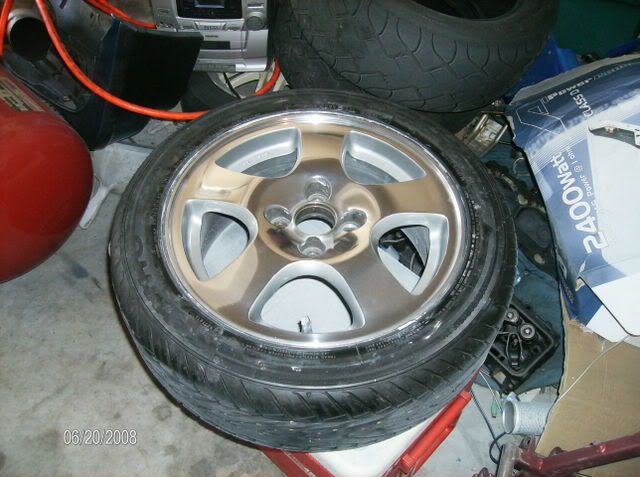
My old wheels...


 Reply With Quote