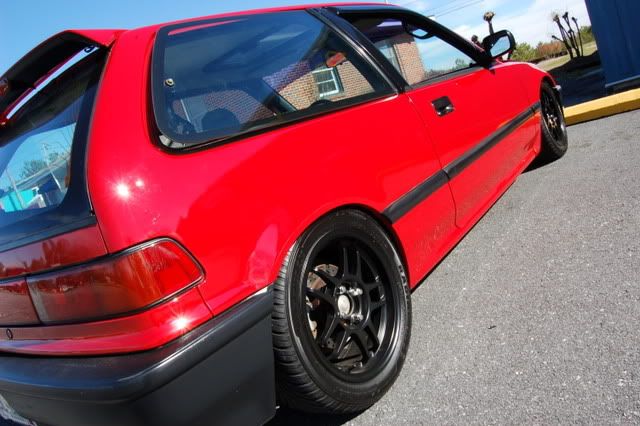
will have much better pics tommorow


better pics

looks alright, just wash ur car.
lol, i kno its too cold!

thats not tint, thats paint. lol too dark ftl.
yea yea same thing, i didn't feel like payin 20 bucks for actual tint

looks to me like they need to be wetsanded and polished.
nah, i wetsanded b4 hand....damn no love

you know after you lay the clear on your supposed to wetsand and polish like nick said
Val for President

tinted tails are ugly but to each his own
"I remember the first time I had sex I kept the receipt."
better than cf tails, thats why their tintedOriginally Posted by Wurm
so wheres the before pics of your altezzas?
Val for President

Yucky...
:boobies:
Shooting mutha fuckahs in the face and gettin paid.
too shamed to take pics of altezzas b4 ^^^^yucky right back, yellow, red, and slow don't mix
One its not yellow. Its green. And at the time im rockin black subzero's. And slow, well you can think what you want boss.
Shooting mutha fuckahs in the face and gettin paid.
ok then ill put money up
HAHA how old are you man. Grow up bro. Someone insults you on the ugly tail lights you get your panties in a bunch, and say put money up on a race. so put yourback in your pocket and do your homework.
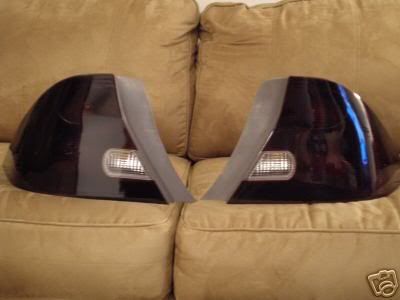
oh and this is how it looks as of the minute.
Shooting mutha fuckahs in the face and gettin paid.
Wow.......I would like to know how U did them Cuz im tinting My tails soon, and personally would like them to trn out a little different..No Offense
Last edited by B00STedSvT; 01-27-2007 at 07:46 PM.

old enough not to be an ass and post worthless comments in someone else's thread...
Looks like a DIY job in the pics.
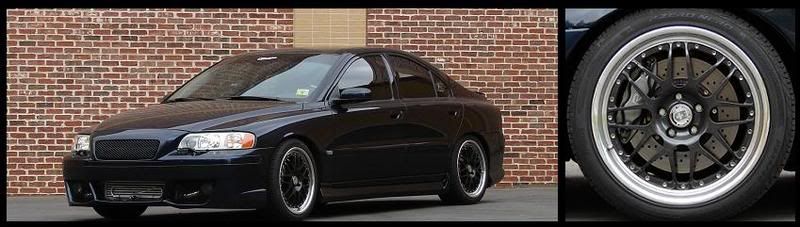
This is how tinted tails are supposed to look
on car pics soon as i get it out of the shop.
Now those are some nice lookin tail lights, and quality.+1 for you man.
Shooting mutha fuckahs in the face and gettin paid.
^^..Nice!..How did u do them?..I heard if U get tint put on them It doesnt last for a long time..Ur supposed to get them painted or wha?
Here you go bro.
I'm guessing you could take the same process but instead of amber, do it with some black mixed in.
This was taken from g2ic.com, if you wanna make your bumper lights, etc amber. this is a good tutorial.
Enjoy. Sry i had to this forum has nothing and has rippped my heart.
I discovered a reliable method, I obviously invented , to create nearly-OEM-as-if-they-made-OEM-amber-bumper-lights bumper lights. I created these for a friend, and it has proven durable because he polishes the lights when he polishes the car. This tutorial is for advance users only. I will not take any questions that are not related to this tutorial as well. In addition to being BIASED, this is for the only people who have access to many materials. Sorry for being mean - I just don't want anyone criticizing "shit you could of bought a new bumper light instead of doing this"
Materials:
-Water Soluble Tamiya Clear Red AND Yellow Paint OR Any ACRYLIC Clear Paint at any hobby store
-Small shot glass cup to custom mix your amber
-Paint brush
-800 and 1500 grit sand paper
-Blow dryer
-Any Acrylic Enamel Clear Spray Paint (e.g. Duplicolor, Rustoleum, Krylon) - if you have access to automotive durable clear, go for it.
-Buffing compound and buffing polish (not plastic compound and polish)
1. Clean and wet sand your lights with 800 grit. It should look evenly hazed. This step creates a "biting" area for the paint.
http://www.boomspeed.com/gerok/IMG_1484.JPG
http://www.boomspeed.com/gerok/IMG_1490.JPG
2. In the shot glass, put 2 parts of yellow to 1 part red. This will create a nice amber. I tested it out on a spare light to save you people the hassle of finding out that you have a too yellow/red color light. To custom mix your amber, you need to experiment. This is one of the reasons why I did not buy just the orange bottle.
http://www.boomspeed.com/gerok/IMG_1495.JPG
http://www.boomspeed.com/gerok/IMG_1491.JPG
3. Make sure if you did not buy the Tamiya brand acrylic color clear paint to check if your paint is water soluble. Add a LITTLE water - this is to create an even texture when you paint it on the lights. Mix well.
http://www.boomspeed.com/gerok/IMG_1509.JPG
4. Paint the lights in one LONG direction THINLY to create an even texture. It should NOT drip or bead on the edges. After the first coat, blow dry it quickly so the paint does not bead up on the edges. Paint and blow dry 4-6 EVEN THIN coats to create the color you want. It should match my sample I did on a spare light. Let it cure for about an hour. There will be lumps but dont worry, the next step will even it out. (You could stop at this step because its already shiny, but it won't be durable).
http://www.boomspeed.com/gerok/IMG_1510.JPG
http://www.boomspeed.com/gerok/IMG_1513.JPG
http://www.boomspeed.com/gerok/IMG_1512.JPG
http://www.boomspeed.com/gerok/IMG_1493.JPG
5. Wet sand the lights with 1500 grit LIGHTLY until it is EVEN and HAZED. This step is to prep for the clear coat.
http://www.boomspeed.com/gerok/IMG_1515.JPG
6. Spray the first coat of clear really really light, it should look bumpy and thin. This is to create a "biting" area for the oncoming coats. Spray 5-6 coats thinly or 3 coats heavily. Sorry no picture...
http://www.boomspeed.com/gerok/IMG_1514.JPG
7. As you may have already noticed, the clear doesn't look as even as you thought it would be. "What the **** happened? Before I put the clear, the lights look super clean?" Well bitch, sand them down again with 1500 sand paper this time. There should not be ANY SHINY SPOTS or LOW CLEAR BUMPS - just one EVEN HAZE - this is critical.
http://www.boomspeed.com/gerok/IMG_1516.JPG
8. Elbow grease (not really hard to do though) - use a rag and rub that bitch with buffing compound. You'll instantly see that it will become shiny the minute you rub her curves. Well, its not done yet. Grab the polish and repeat the same step with a lighter material such as a foam sponge or toilet paper.
Care: Remember, these are not plastic no more because you coated them with paint. When you wax and polish your car, run it on these lights too. From what I've seen, the lights never yellowed or discolored because when you wax/polish your car it'll create a thin UV protective film.
enjoy
good luck
Sry for the message length

Mine are tinted.. but I actually used tint for em.. They dont look bad.. but they need to be wetsanded and buffed as they look very dull..
Val For President
R.I.P. Our Dear Leisa..
ASAP N.E. Chapter VP
No more supra
__________________________________________________ ________________________________________
NIKON Squad member| NikonD40
you really just need to do it the correct way
paint, it wont fade
Val for President
ok guys i just did it the cheap way, got a can of spray paint for plastic and sprayed it on, its not that dull to me, i just think the pics make it look worse than it is, honestly i dont think that it looks bad, i mean its on a dark blue car...
Last edited by TR_Accord; 01-28-2007 at 10:19 PM.
U should have done it the RIGHT way for yourself. Not for us.
I was just bout to say that. But you know. somepeople well haha nm.
Shooting mutha fuckahs in the face and gettin paid.
Hmm. I got mine painted.
gtfo and get a real car

that ef is a real car btw (torque beast top secret) Btw you should have done the taillights the right way the first time man.

who are you talking about?
its okay man he is just upset he got grandpa's hand me down.
Shooting mutha fuckahs in the face and gettin paid.
not you lol
lol, funny i pay for my shit bitch
you had to pay your gramps for that. BWahaha. sucks for you son.
Shooting mutha fuckahs in the face and gettin paid.
ok, well how many boxes of cracker jack did you go through b4 you found that peice of #### that wont go faster than my little brothers scooter?
HMM bout 3,465,405,001. Found a couple of them, this one, a grey one, 3 white crx's a ej8 and some other random higher end cars.
Shooting mutha fuckahs in the face and gettin paid.

buddy dont get mad because other people have different opinions. honestly I dont think they look too "bad." I wouldnt rock them on my ride tho, but with a lil wetsanding and a few more coats of paint and clear, you can have that glossy look (unless you want that dull flat black look).
Last edited by bigdare23; 01-29-2007 at 04:40 PM.
 Posting Permissions

 Reply With Quote