Page 1 of 4 1234 LastLast
Results 1 to 40 of 134

Thread: SRDFTITAN/LOADED811 97 EJ8 TURBO BUILD THREAD!! LOTS OF PICS **CUSTOM GAUGE HOLDER**

  1. #1
    Certified Gearhead SRDFTITAN's Avatar
    Join Date
    Apr 2005
    Age
    40
    Posts
    246
    Rep Power
    20

    Cool SRDFTITAN 97 EJ8 BUILD THREAD...TIME FOR PAINT!!

    Ok so I used to be in the honda game way back in the day (about 7 years ago) so I'm just getting back into it thanks to the wife.....I know strange. Anyway last August wife comes up to me and says, babe I don't want my BMW anymore and I want to get rid of some debt. I'm thinking ok, you can sell your car but I'm not selling my car (2008 black on black Charger). Well wife sells her BMW and I get her a civic (1997 Civic EX coupe 5 spd), I'm thinking hey a Civic is reliable, good on gas and if something happens to it I can fix it, you know the all american husband lol!! So we fast forward to January of this year (2012) and wife blows the head gasket on said Civic and is now stranded on the side of the highway at 3 in the morning. I meet her, make a quick fix and on the way home wife says; I don't want this car anymore, I want a EK hatch!! I'm thinking first off where did you get that chassis code from (EK)? You been watching that Top Gear show again lol? She said no I've been on Import Atlanta and Honda Tech. I'm like ok well we'll find you a hatch and I'll keep the coupe (in my mind I'm like hell yeah, she has no idea what I'm going to do with this car)!! Long story short I buy her a pretty clean 1996 Civic CX hatch and she loves it!! So now that I've kept the wife happy (for now) I'll move on to the build:

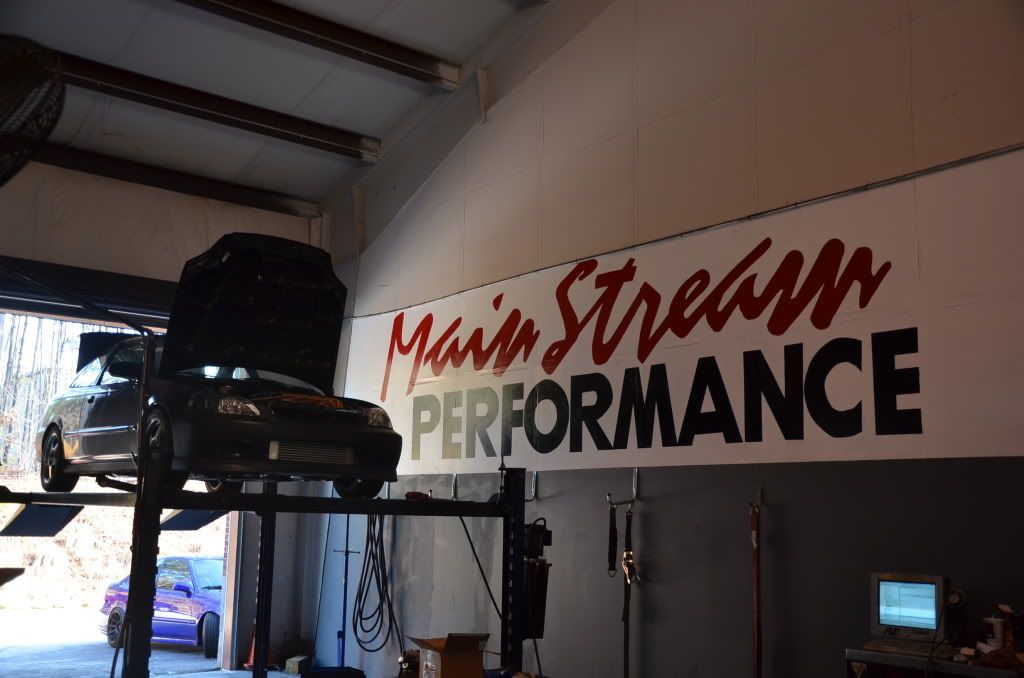
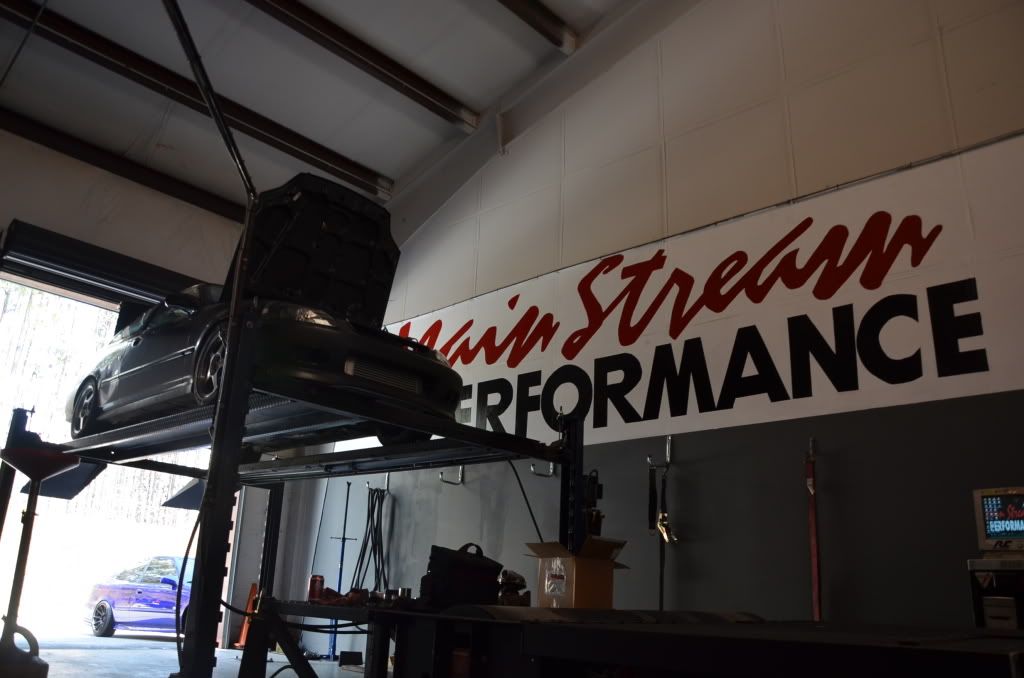
    Now keep in mind I just started this build in January and still have a lot of work to do, but thanks to the guys and Mainstream Performance (Robert, Ben, James and you can never forget ole Scotty!!) this build is happening, so I would definately like to thank all of them!!!

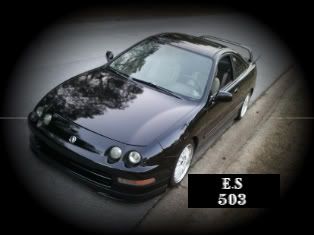
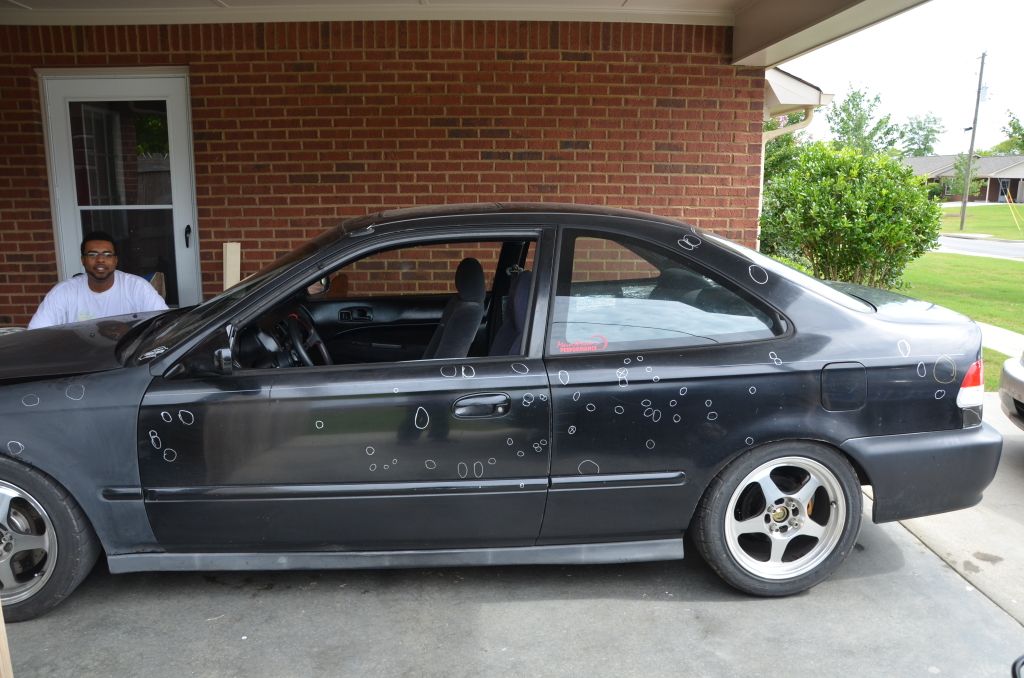
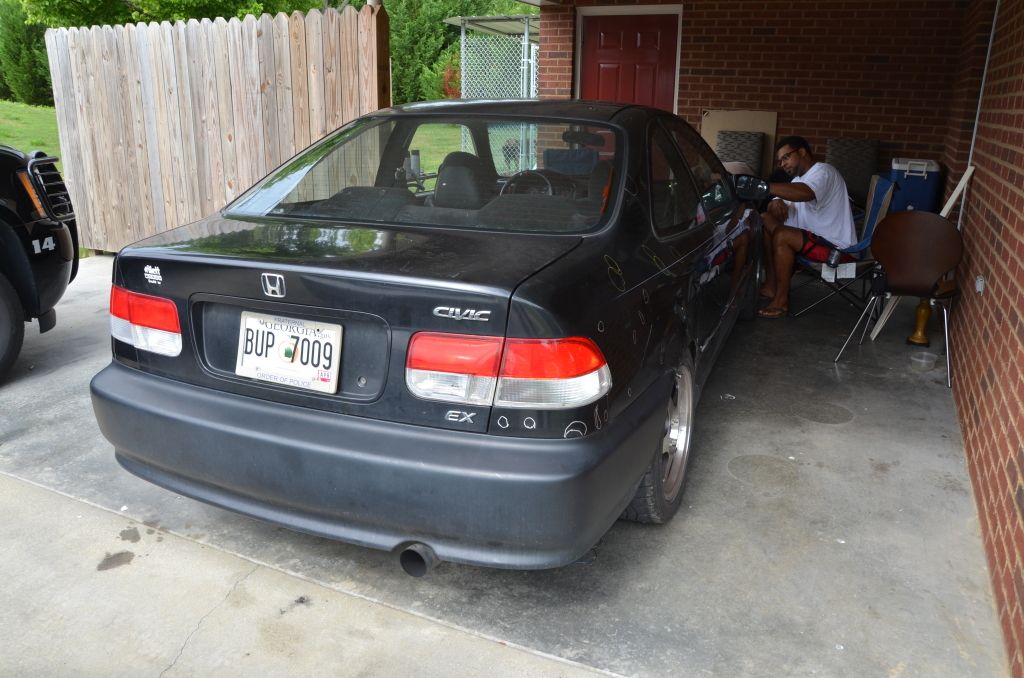
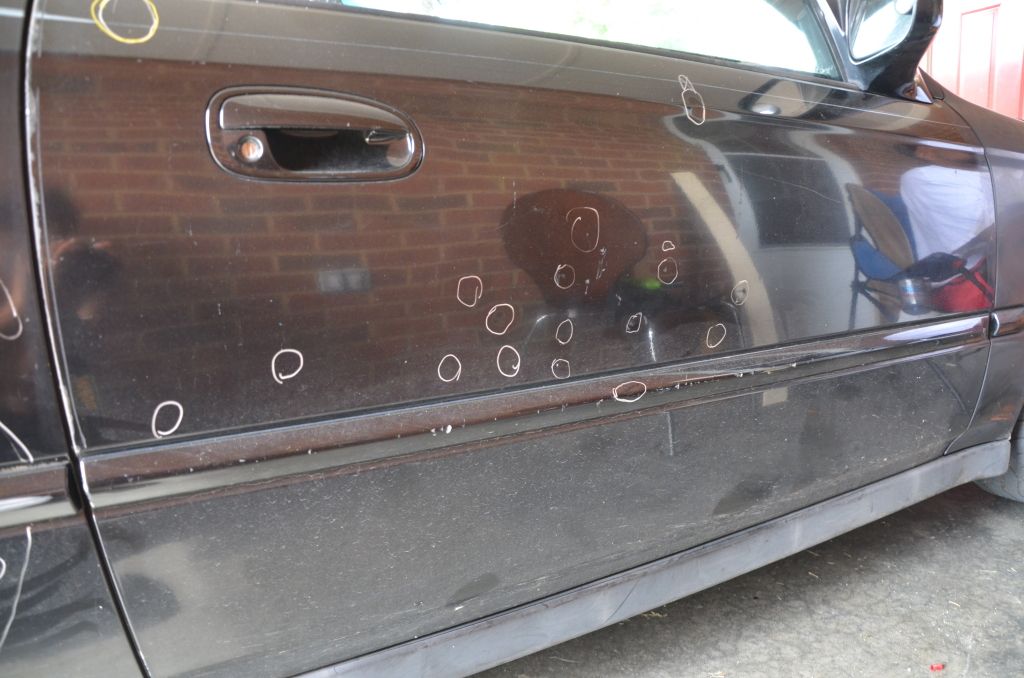
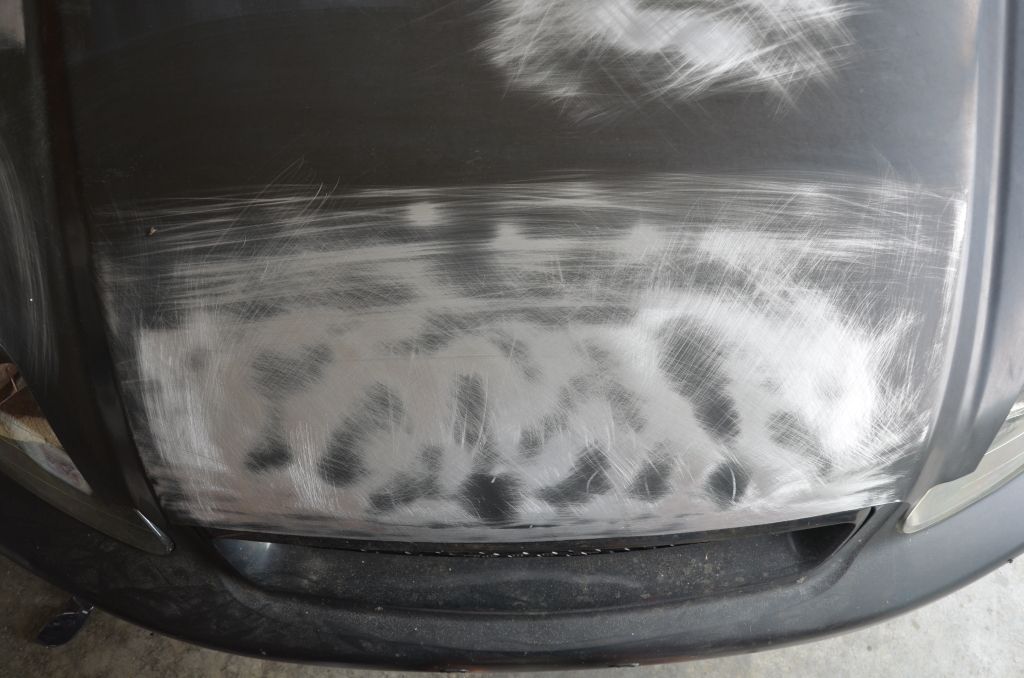
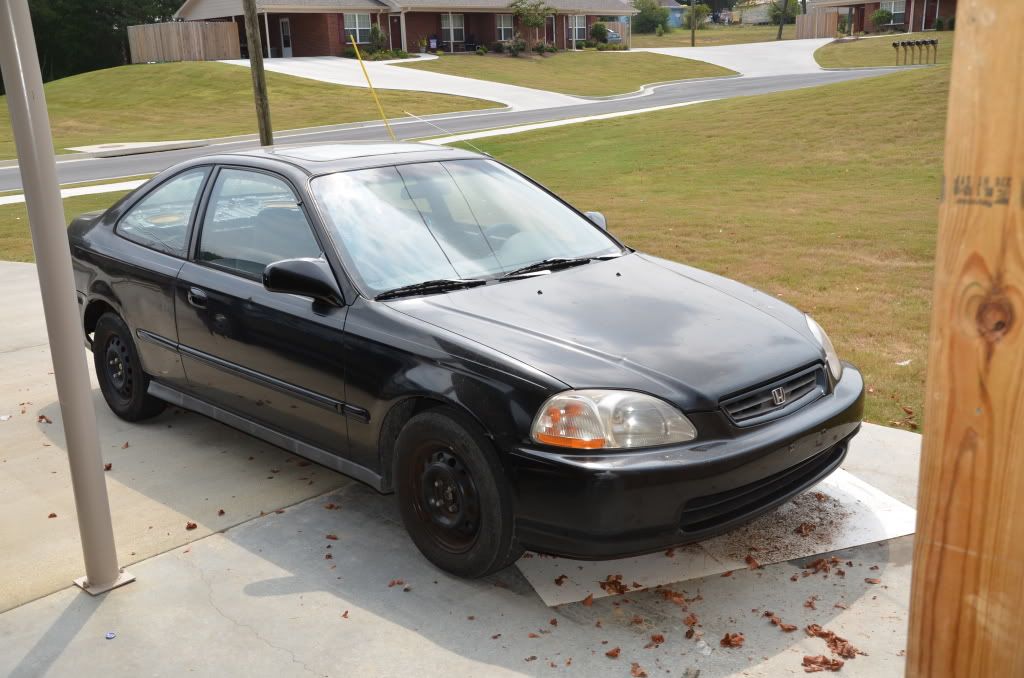
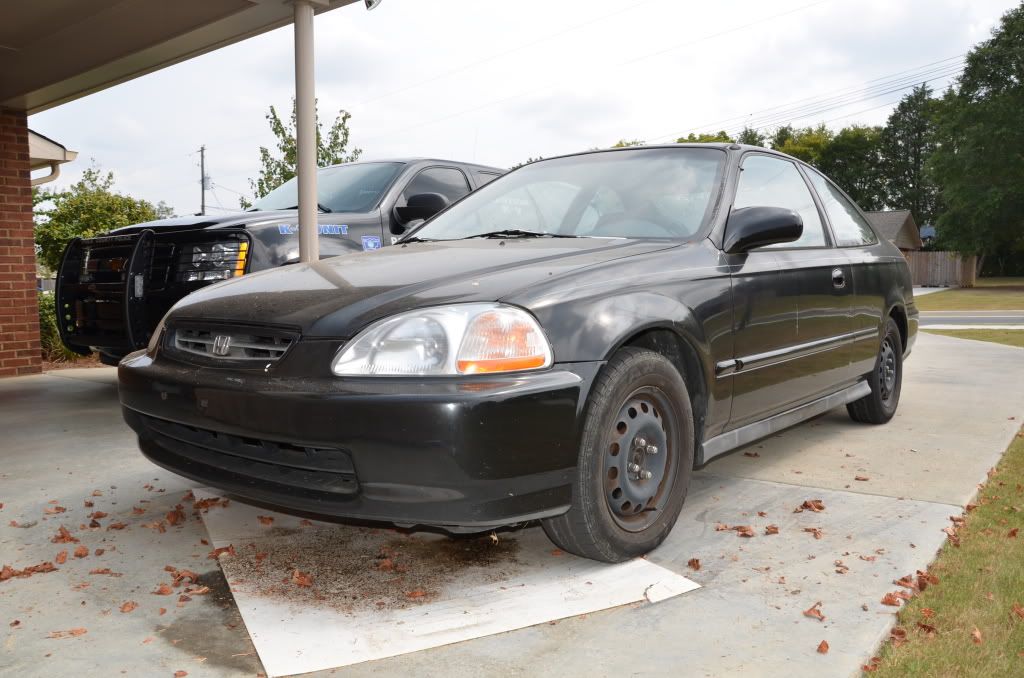
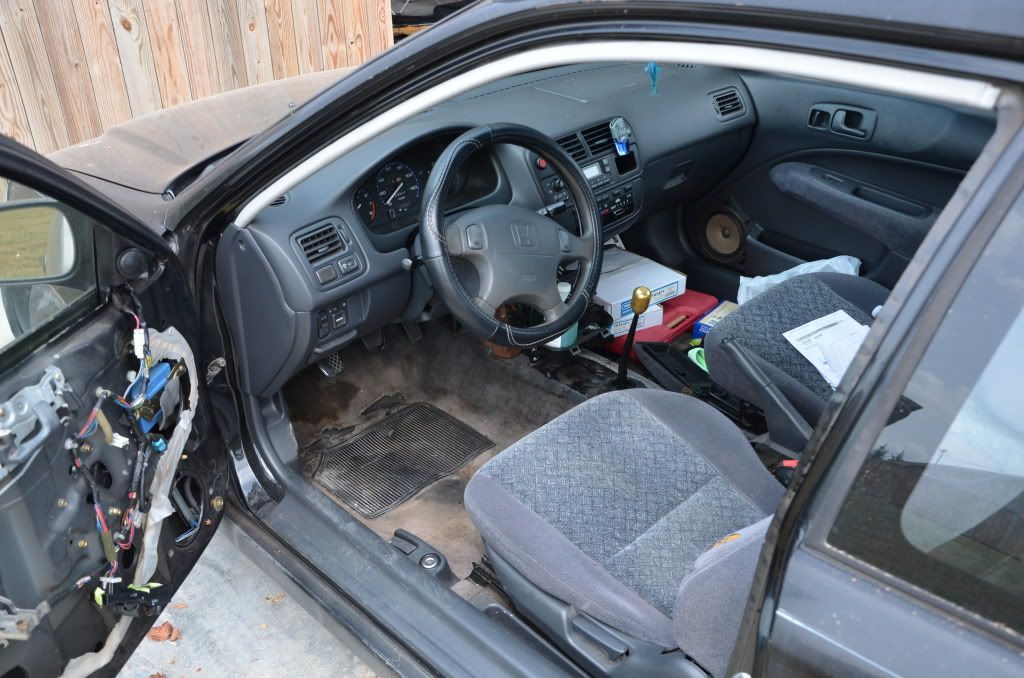
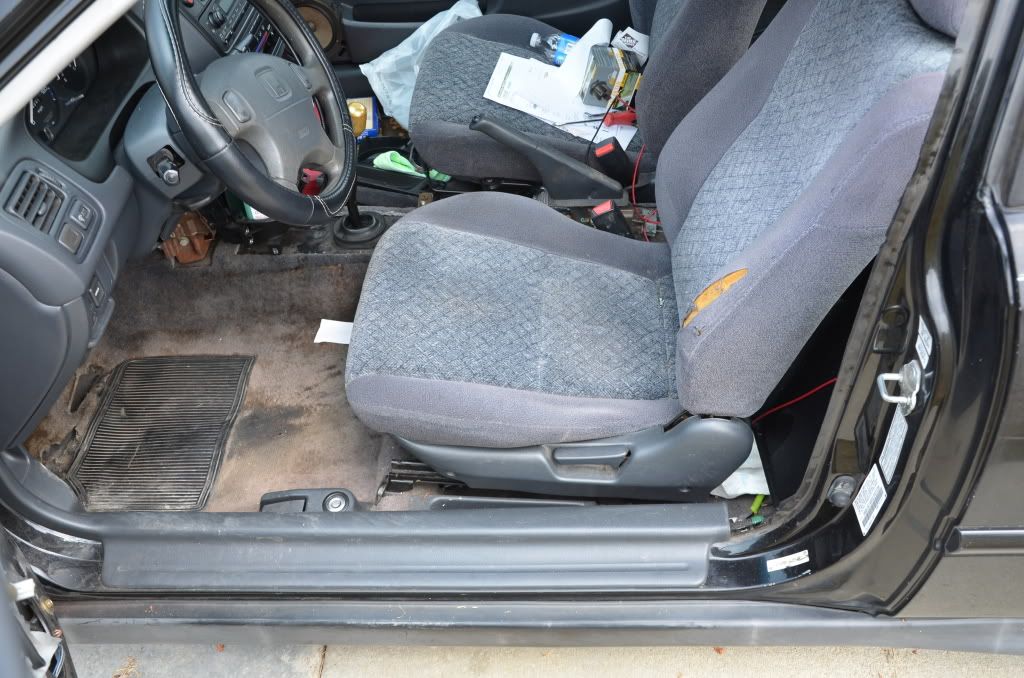
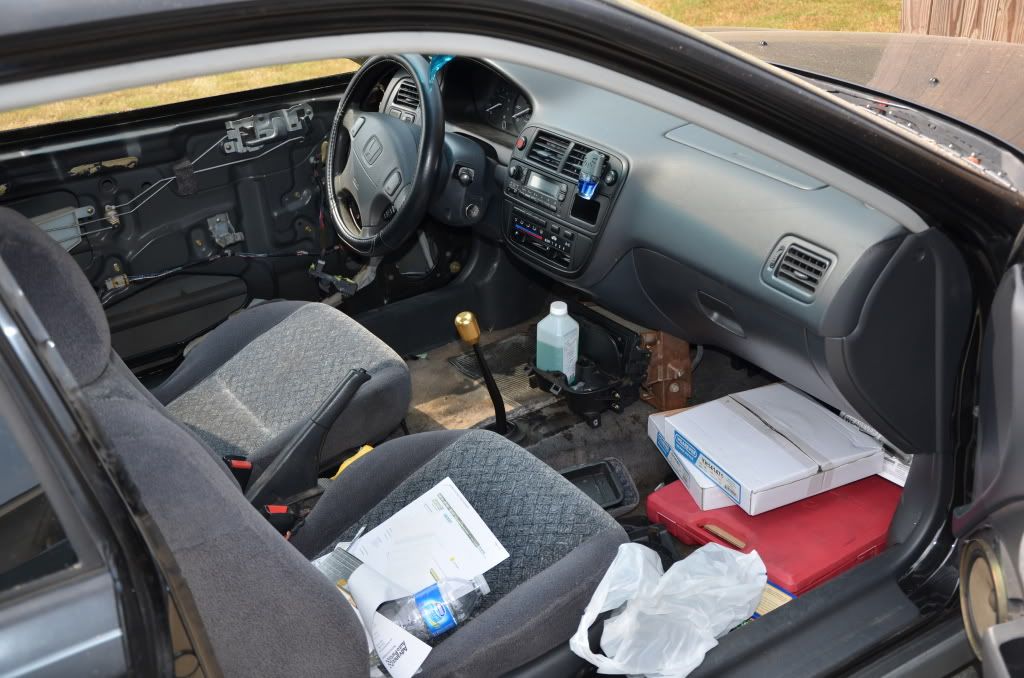
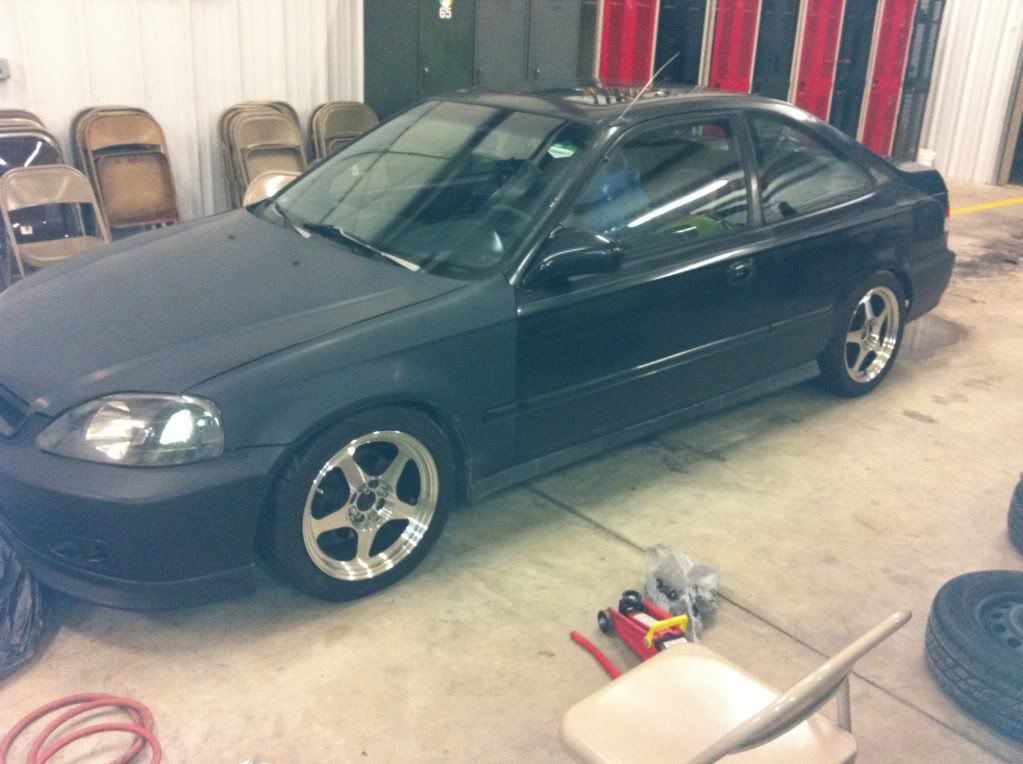
    Ok first pics right after purchase:


    The car was in decent shape. I bought the car back when gas was a little higher than it was now and Hondas were going for the premium. Seller wanted $3500.00 but after picking it a part I ended up getting it for $2,060.00. I thought it was a pretty good deal with 124,000 miles on it.

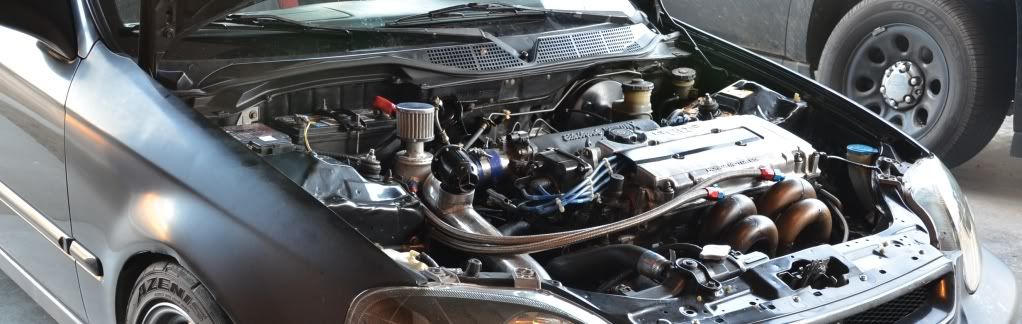
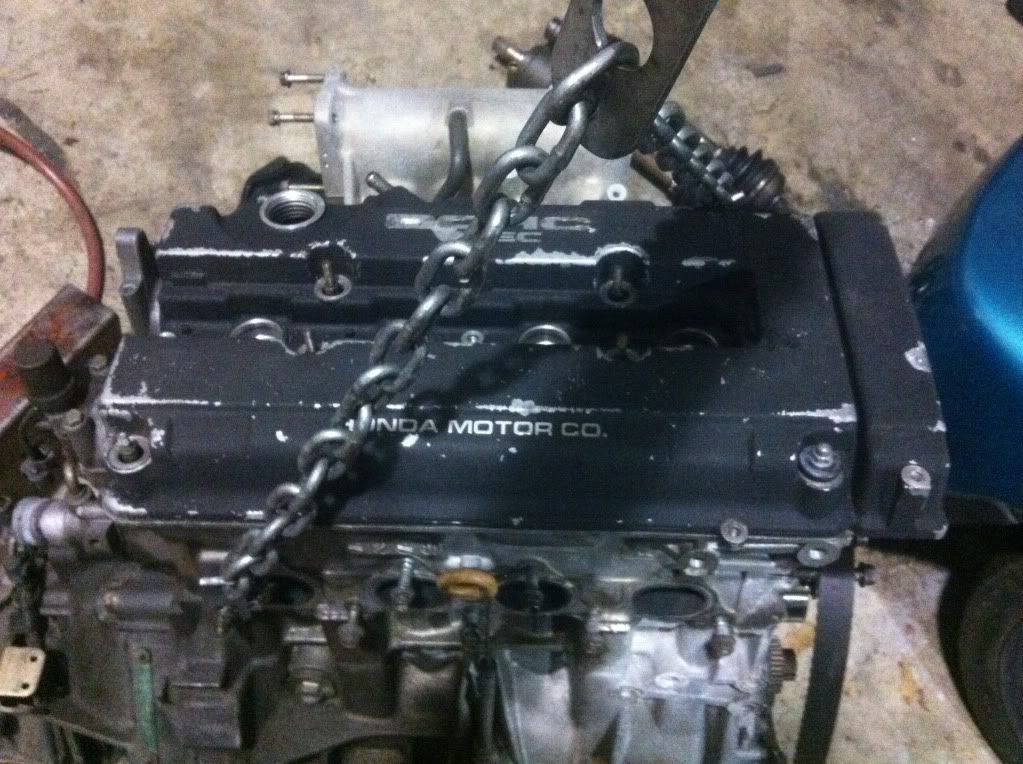
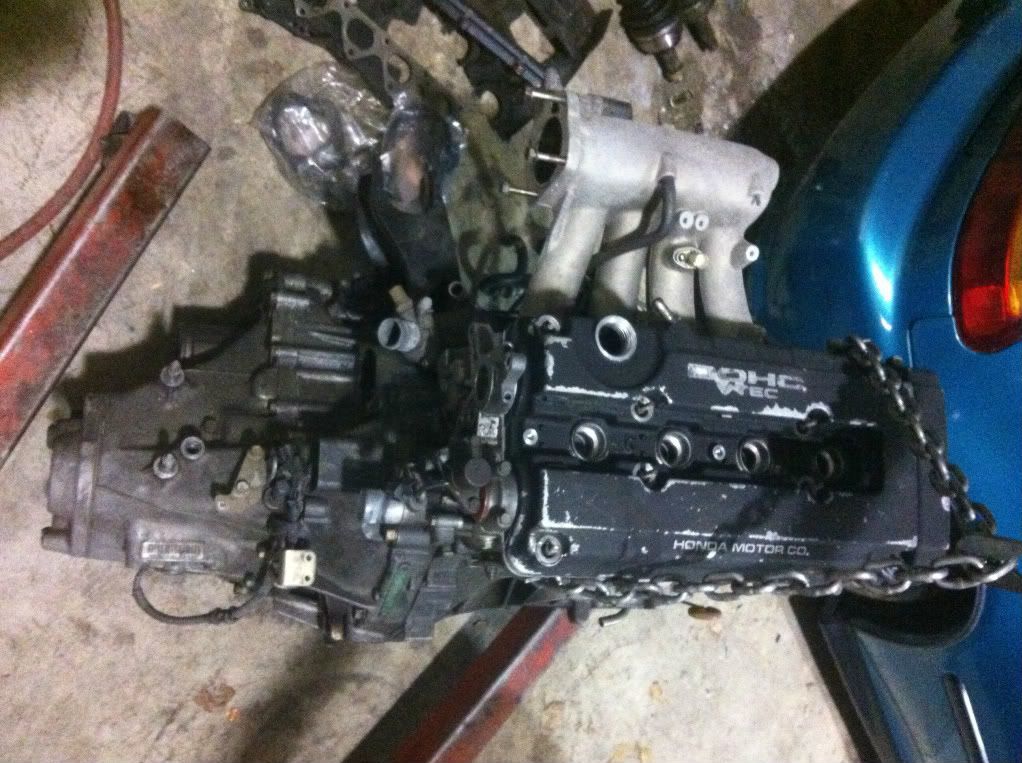
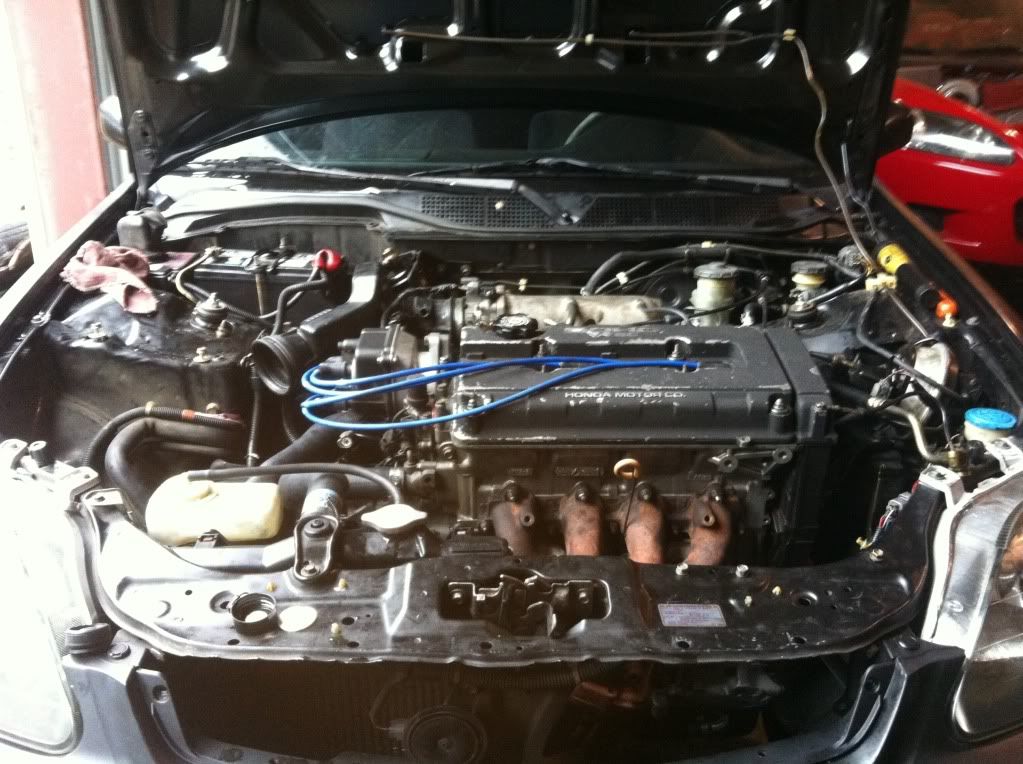
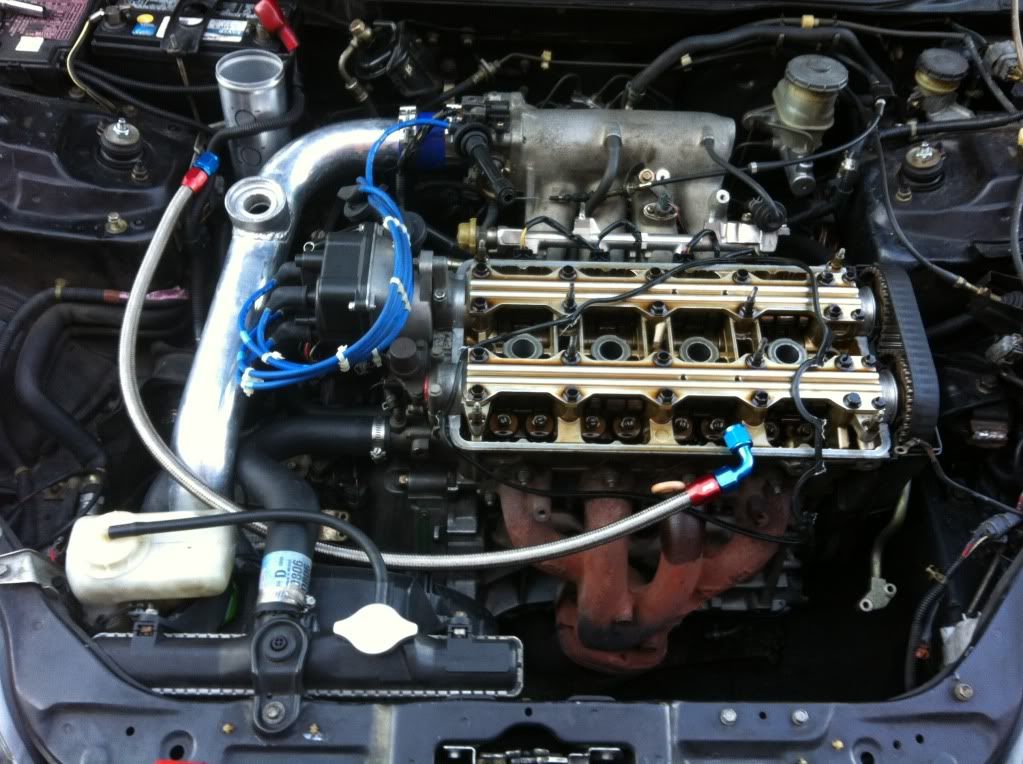
    So like I said earlier my wife blows the head gasket so now comes the hard decision. Do I stay single cam and throw a little boost on her, or do I go atleast with an LS swap and boost it. Well after visiting Mainstream the decision was much easier, I ended up picking up a jdm GSR swap that was fully built with only about 3k miles on it. The swap was full of aftermarket goodies like Eagle rods, JE pistons, block gaurd, magnetic drain plug, Skunk2 intake manifold, Wavetrac lsd, ACT clutch/flywheel and brand new seals and shit!! The motor and tranny was built at Mainstream with all Honda OEM parts and such and I got it on the low (thanks Charles!!) Anyway so after a few frustrating days (mainly because I forgot how to do everything) the swap was in!!


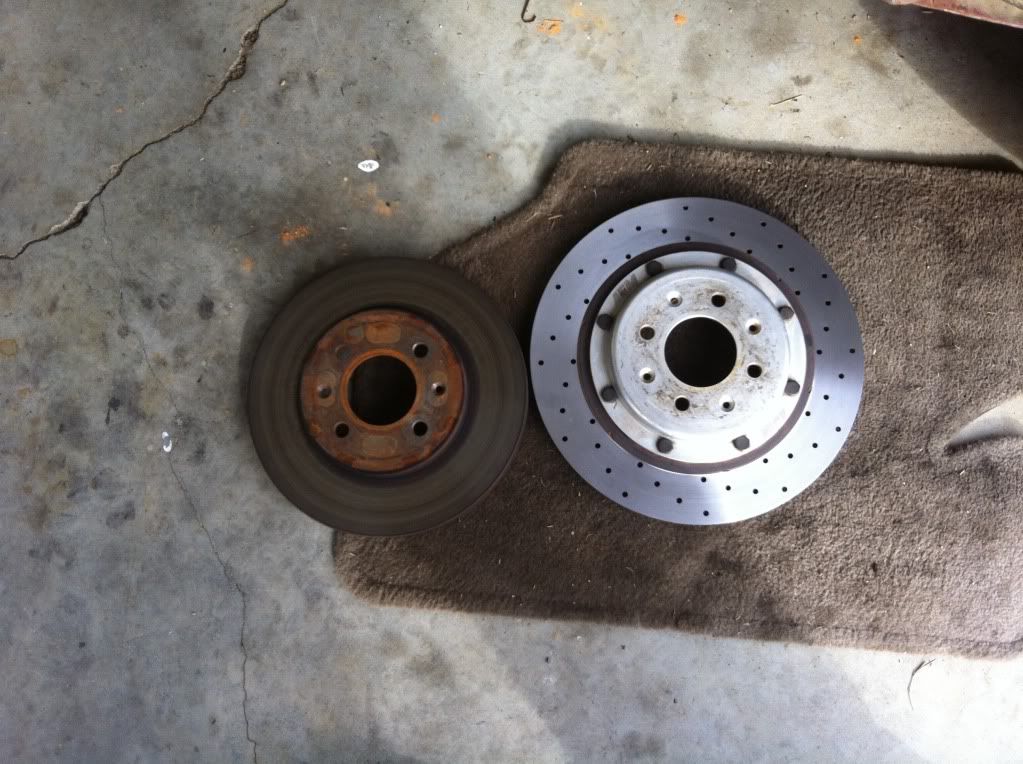
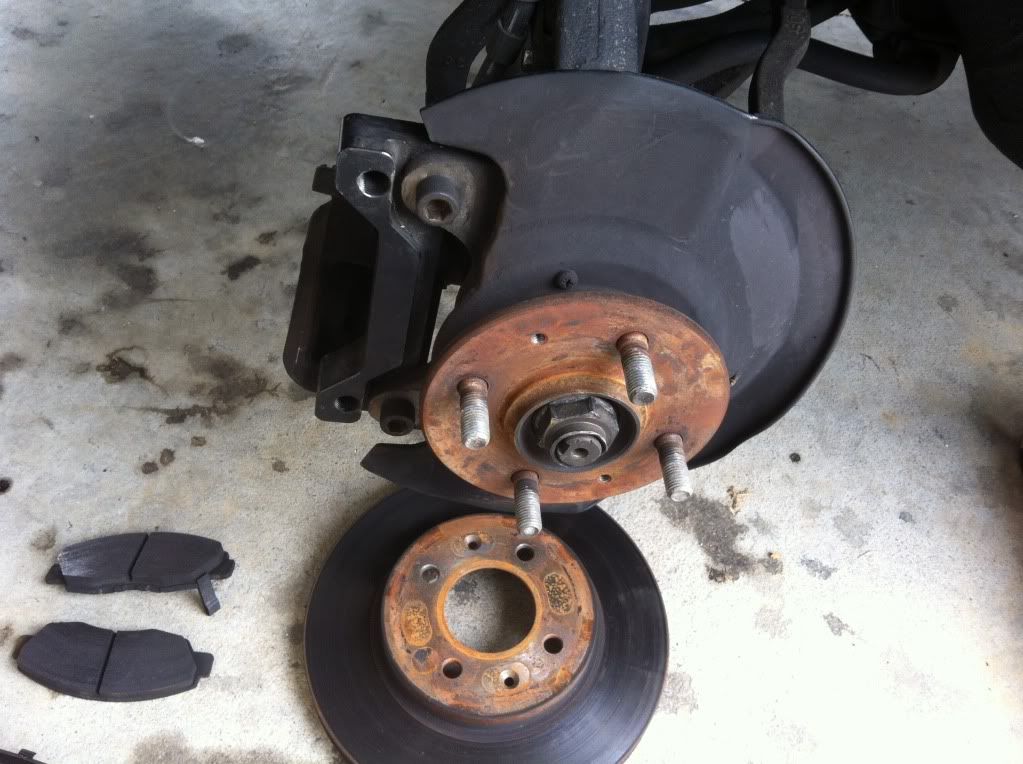
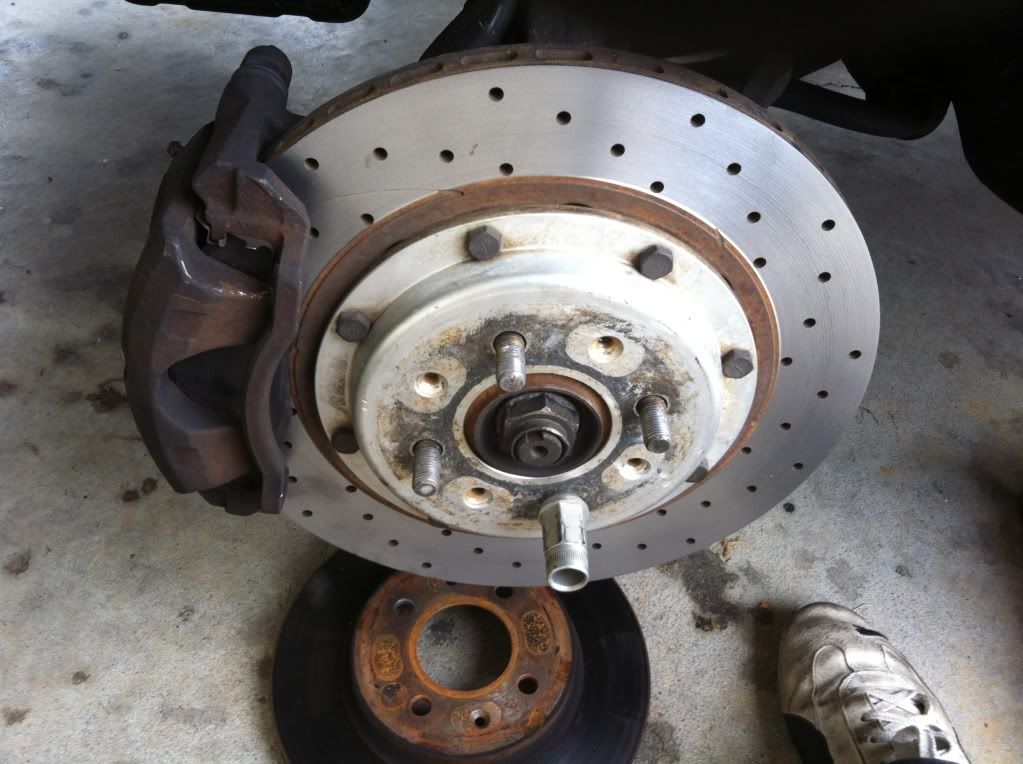
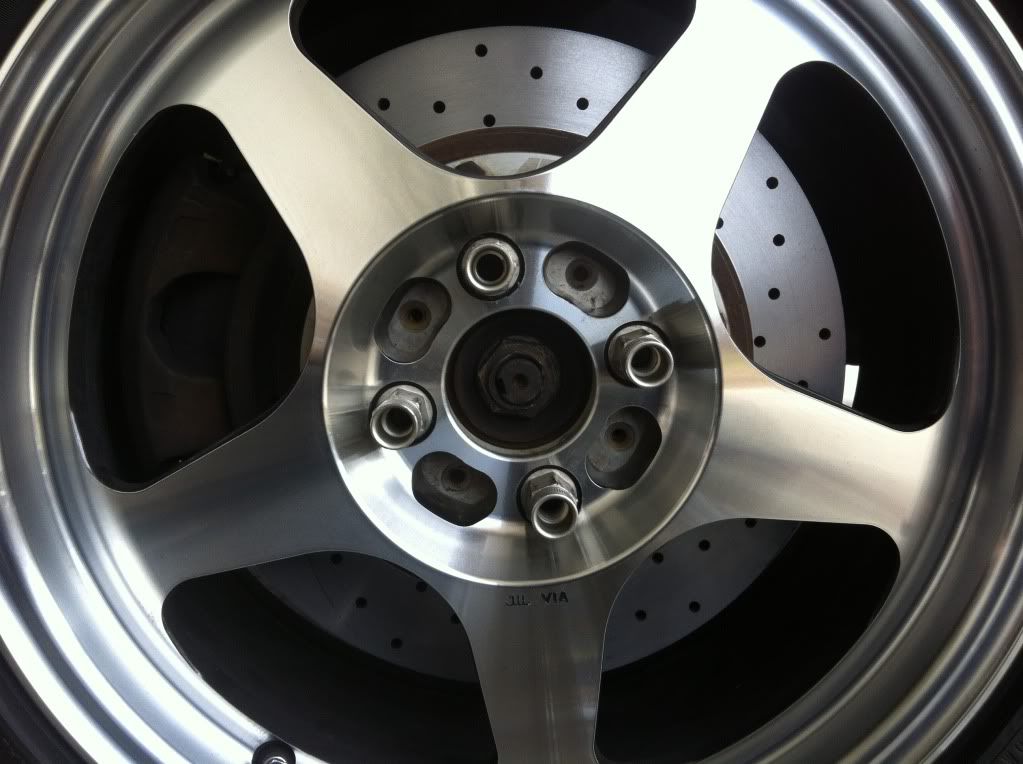
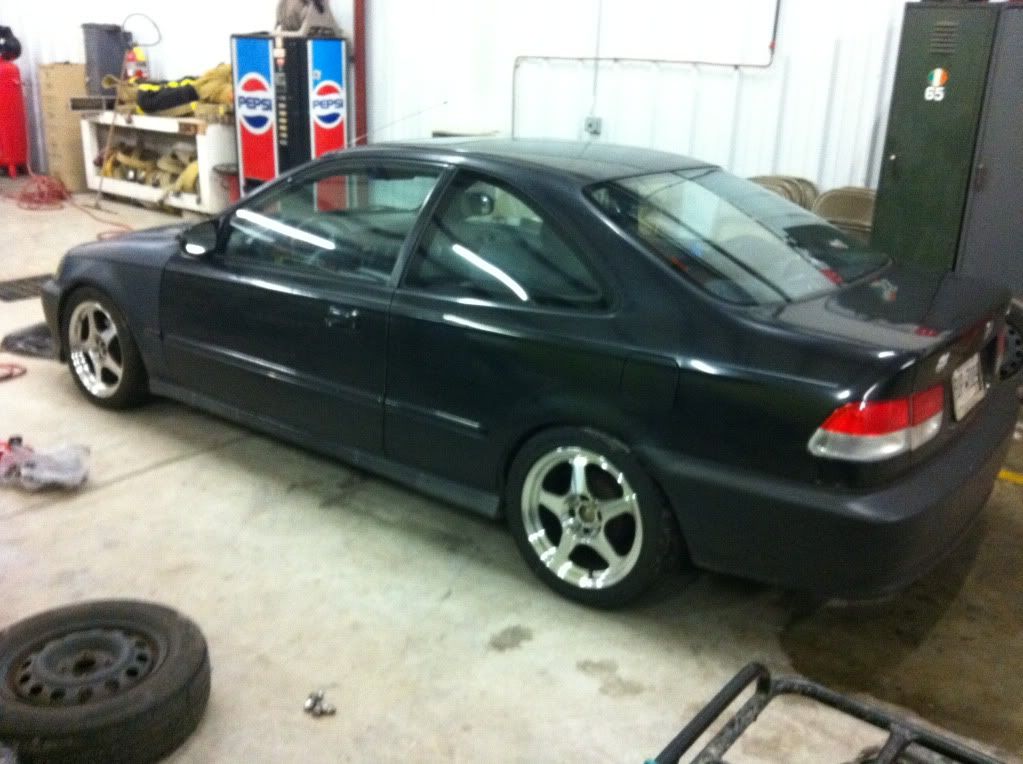
    Ok so now the swap was in and now it was time to address a few things before the boost came. First order of business was the wheels/tires, suspension and brakes. I ended up going with the Eibach Pro System Plus, complete with springs, shocks and swap bars. As far as brakes I ended going with an AEM big brake kit for now with hawk pads. Will probably end up going with the Willwood kit before long! As far as wheels go I went with some 16" polished Rota slips, wrapped in Falken Azenis (215-45R16) to round everything out!!

    More pics:


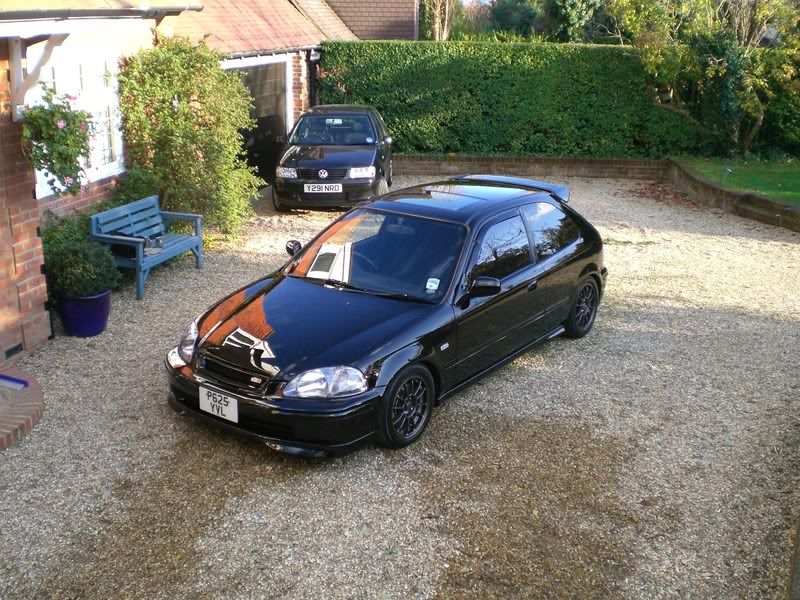
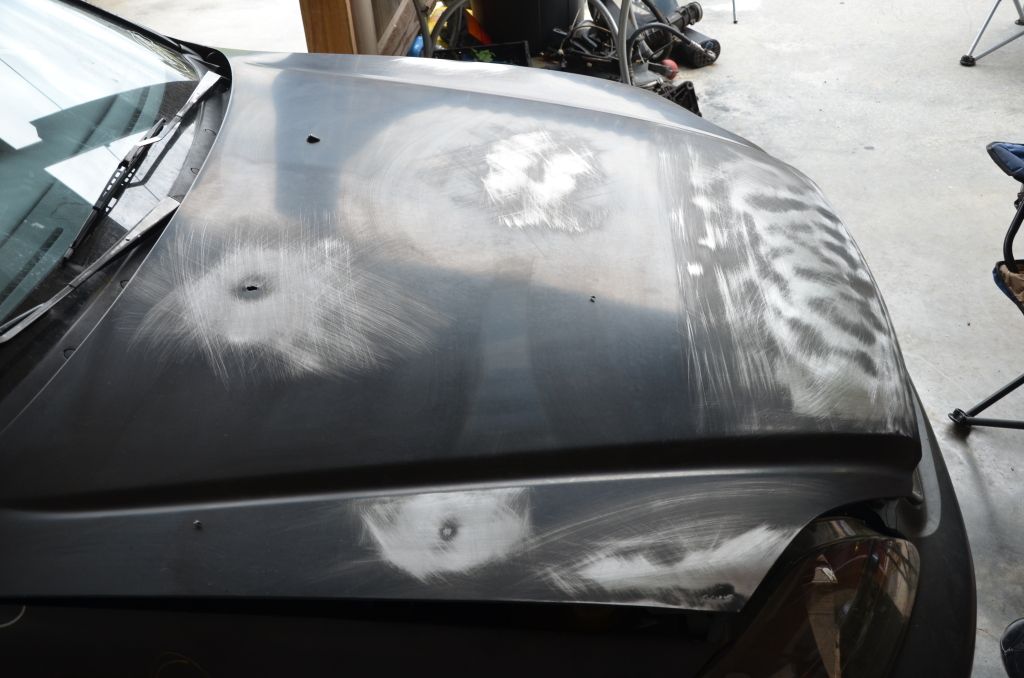
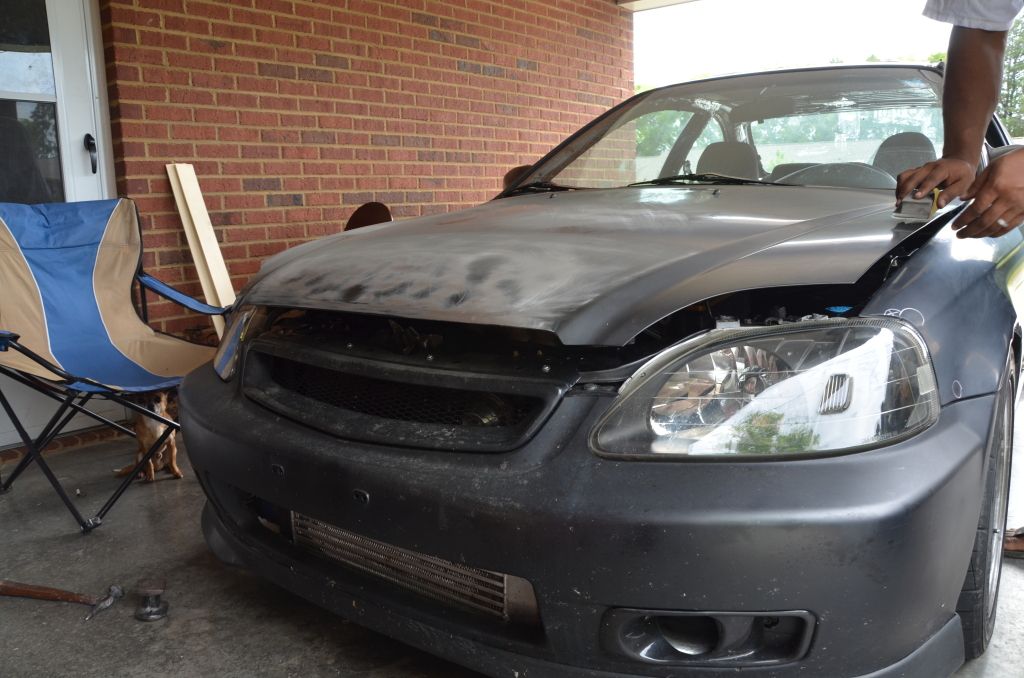
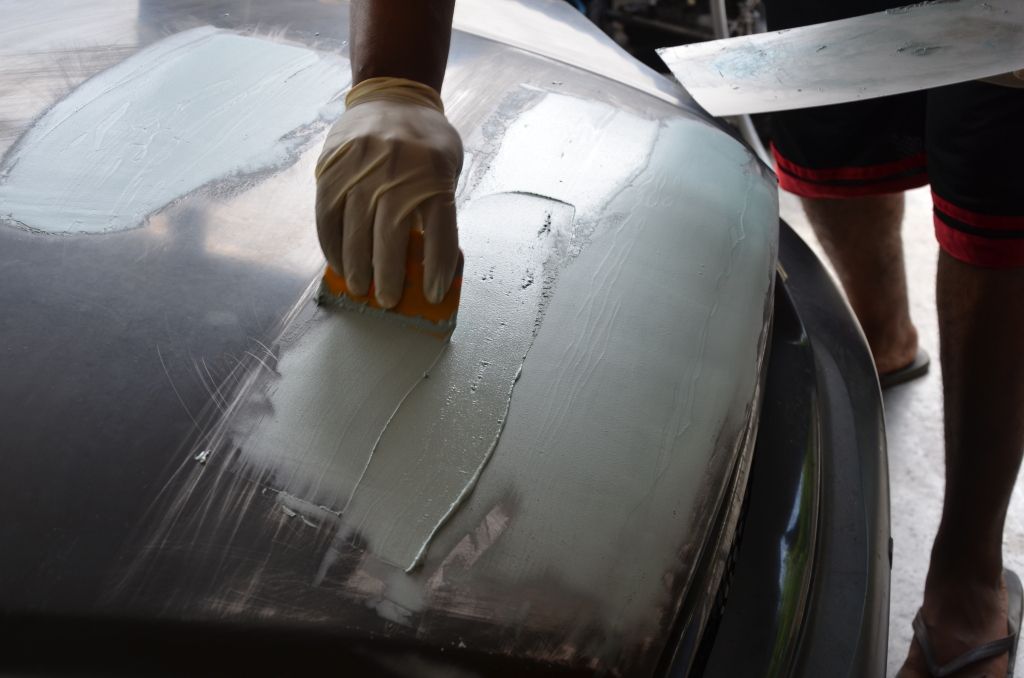
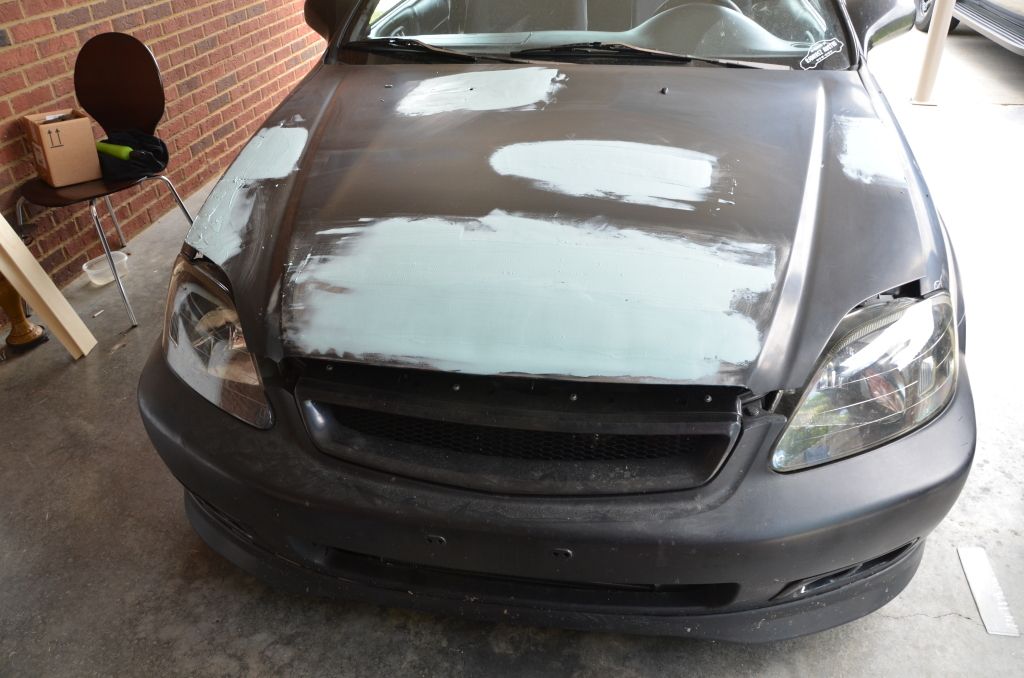
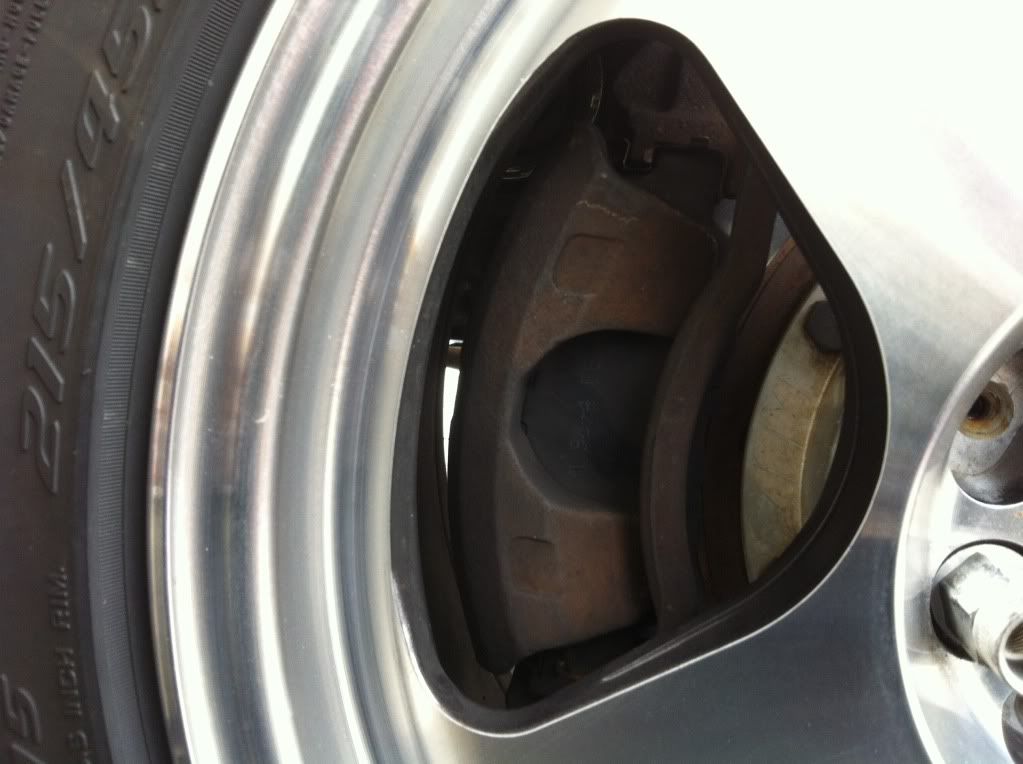
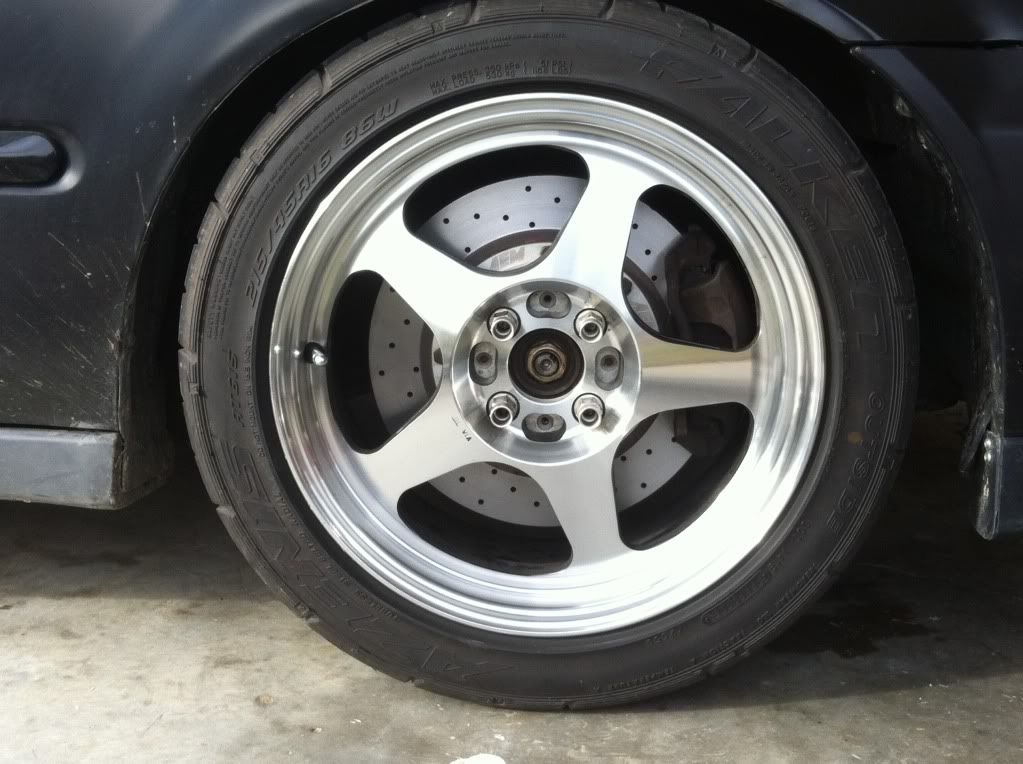
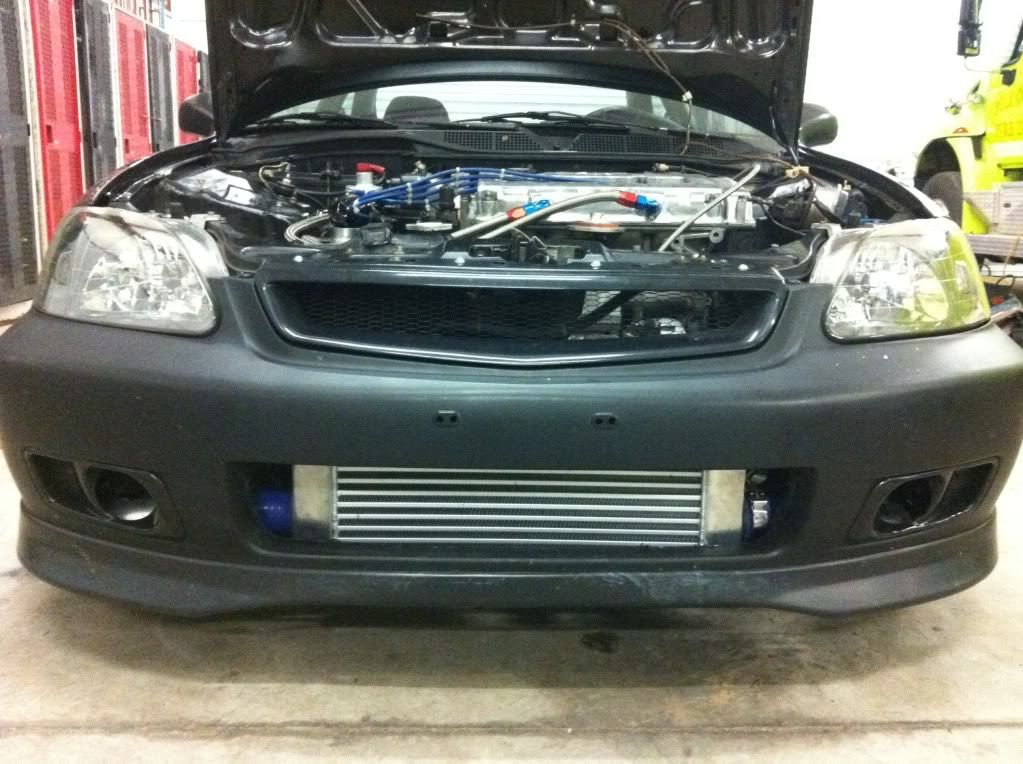
    And yes these brakes do fit behind 16" wheels, I still have about 1/4 gap between the calipers and wheels with this setup. These AEM brakes kind of suck, good thing I don't have to much money in them. I wonder if Fastbrakes has figured out a way to mount the willwood calipers on the AEM big brake kit? Will have to find that out. Oh and by the way I ended up doing a complete 99-00 front end conversion (headlights, front and rear bumpers, both fenders, hood, foglights and both front and rear lips). I'm probably going to end up going with a Back Yard Special (BYS) front bumper before I finish the exterior though.

    And now pics of the new stance:


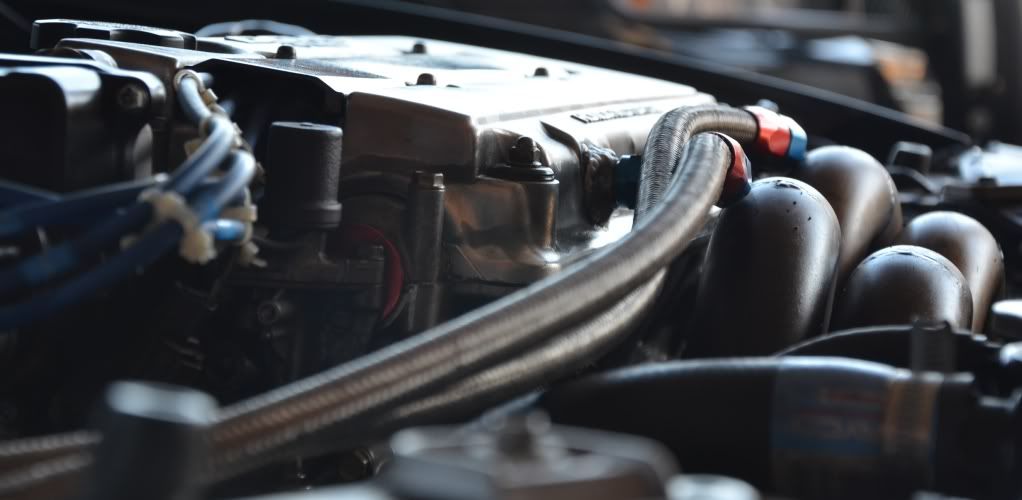
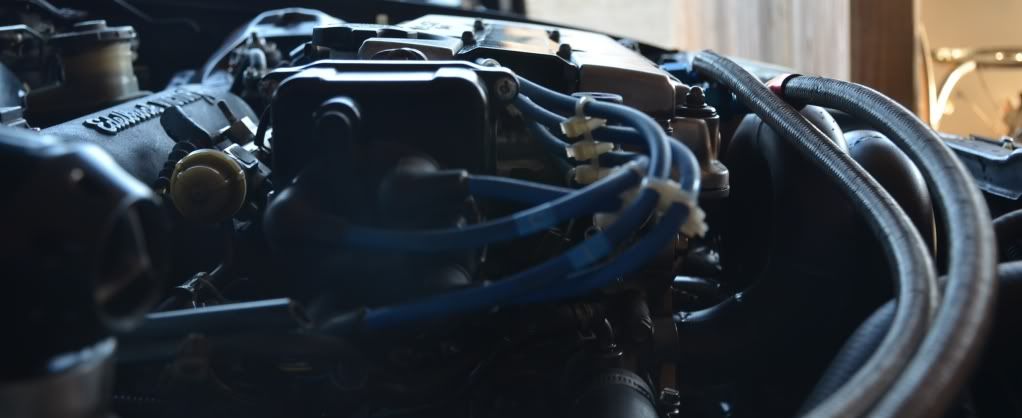
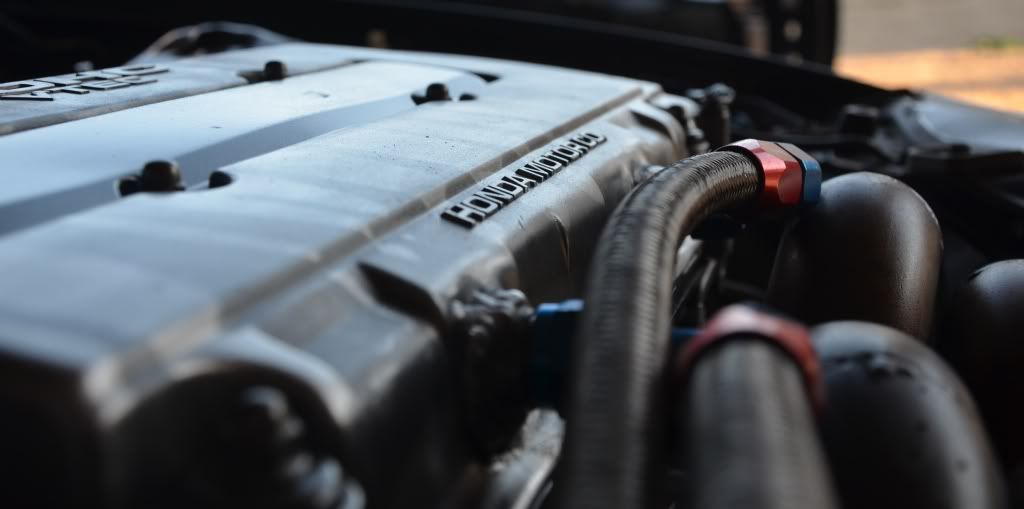
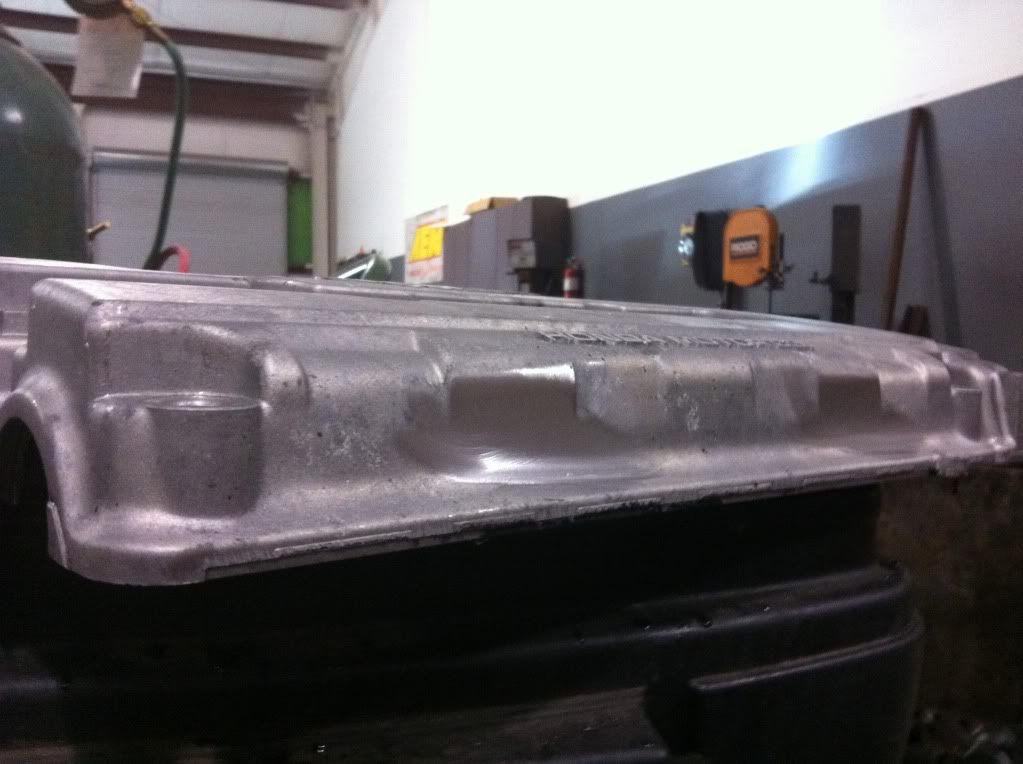
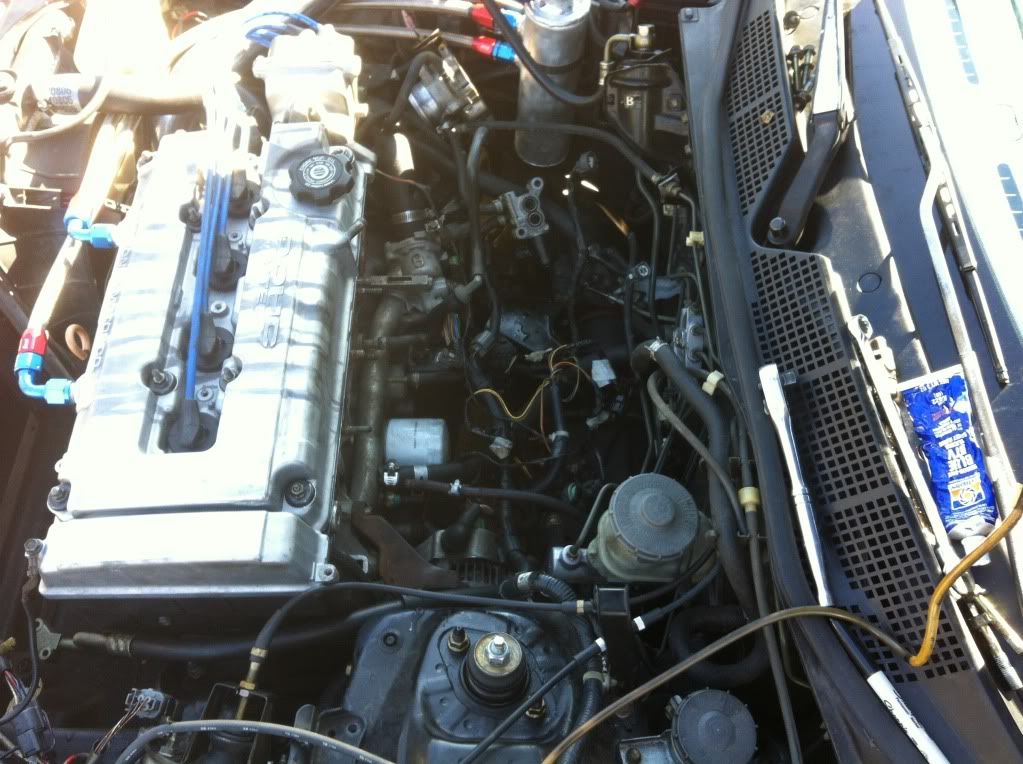
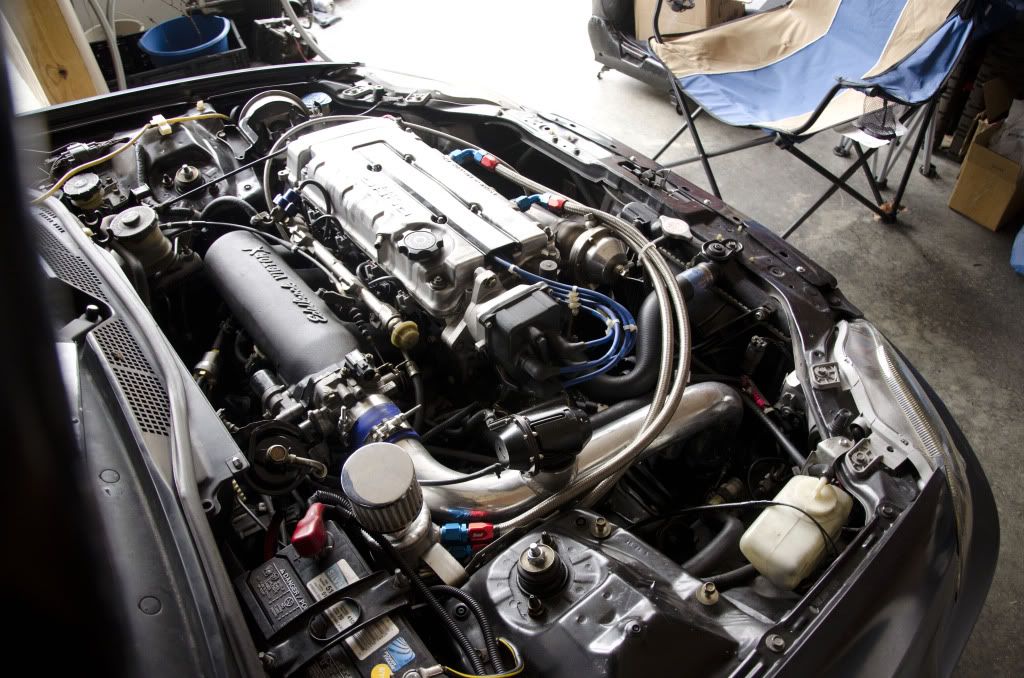
    Ok now the next order of business was to have Mainstream fabricate me a valve cover ventilation/catch can system for the boost to come!!

    Lines and catch can mocked up:


    Valve cover stripped and prepped for some welding:


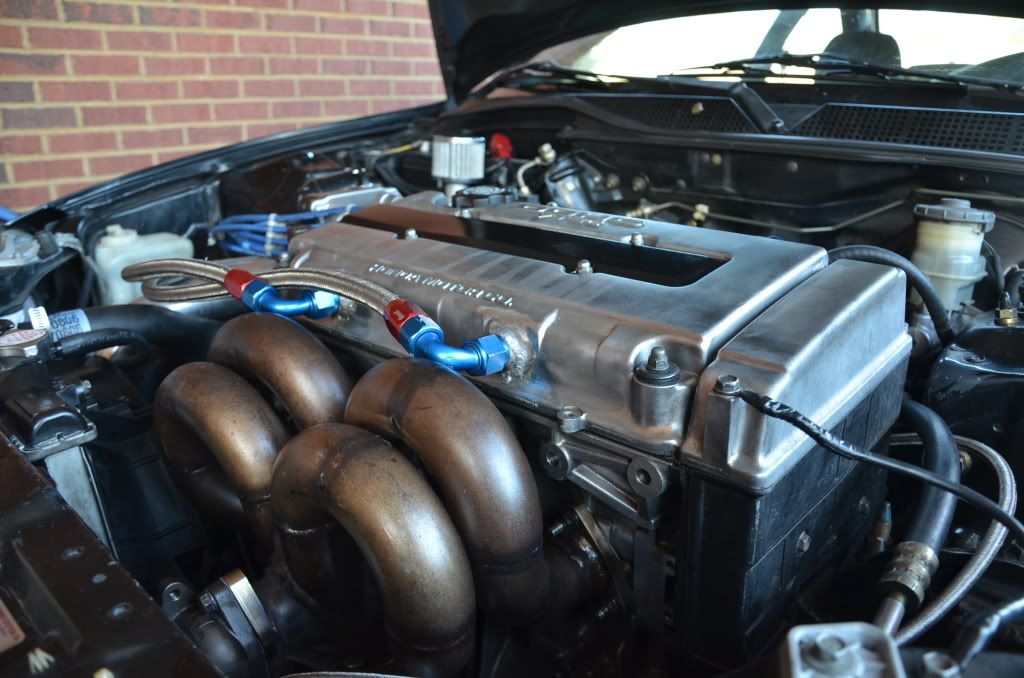
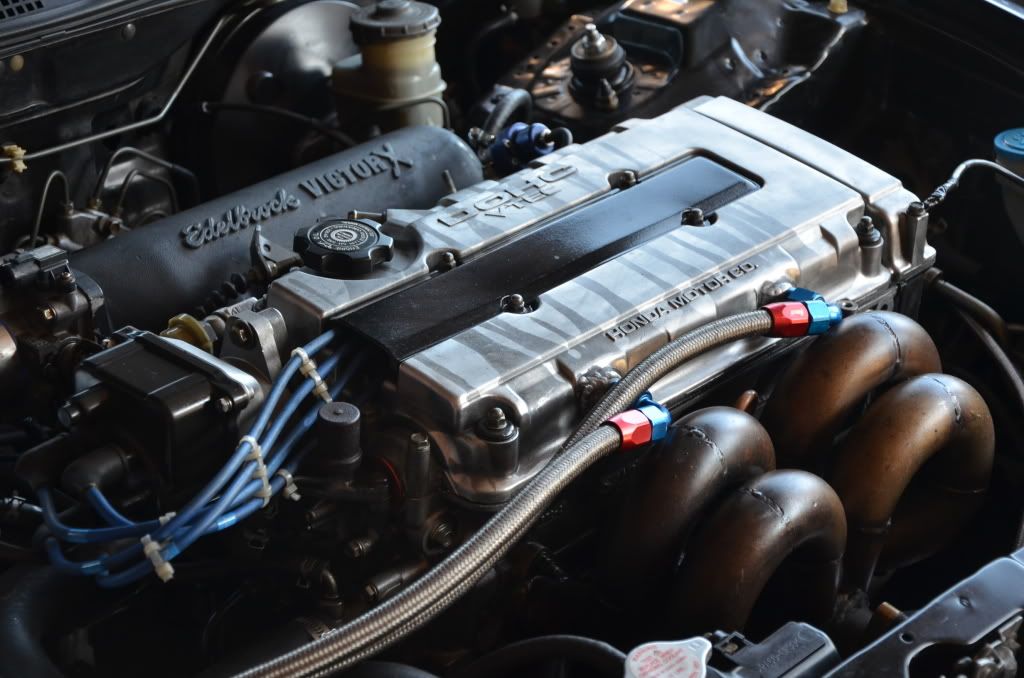
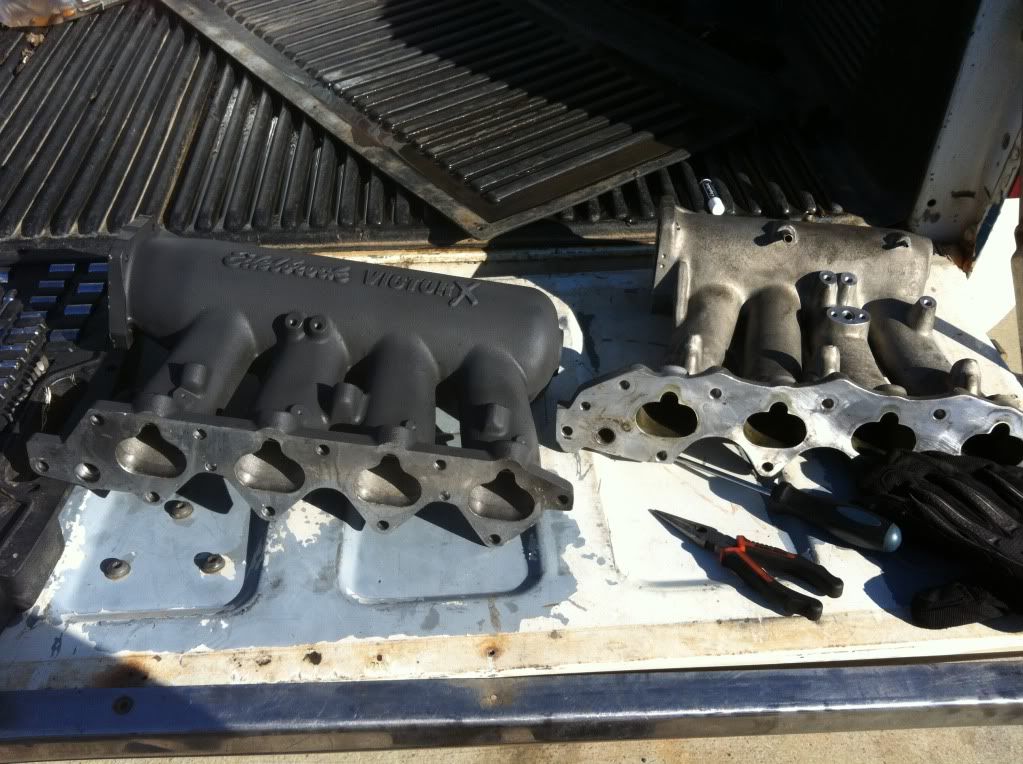
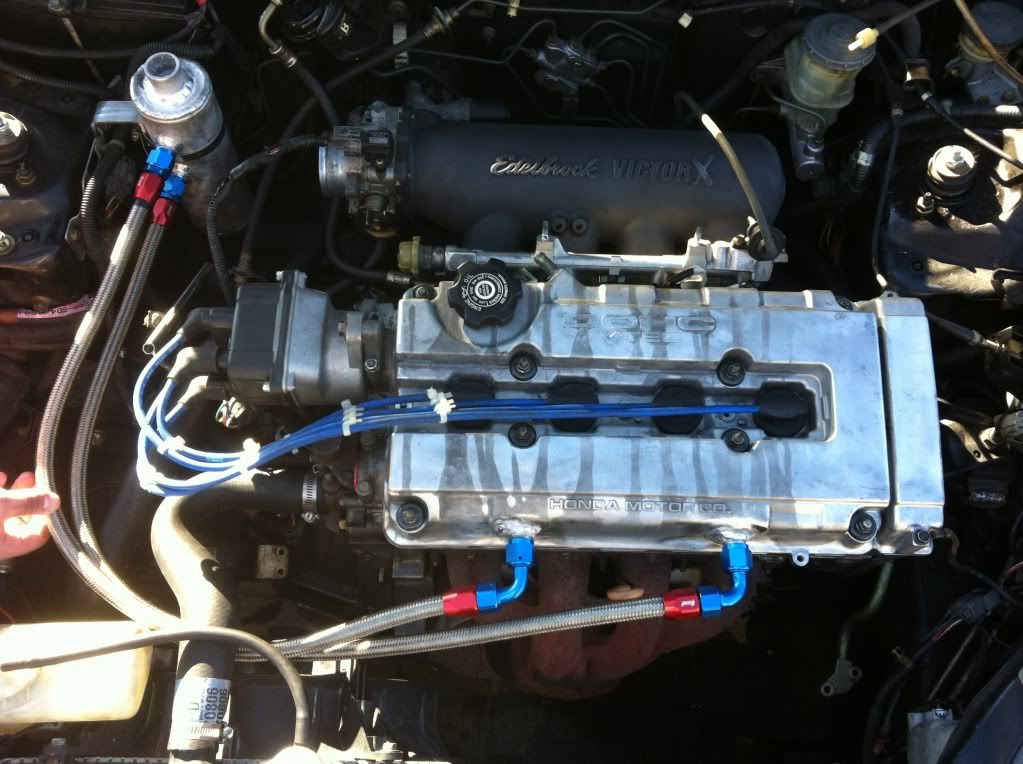
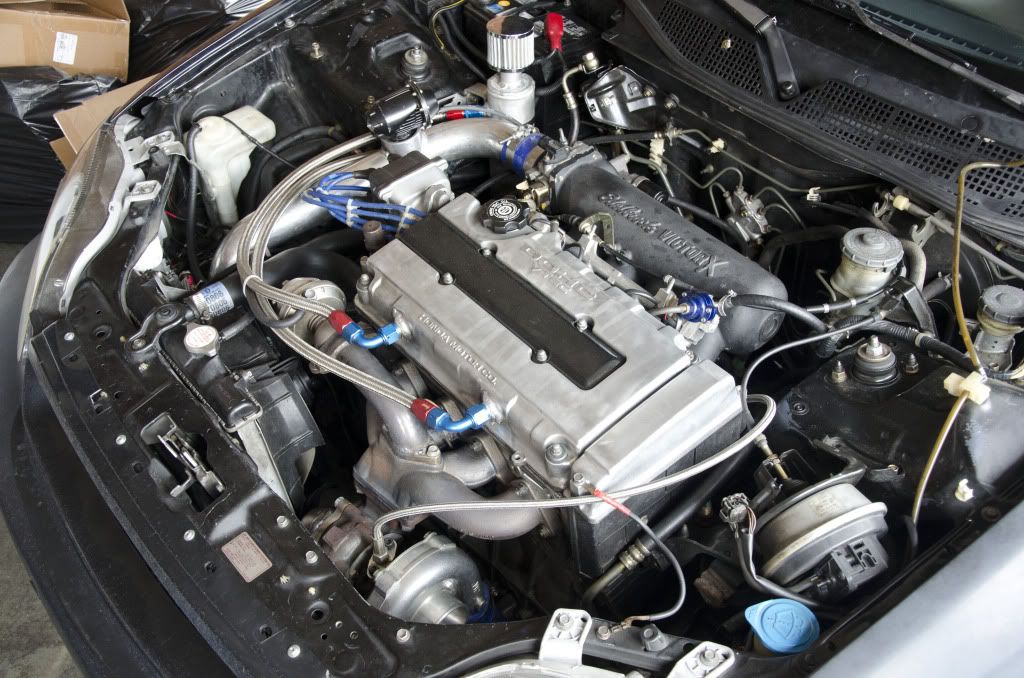
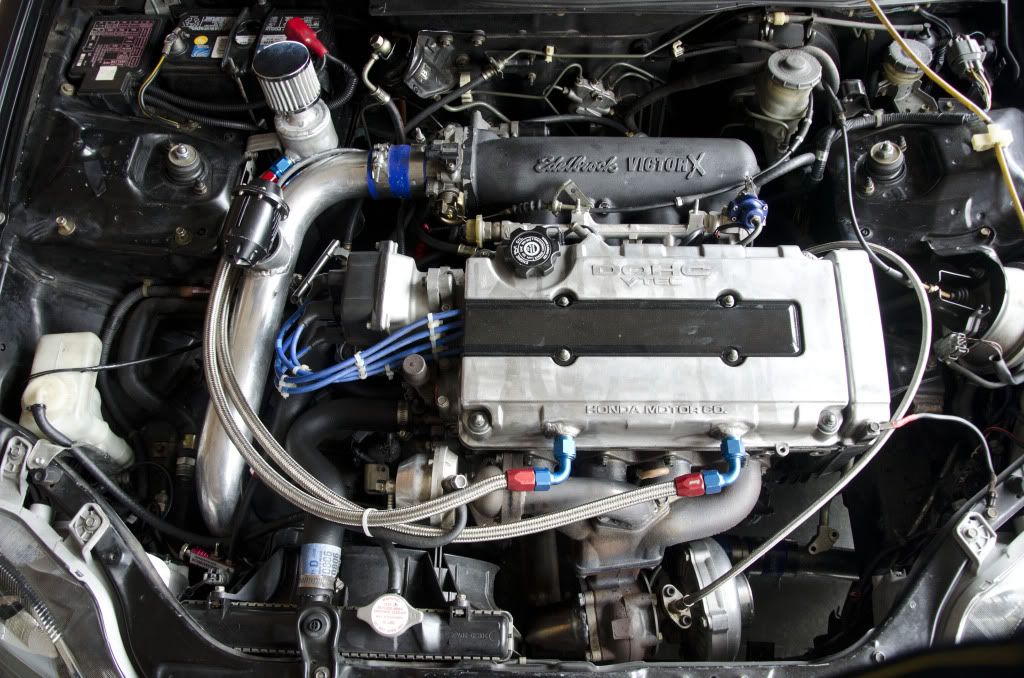
    Ok now that the ventilation system was taken care of it was now time to swap the Skunk2 intake manifold for an Edeldbrock piece:


    End results:


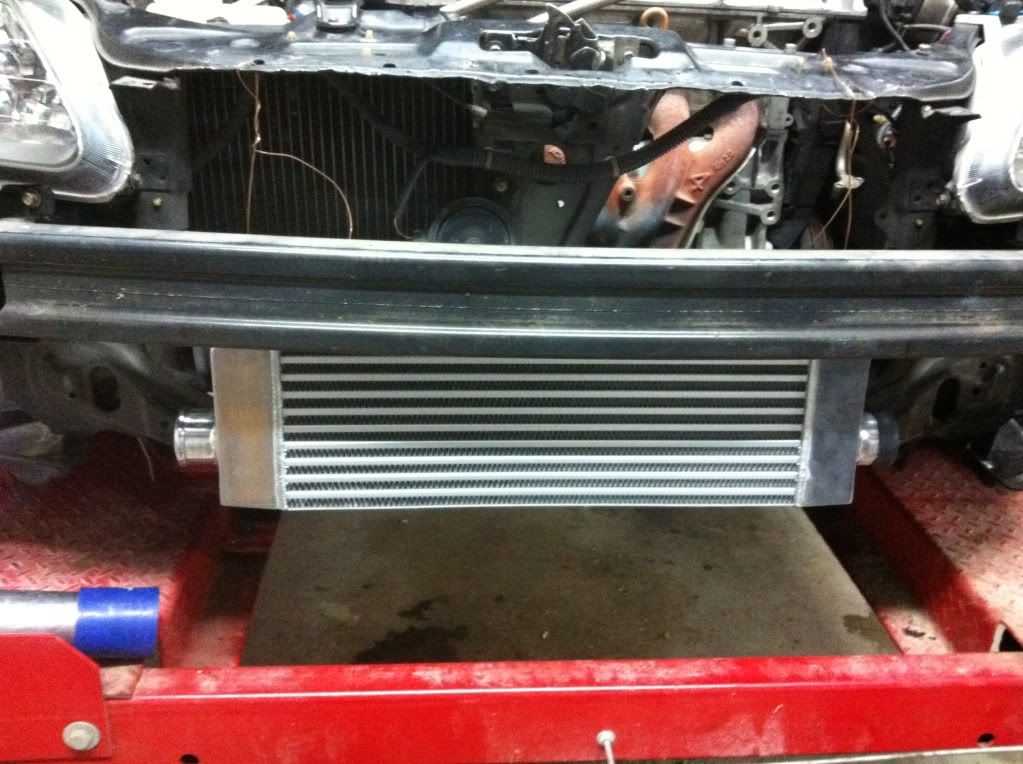
    Next up was mounting of the intercooler and some modifications to the intercooler piping to get everything to fit snug. I got the intercooler off of ebay and the dimensions are 28x8x3.


    Next I ordered some 1000cc injectors from Fuel Injector Connection up in Cumming GA (freakin awesome deal) and a Walbro fuel pump. Now you would think that all the hard crap was done...........wrong (rant time!!) I swear I had never seen people that will post something online that they are trying to sell and then when you call them and tell em that you want to buy it they flake!!! I probably found 3-4 nice quality turbo kits ranging from $1500.00-$3000.00 that people were trying to sell that I could not buy for some reason. I would get in contact with them and say:

    Me: hey bro saw you had a turbo kit for sale on the forum and wanted to know if you still had it.
    Them: uhhhh yeah I still have the kit
    Me: ok well I have cash in hand, front pocket, back pocket, your pockets, my socks, your socks and I'm sure if I looked in my glove box I would probably find another dollar!! (you get my drift)(for all the slow people: I was basically saying hey I have all the money in my hand right now, not part of the money, not can you wait until I get paid?).
    Them: well uhhhh hmmmm I don't know man I was about to go to the gym and work out. Think you can come get it next week?
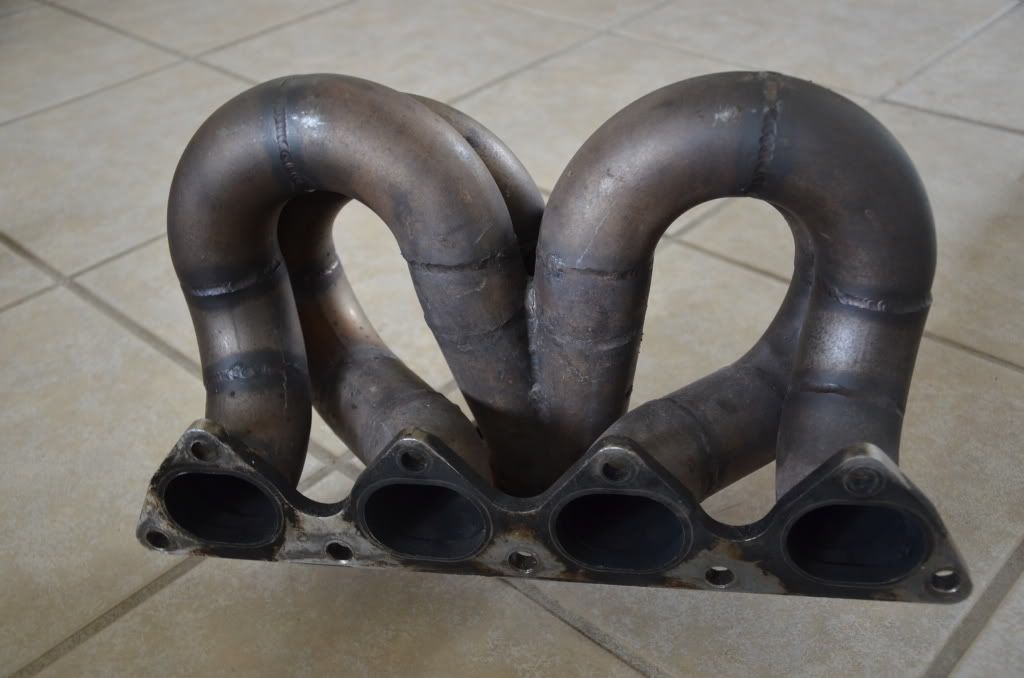
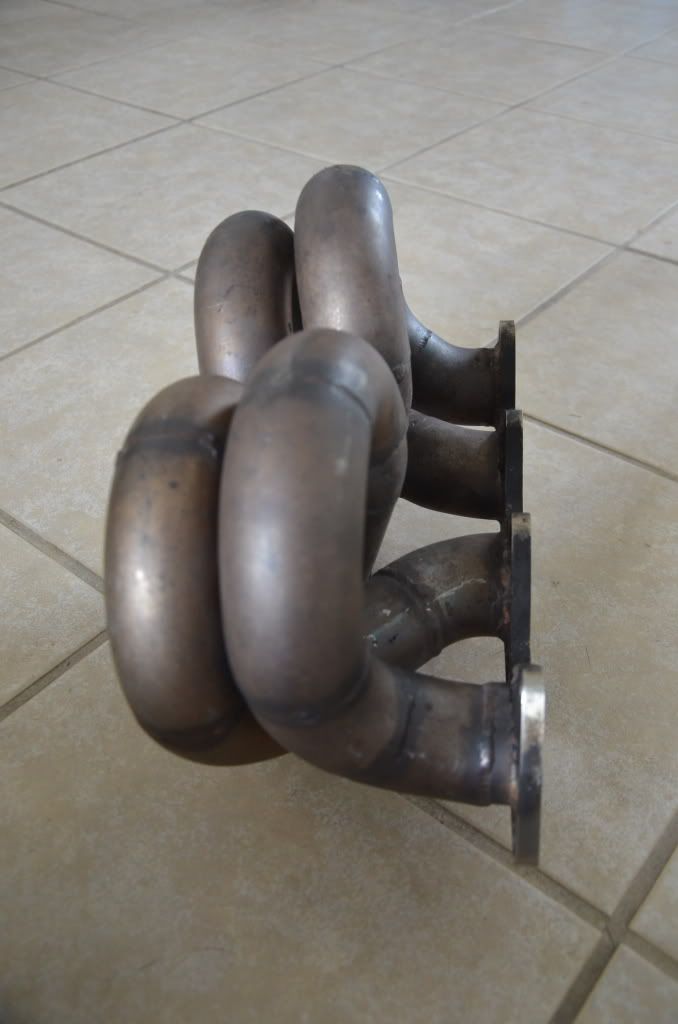
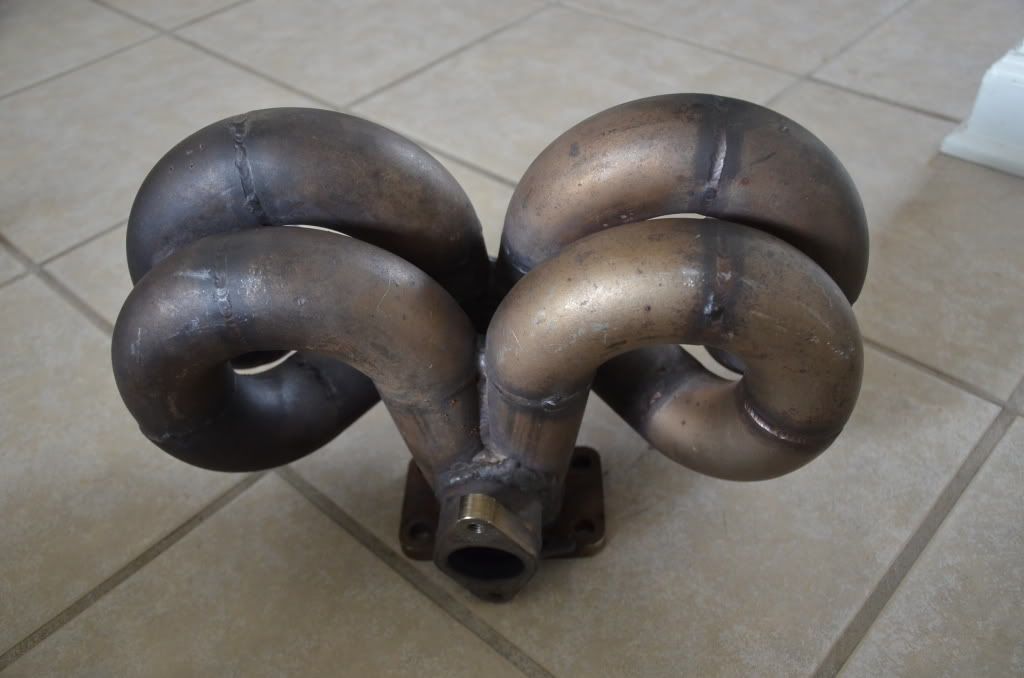
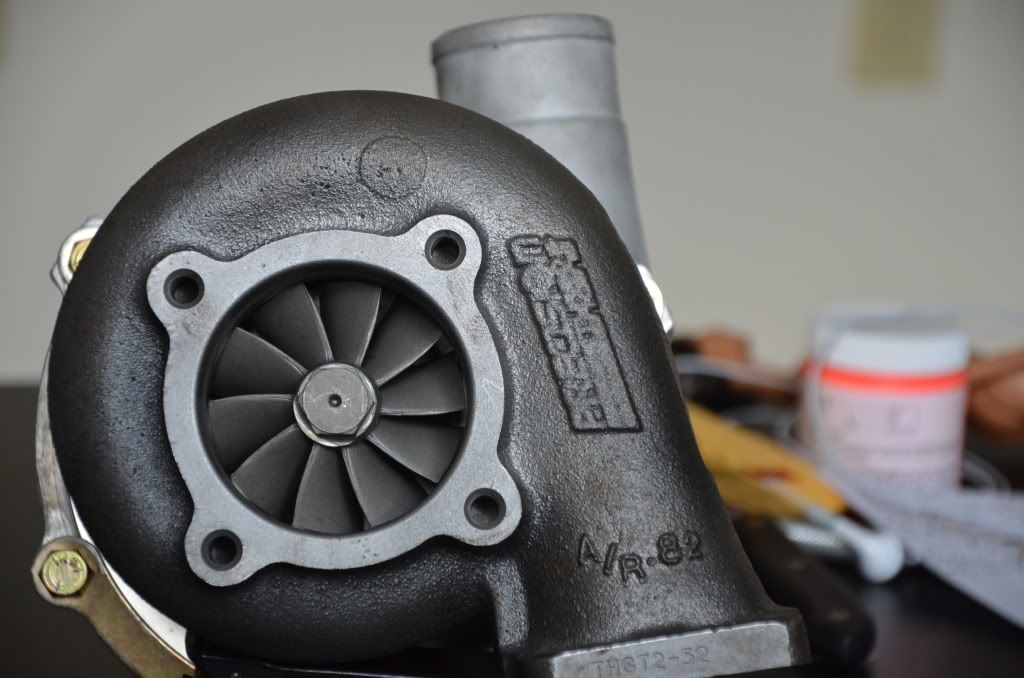
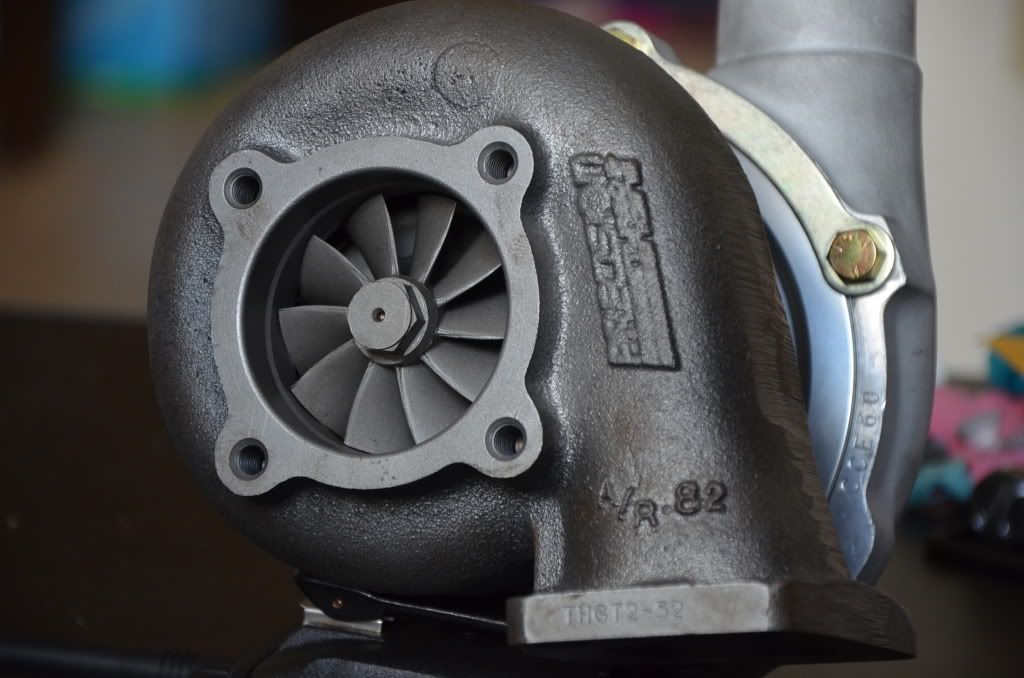
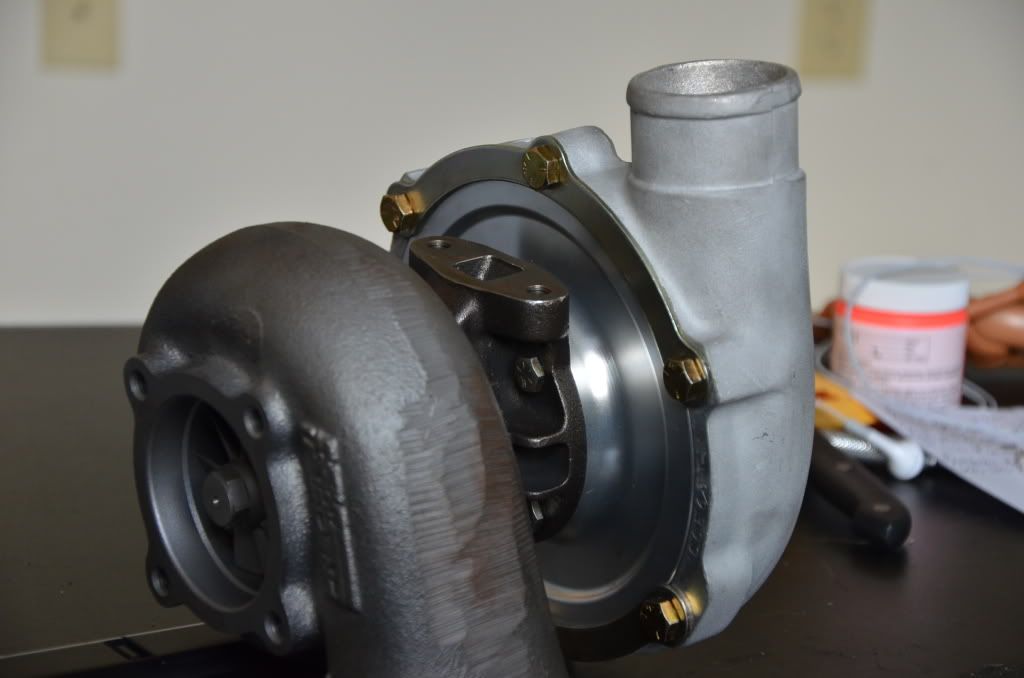
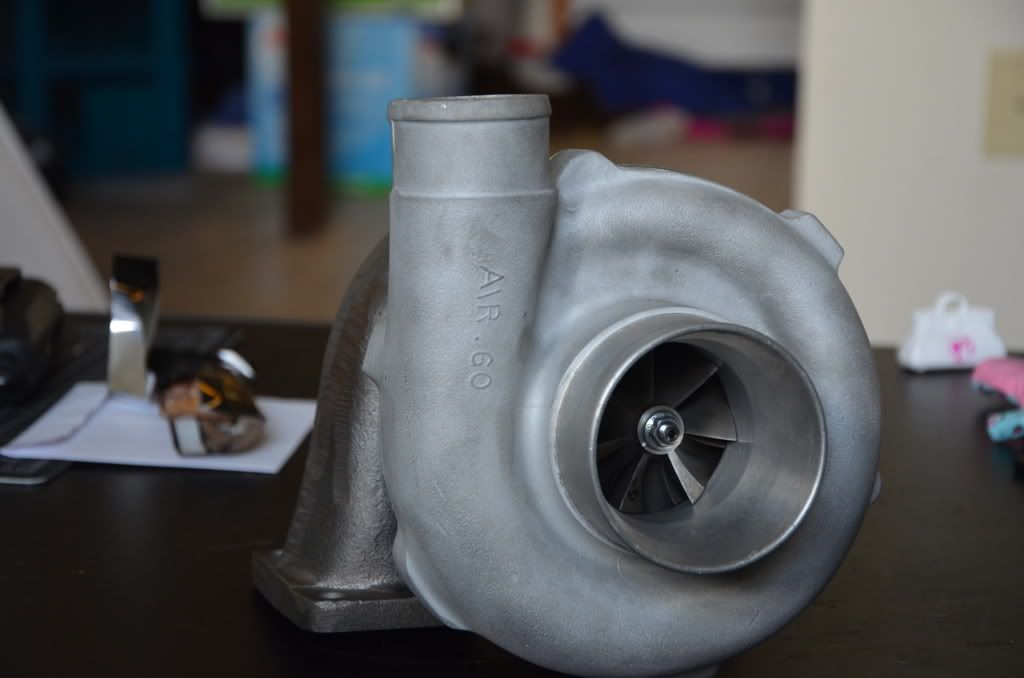
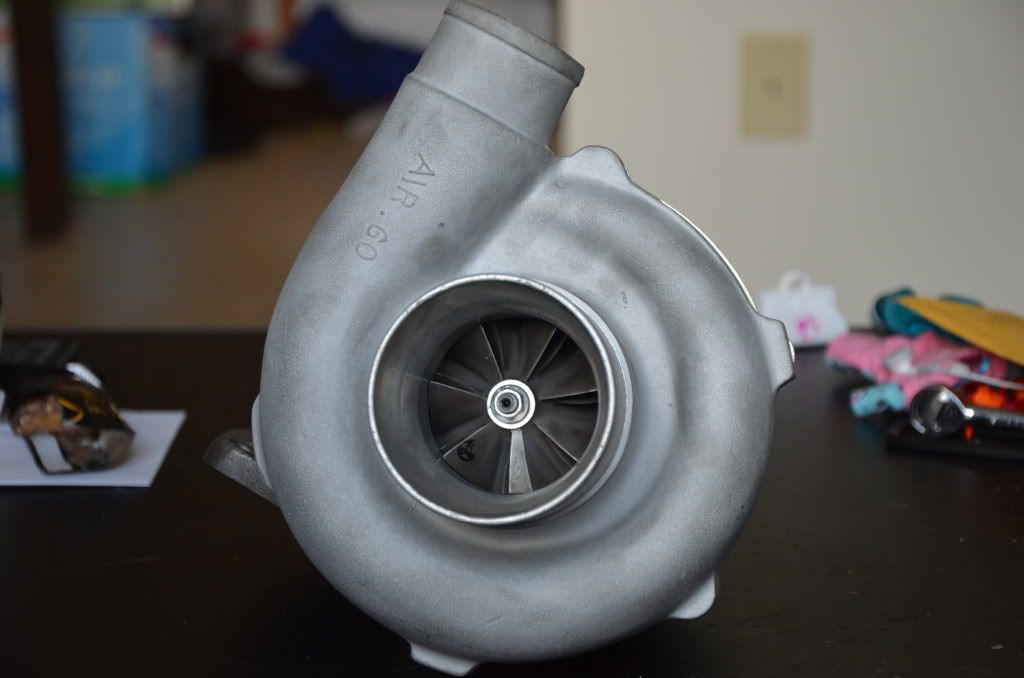
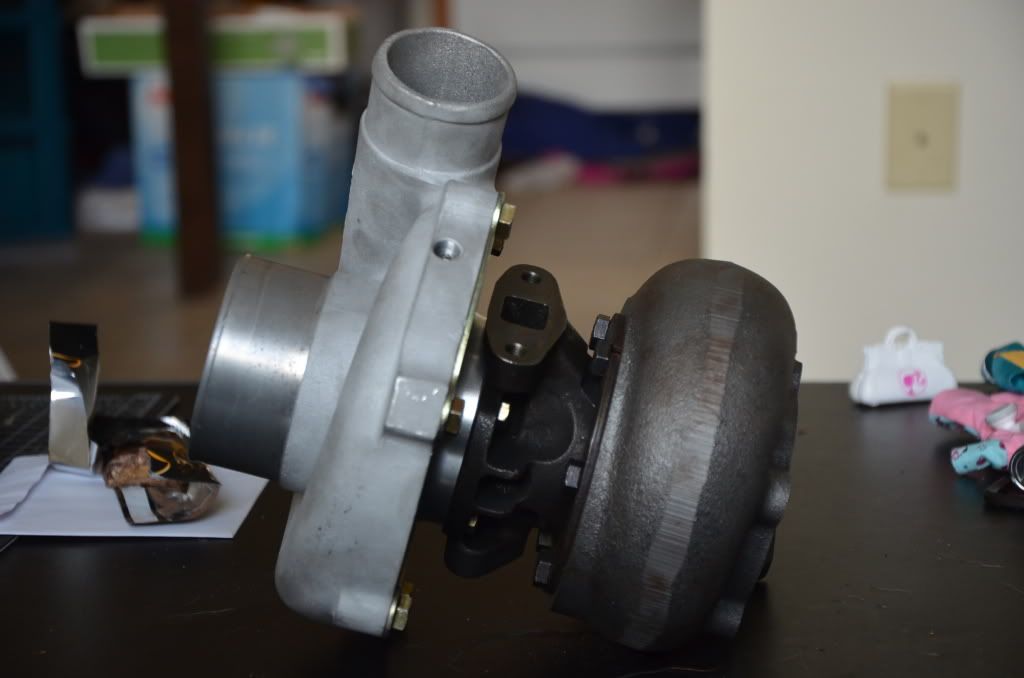
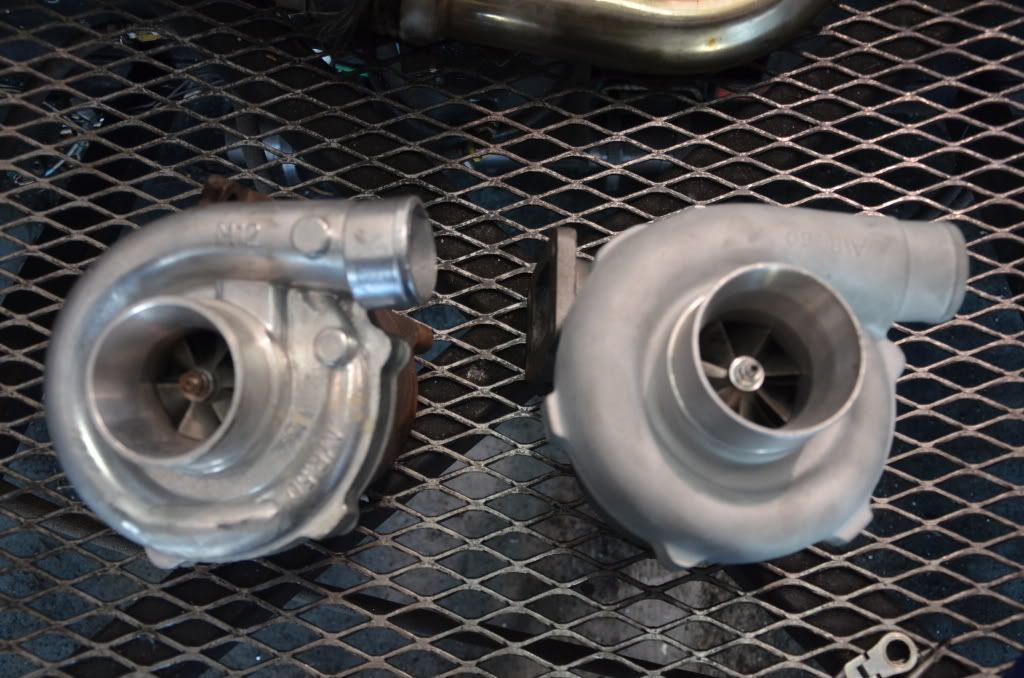
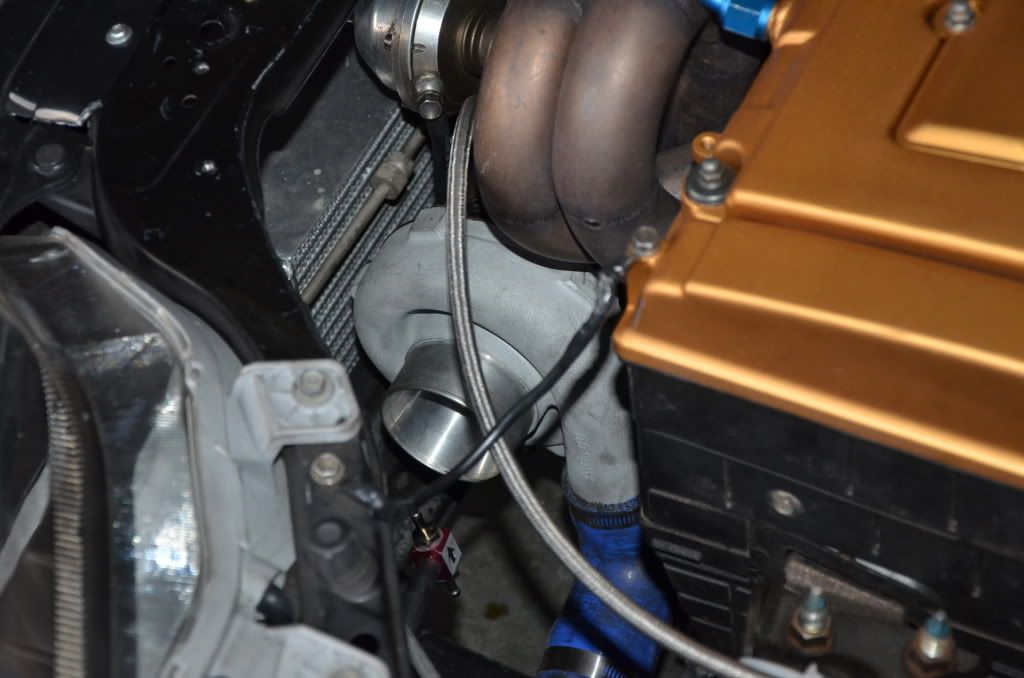
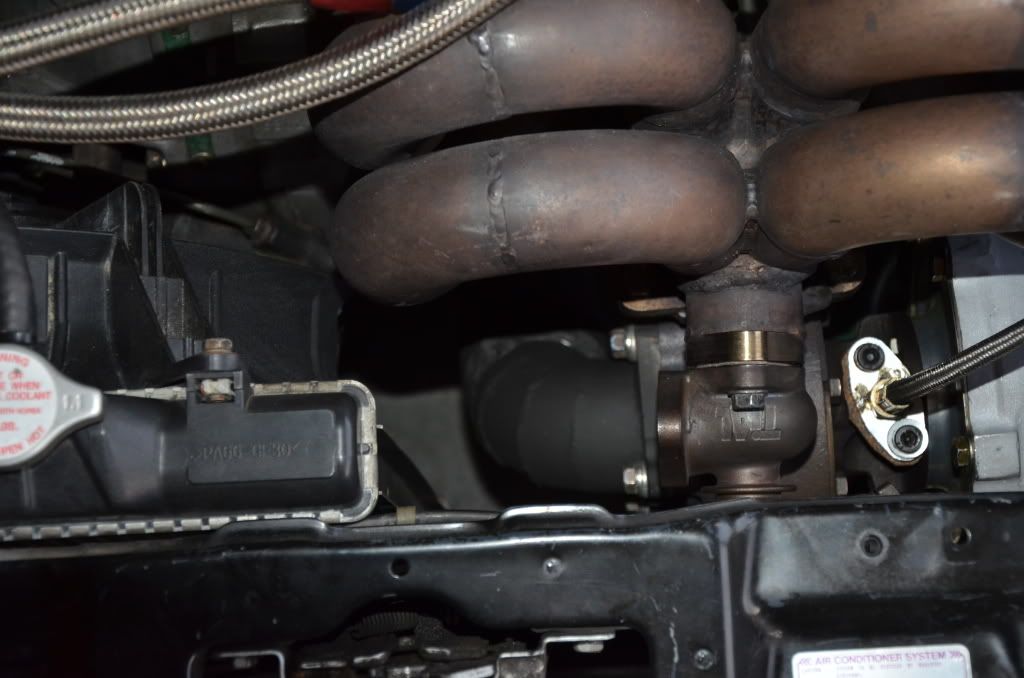
    Me: WTF? Are you serious. Ok guys I know people are busy, but I wouldn't care if I was loaded and trying to sell something. If someone called me wanting to buy one of my parts that I'm trying to sell for like 3 stacks, I'm going to get my fat ass up and meet so I can get paid. Atleast thats what I thought normal people would do. Ok enough ranting. The above scenario happened 3-4 times and I finally got fed up with it, so I called a buddy of mine who had a slightly used (50 miles) ebay kit. Now at first I didn't want the kit for the obvious reasons, plus the kit was intended for a SOHC so the turbo was a t3 t4, but it was a 50 trim. So I rolled my happy ass up to Rome and bought it for $300.00 complete with everything, turbo (zero shaft play), mani, intercooler, intercooler piping, bov and a bunch of other stuff. I hopped on ebay and bought a log style manifold for $40.00 and I also picked up that intercooler that are in the above pics. I ended up getting a tial waste gate from a fella on here (can't remember his screen name, but I appreciate the good deal). After the new mani got here I installed the kit. Had a couple of issues as they should be expected from an ebay kit but none the less the kit was on and working fine.

    Pics:


    Next was the tune which Scotty @ Mainstream did for me. Setup ended up making 360hp @ 14-15lbs. The turbo responds very quickly and was at full spool around 4k rpm. The boost comes in real smooth and has a very broad power band. We tried to go higher (19psi) but the waste gate spring (6lbs) said hell no. No worries because very soon I'll be purchasing some cams, valve train, throttle body, equal length mani and some other crap that I can't remember then I'll retune and see where I'm at. I am very happy with the power output or hp per dollar spent. At 300hp (9-10psi) the car is a beast (ripped the welded driver's side motor mount 3 times and counting). So don't hate on the egay to bad, when this turbo decides that it wants to take a poop, I'll replace it with a 60-1 Garrett variant FTW!! I don't have any pics from the dyno but as soon as I'm done posting this thread I'll upload them to Youtube and edit in a link.

    Here's your vid:

    Built GSR Ebay Turbo 360hp @ 15psi T3T4 50 trim (dyno engine view) - YouTube

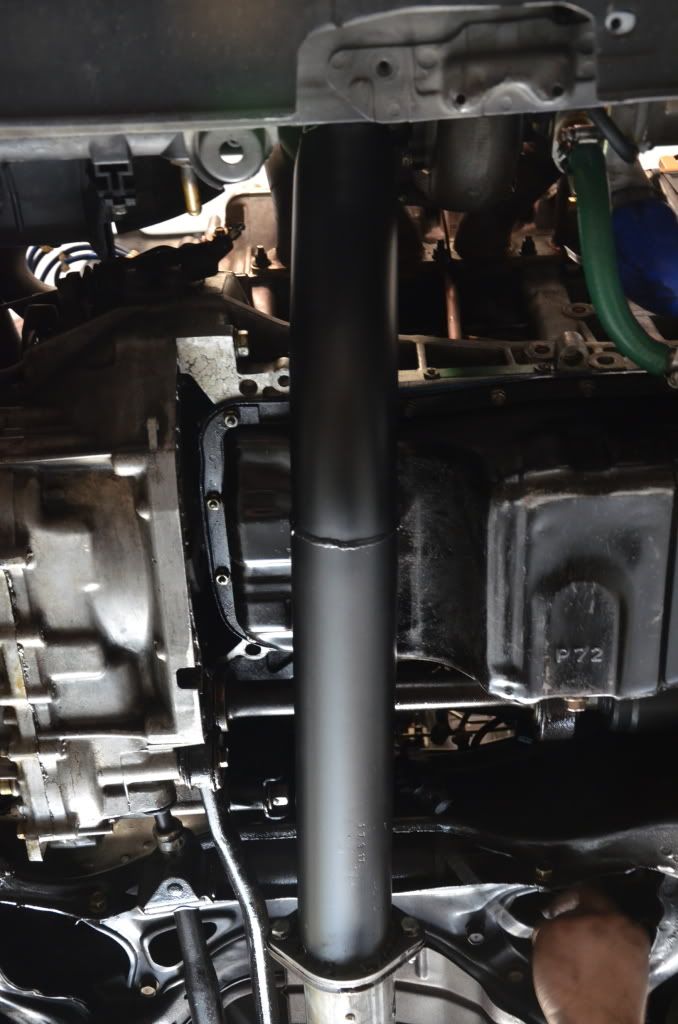
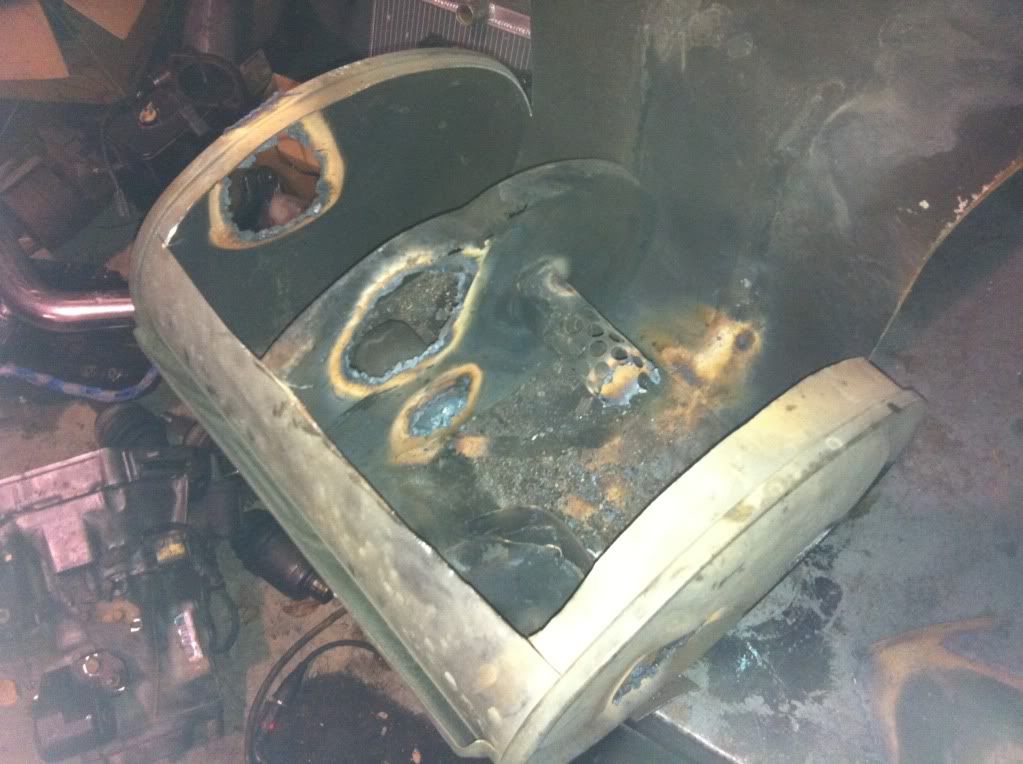
    Ok now came the exhaust, I didn't want anything loud at ALL!!! So I modified my stock muffler. I started by removing the muffler and cutting it open:

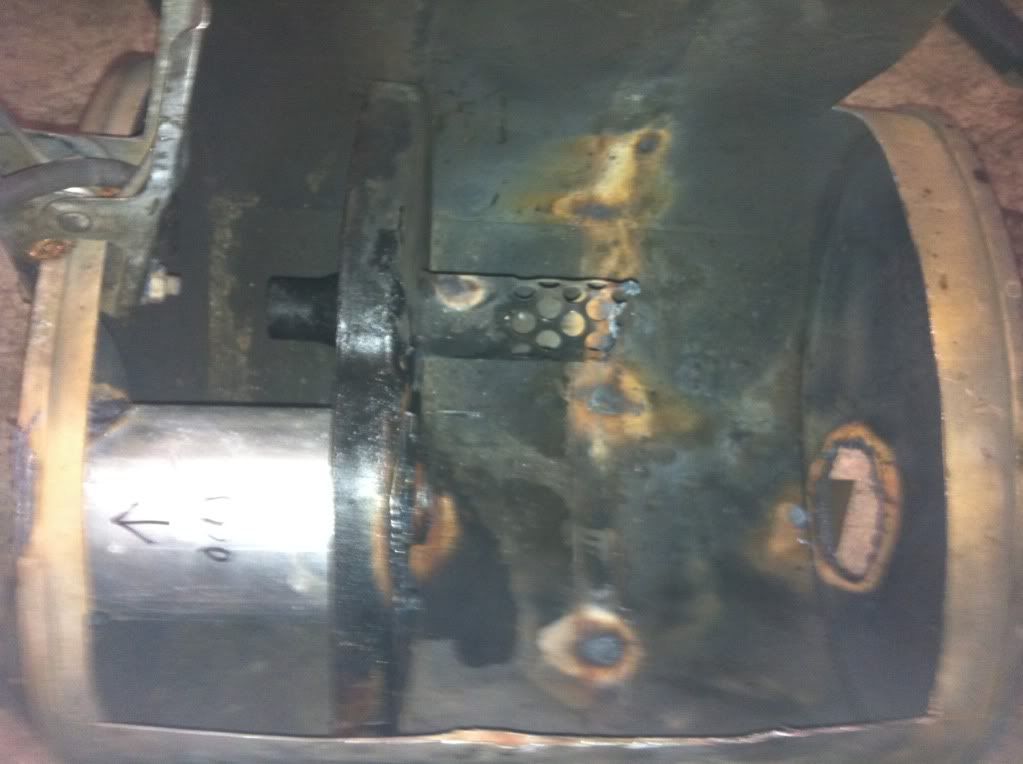
    Took out one of the walls and several baffles.


    Replaced the 1 3/4 pipe with a 3" pipe (outlet):


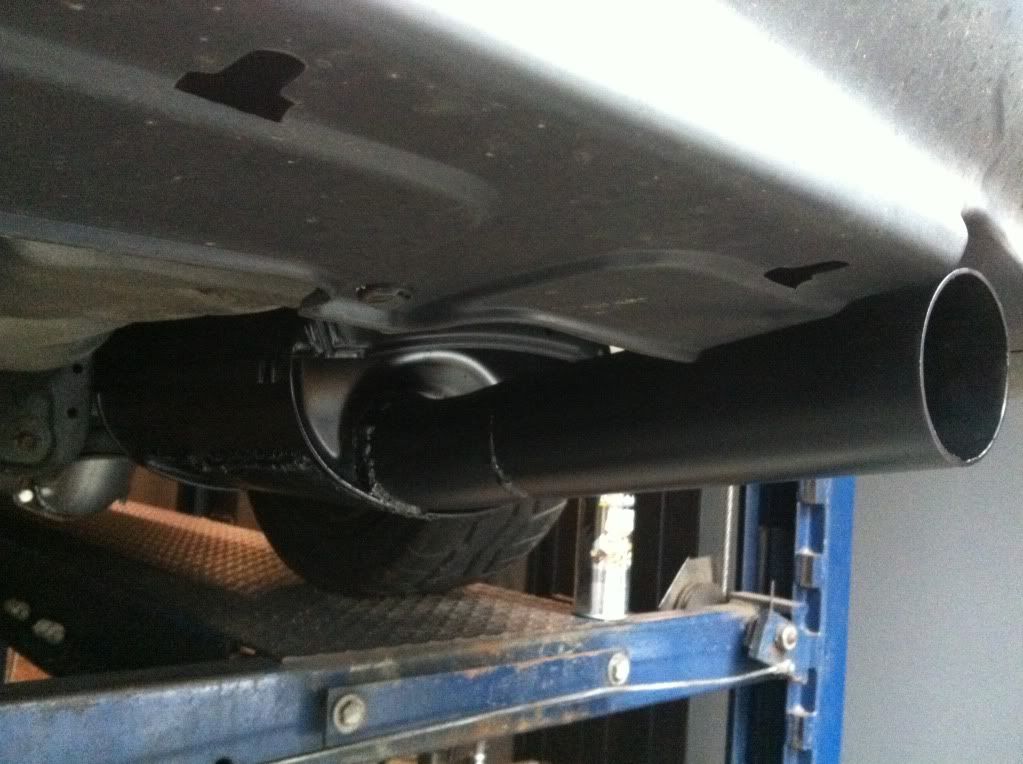
    And welded it back together (I know my welding sucks as I haven't welded in 7 years), you'll be fine. Mocked it on the car and welded a 3" inlet, then took it all back down, welded the axle back portion to the muffler and mocked it back up. We then welded and angled 3" outlet that continued to meet the bumper, then painted everything black to hide my shotty welding.
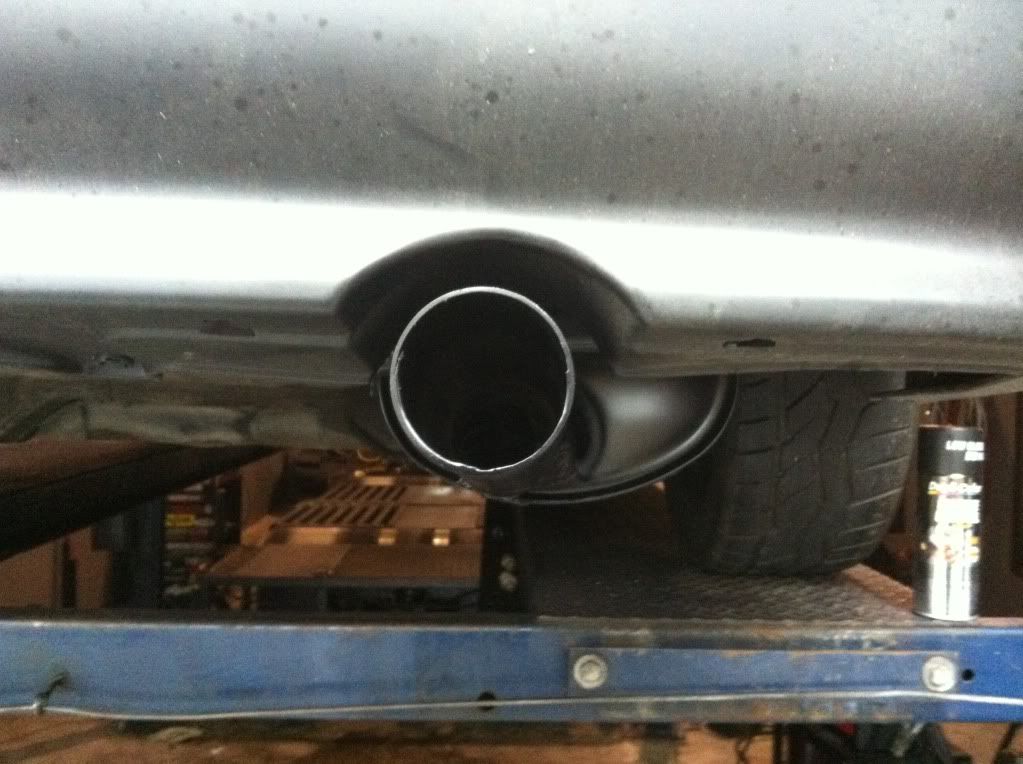
    Enjoy:


    Ok so to me it looks good because it looks stock, but more importantly its flows very well and is quiet as hell (some of my buddies that have rode in my car call it the quiet demon) lol. The entire exhaust is 3" mandrel bent piping all the way out. I also recorded a video of the exhaust and once again as soon as I'm done posting this I will upload one, you should like. Haters go ahead and blast, but it flows well, looks good, sounds great (quiet) and didn't cost me a dime!!!

    Vids:

    Built GSR Ebay Turbo 360hp @ 15psi T3T4 50 trim (dyno modified honda muffler sound) - YouTube

    Built GSR Ebay Turbo 360hp @ 15psi T3T4 50 trim (modified honda muffler view) - YouTube

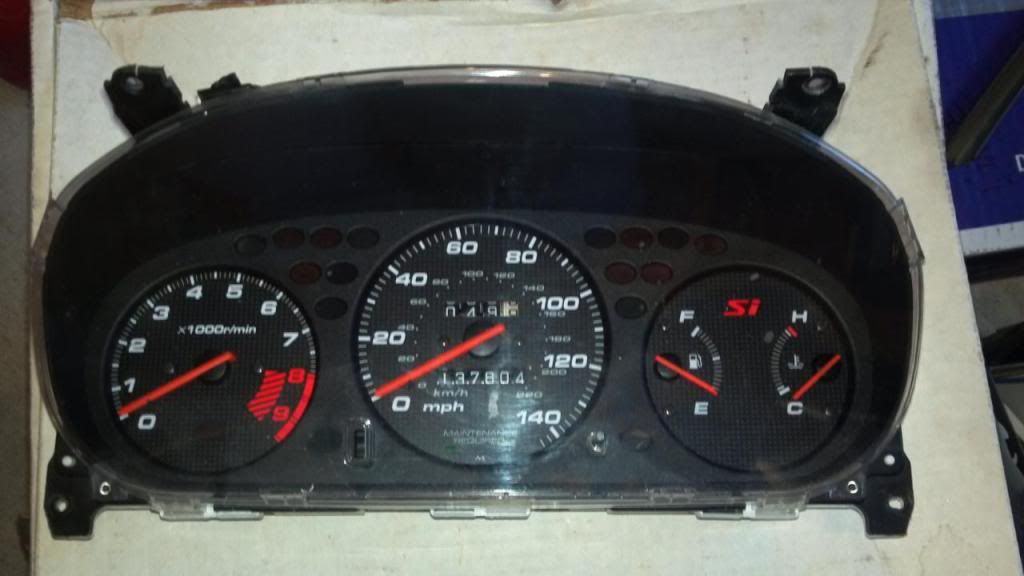
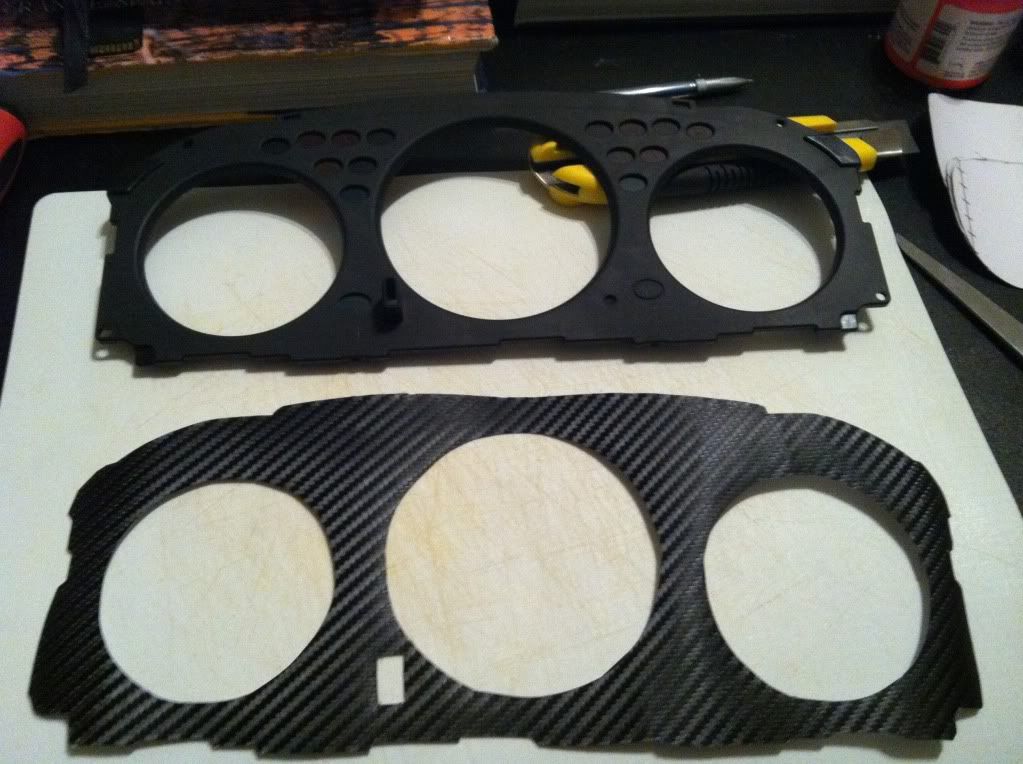
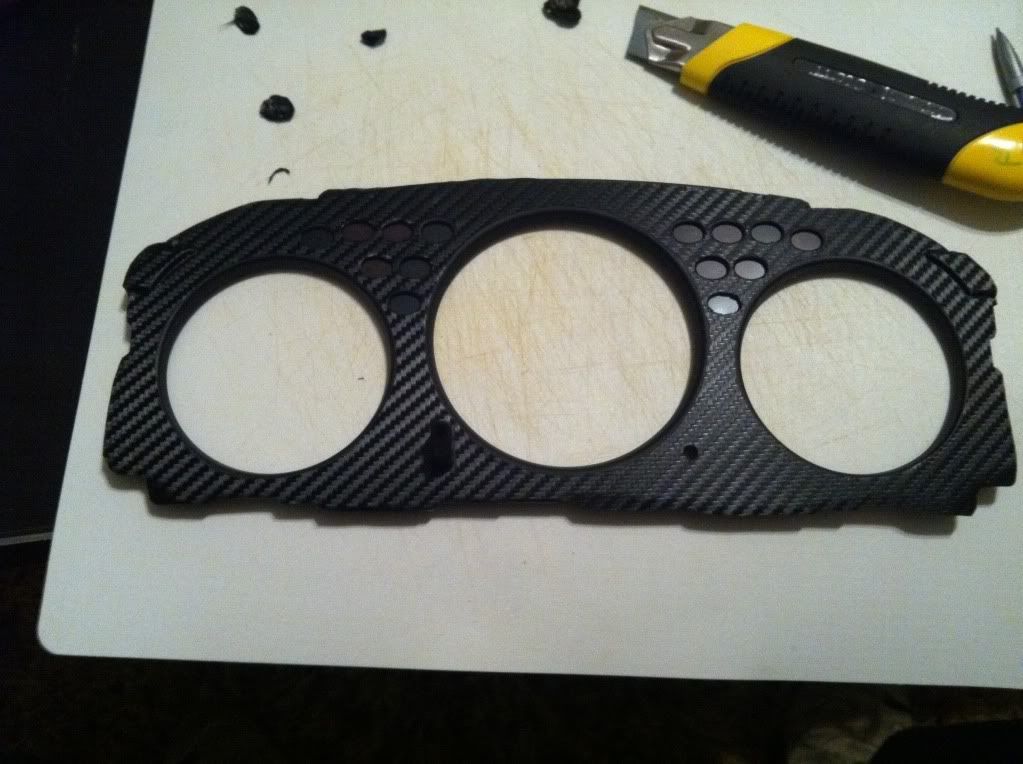
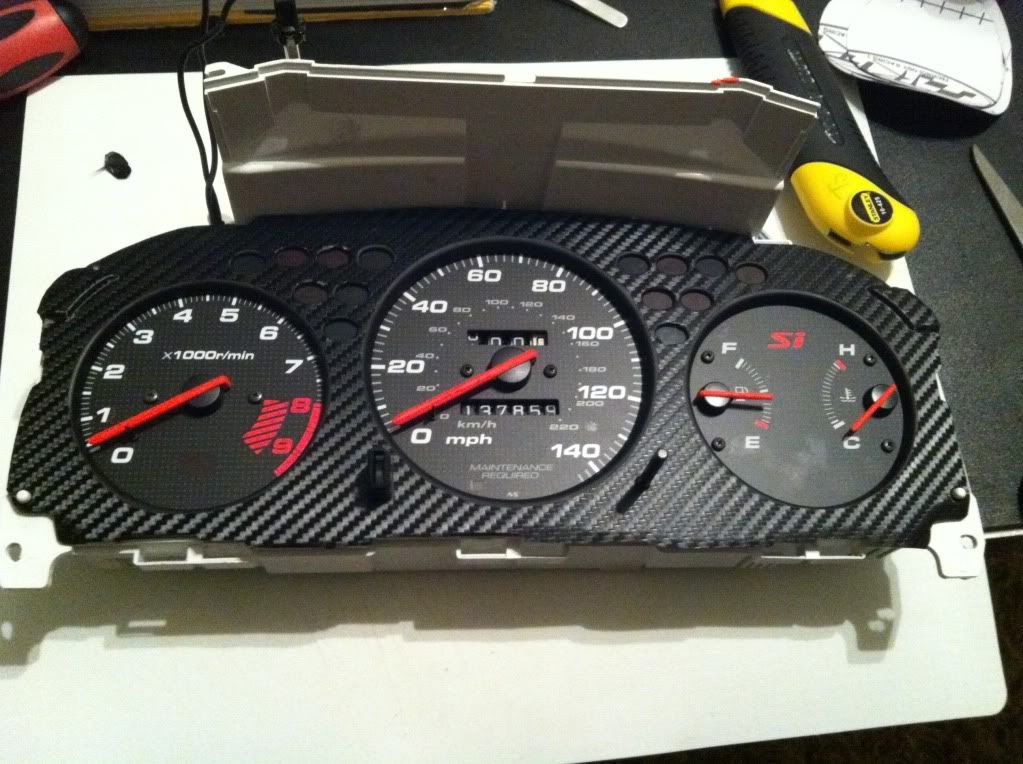
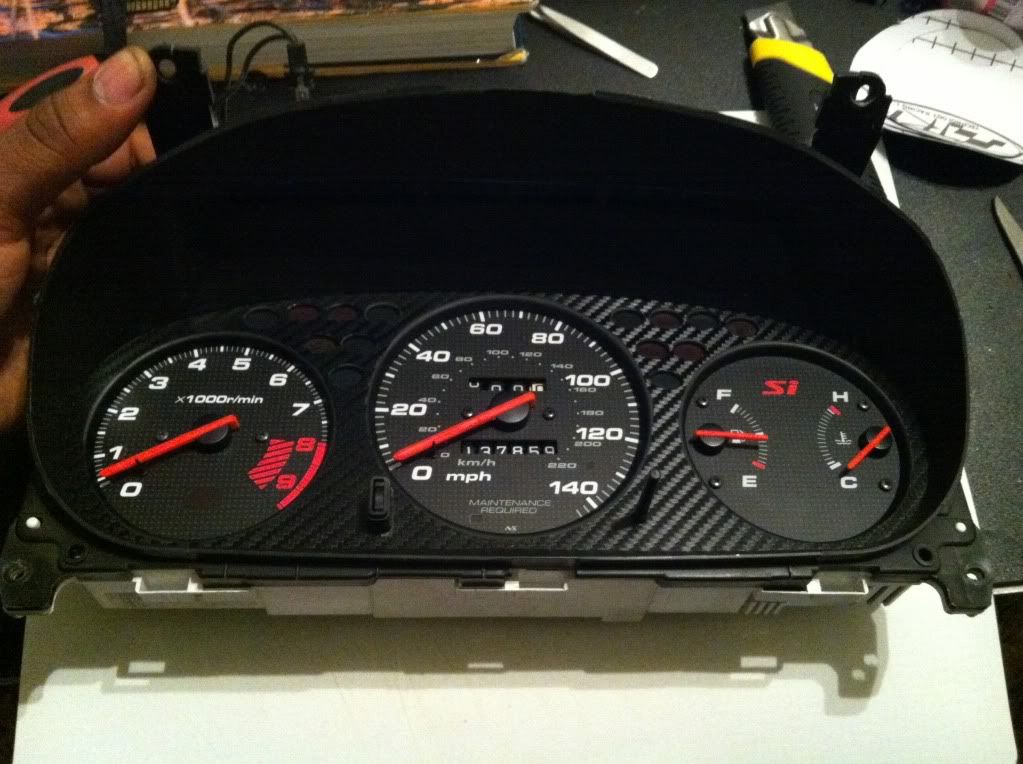
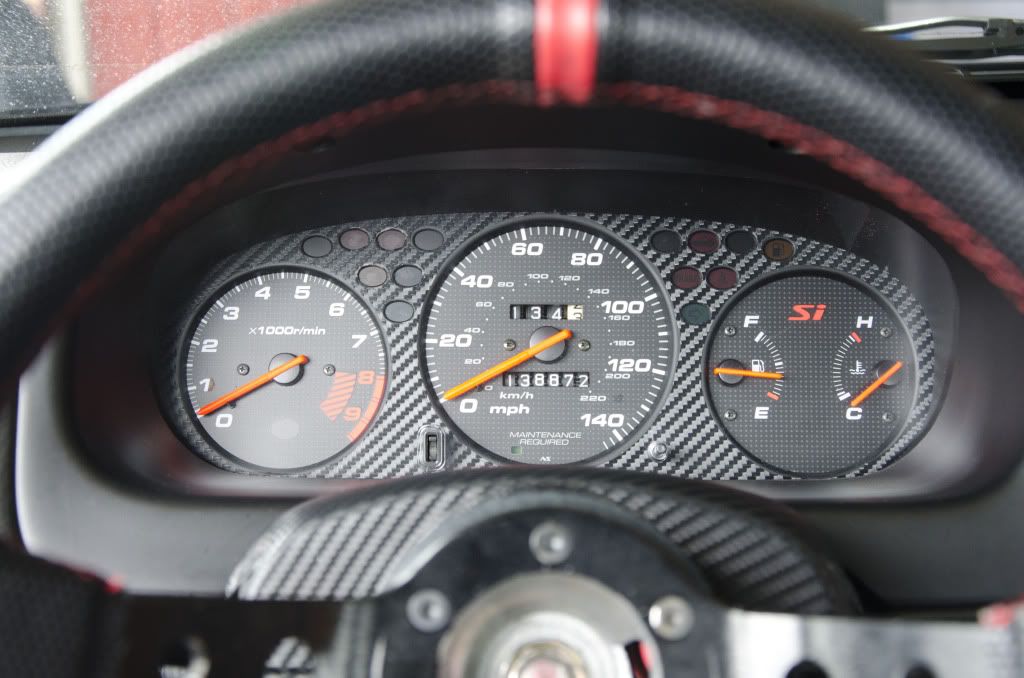
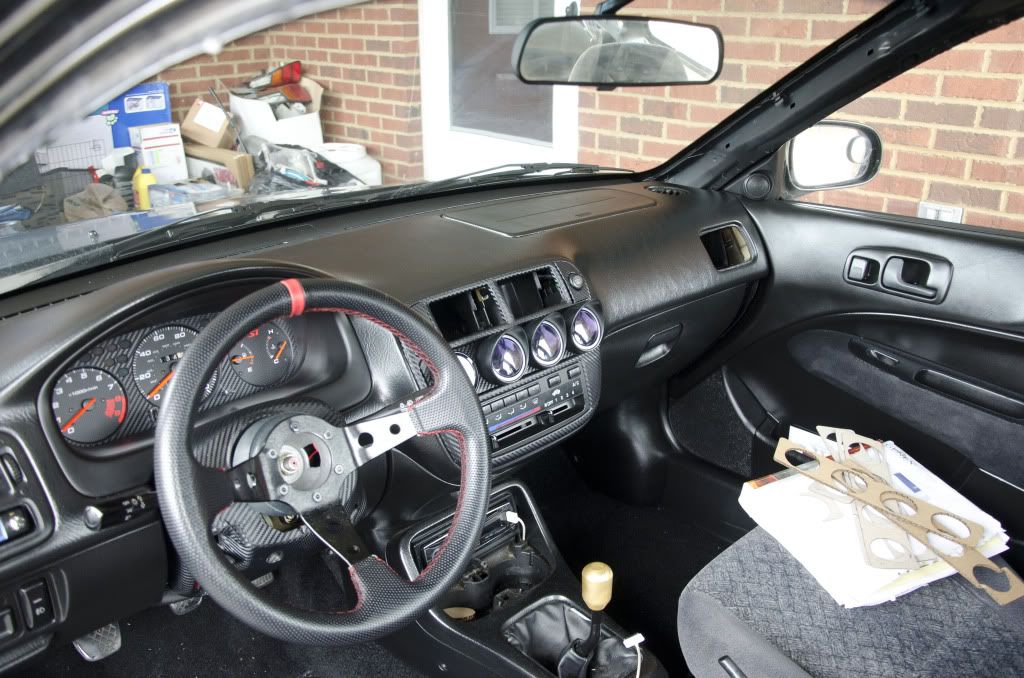
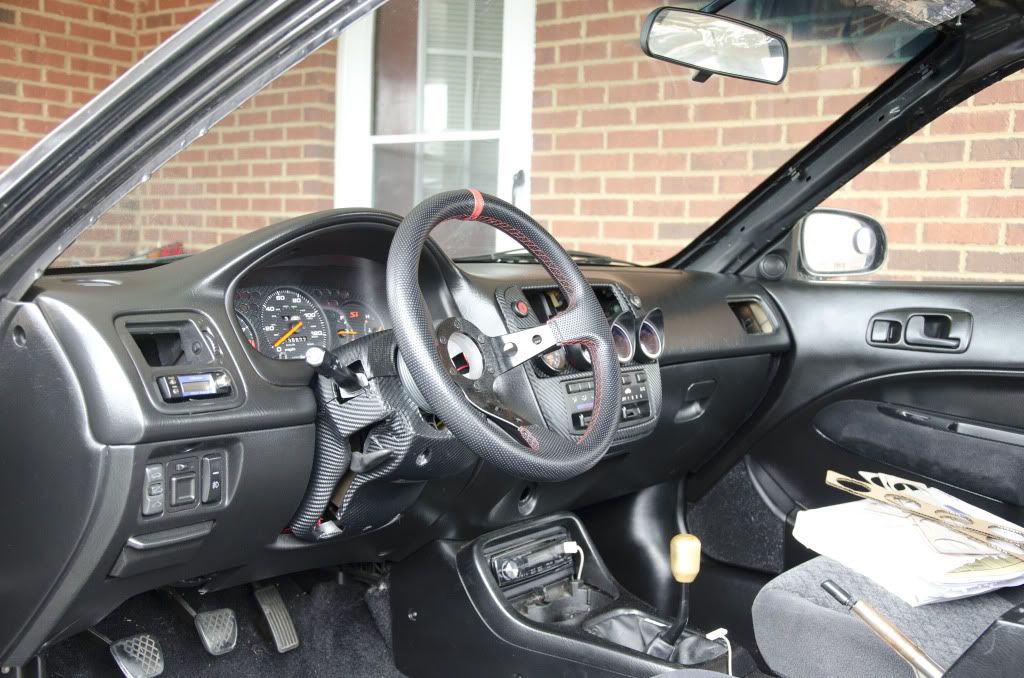
    Ok so now that I can pause on the engine I started on the interior!! First thing I bought was an 99-00 SI gauge cluster. I took the gauge cluster a part so that I could re-paint the needles and put some carbon fiber vinyl on the trim piece. I painted the needles with some flourescent amber/orange paint so the needles can glow under some uv bulbs (still haven't ordered yet). I then took some 3M carbon fiber wrap that I had laying around and wrapped the trim.

    Enjoy:

    Stock before mods:


    Carbon fiber cut out for trim piece:


    Carbon fiber applied to trim piece:


    Trim piece installed back onto newly painted needles:


    Almost there:


    Money shot:


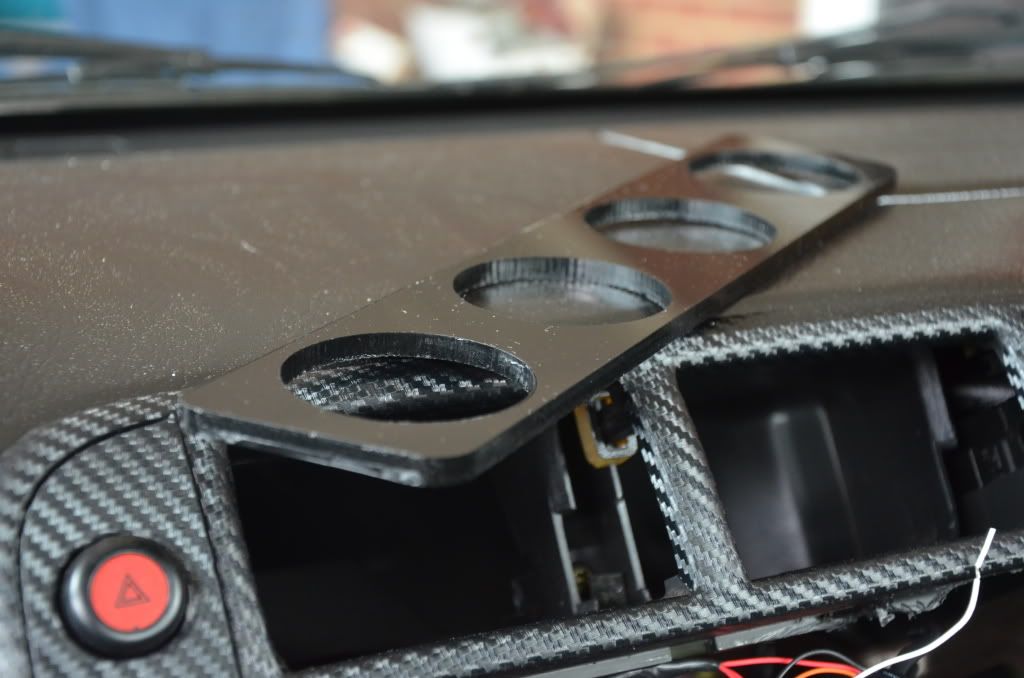
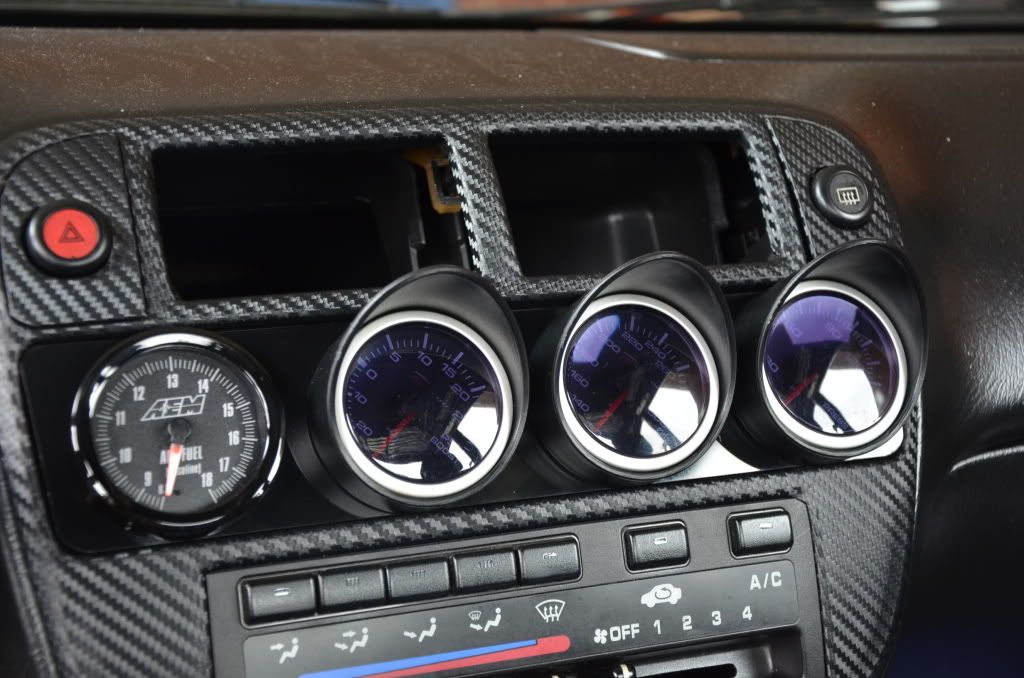
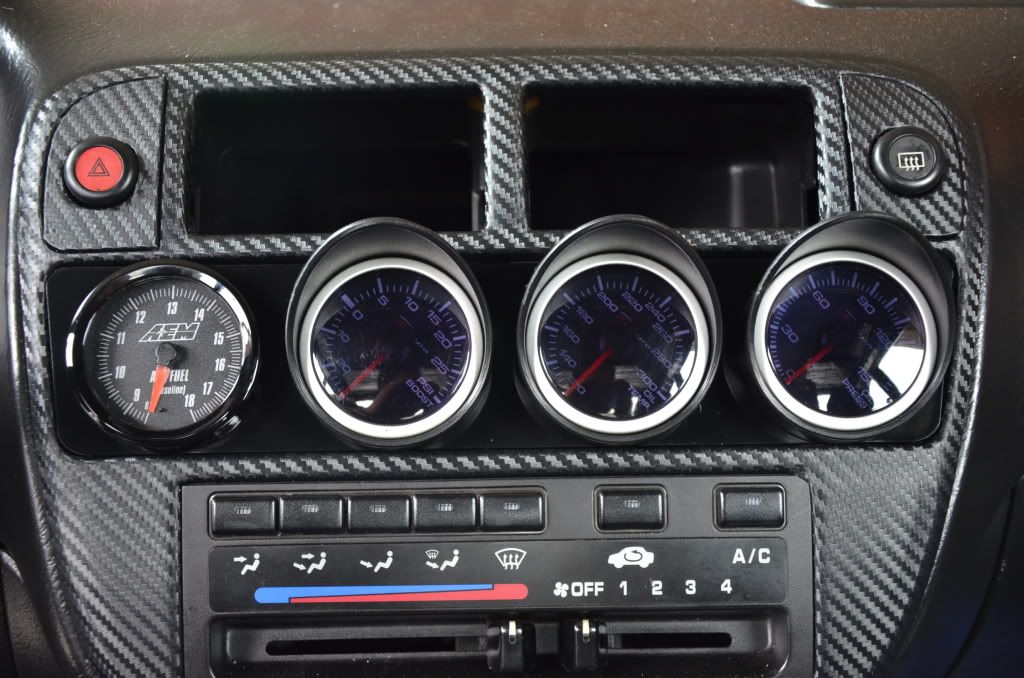
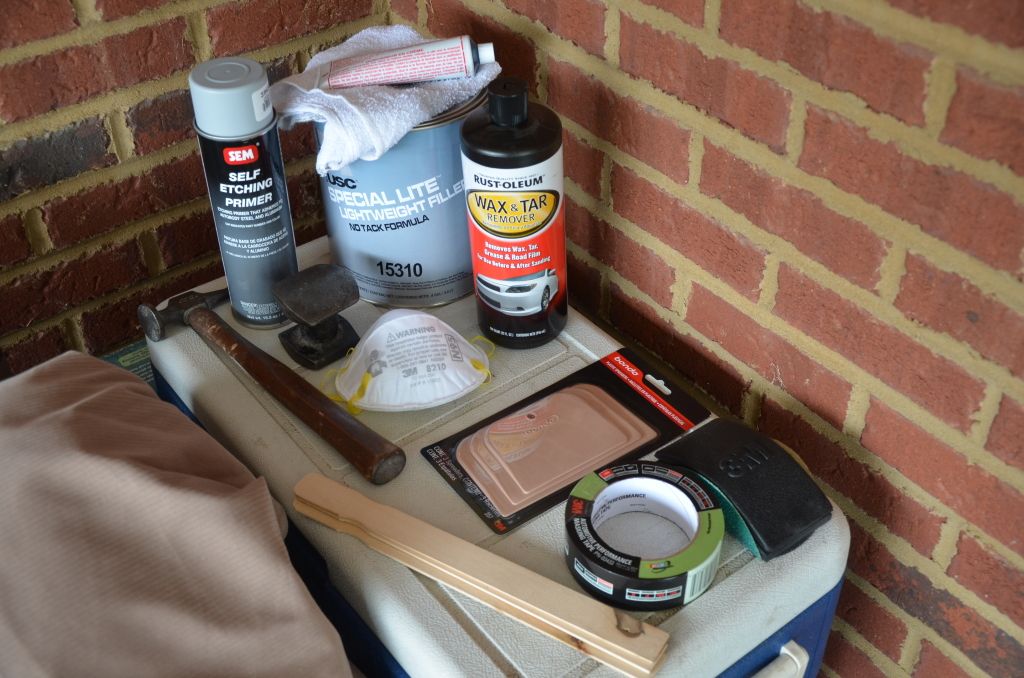
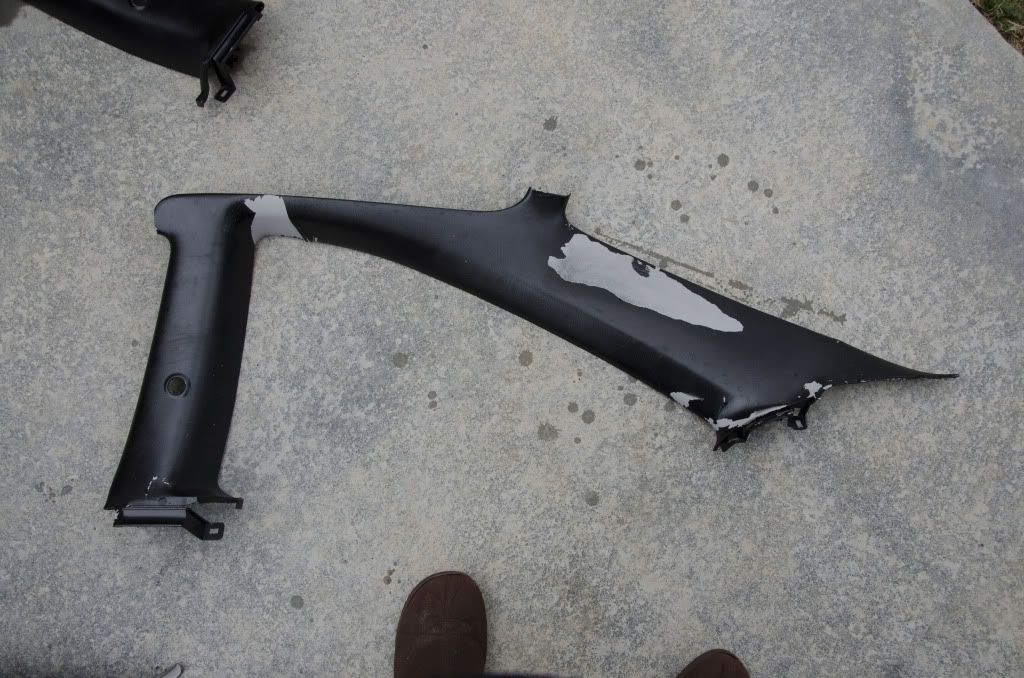
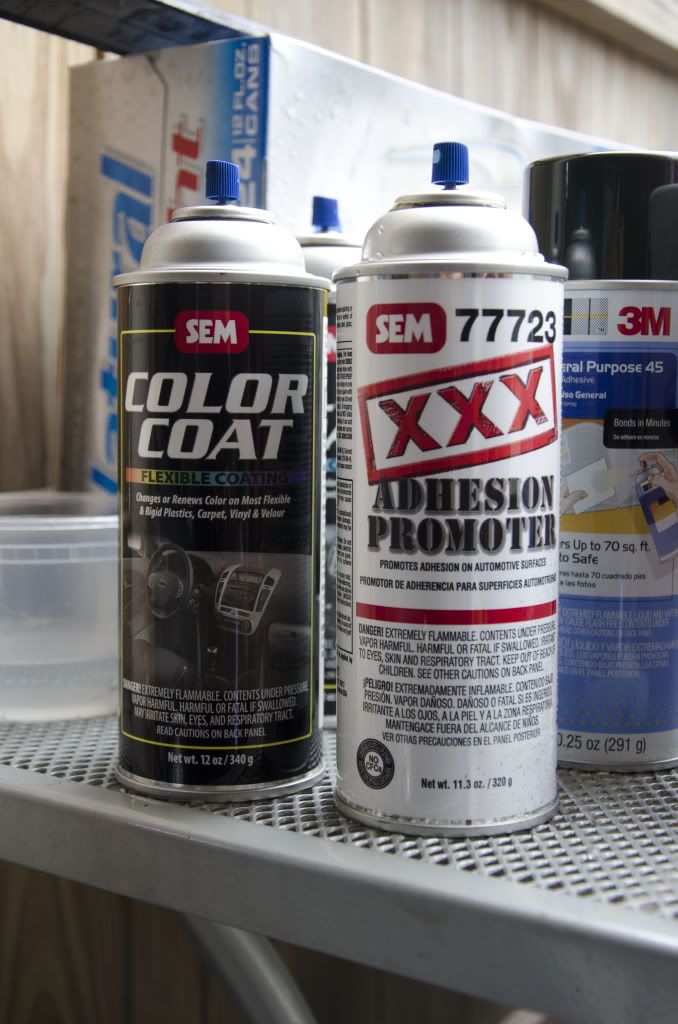
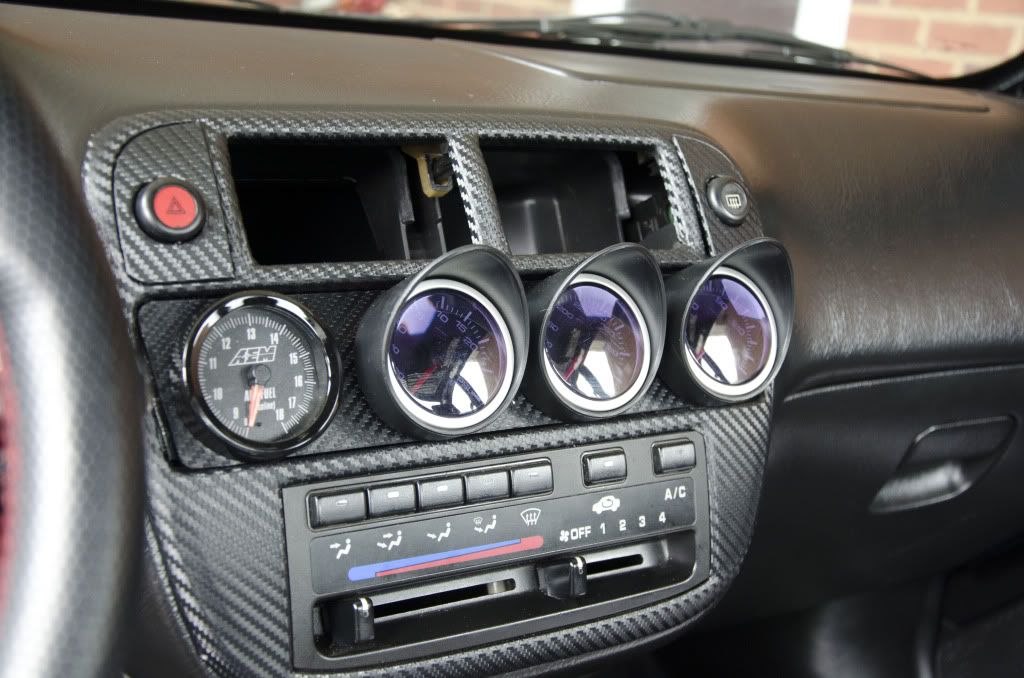
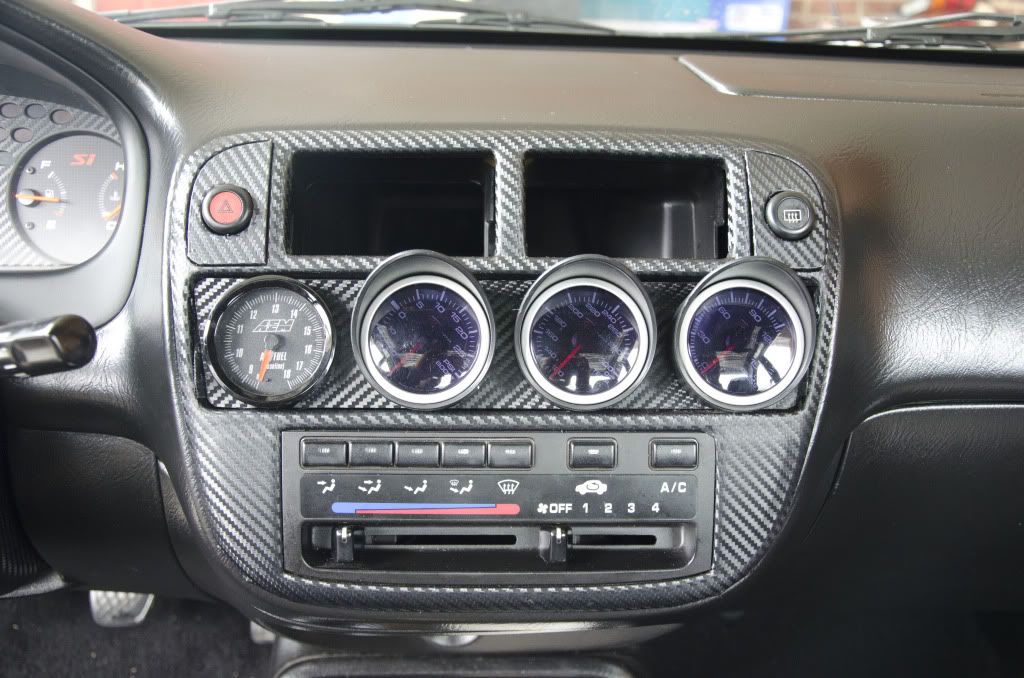
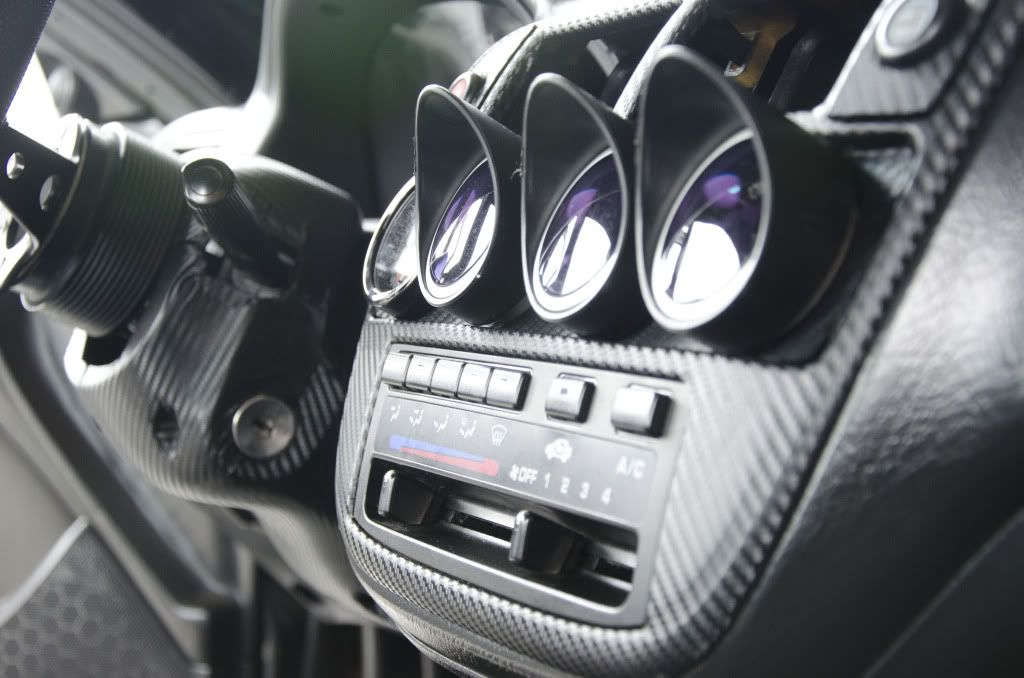
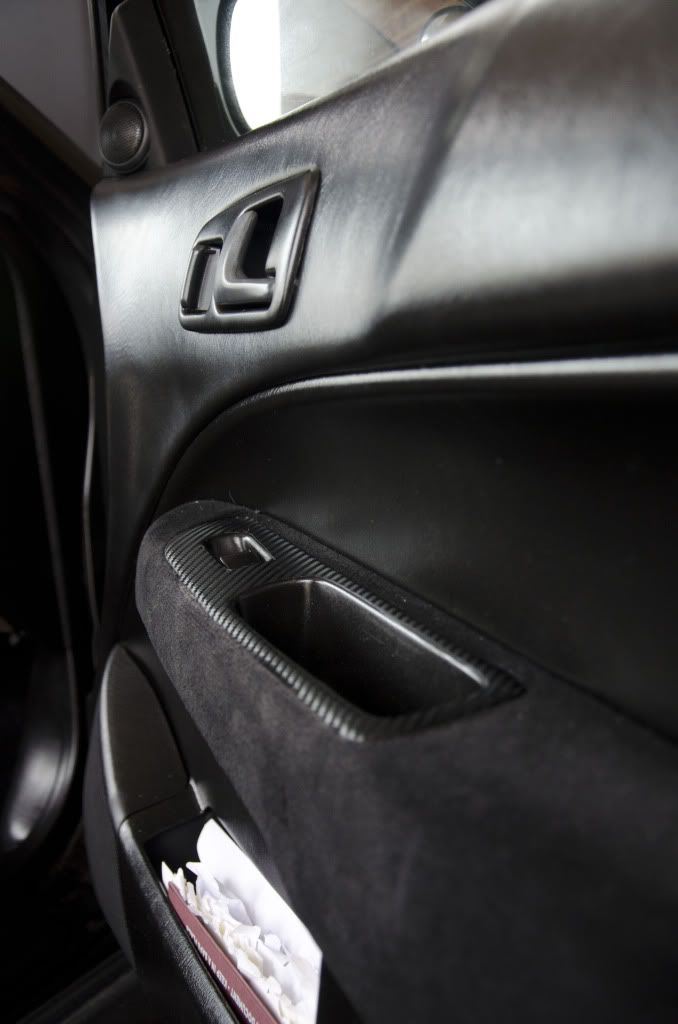
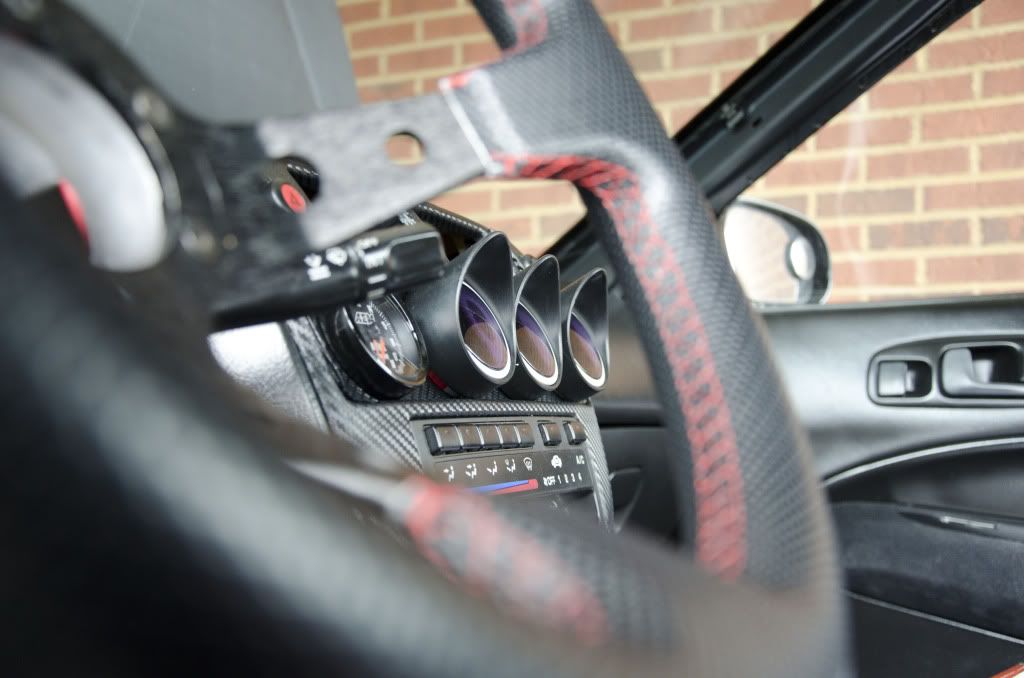
    Ok so hope you liked it but if you don't, don't worry about it lol!! Next I went on to fix a failed attempt to due a complete interior color change from grey to black. I had already attempted to do this once using the Krylon Fusion for plastic paint. A little advise.....DON'T EVERY USE THIS SHIT!!!! Ok now that thats over I can proceed. If you are going to paint the interior of your car only use products from a company called SEM. You can only buy this stuff at automotive paint supply places. This stuff works wonders, I bought the Laudau Black and everything I painted looks like it came from Honda black!!! Anyway I'm almost done with the interior but I'm having to wait on my headliner, sunvisors and center arm rest. As we all know the back upper plastic pieces all play a role in holding up your headliner so I'll just have to wait. I'm getting the headliner, sunvisors and center arm rest all done in black suede with red stitching for the low ($110.00) and they do great work!!! Will post pics when its done. Anyway I ended up buy 4 guages (Depo) to help me monitor my engine so I made a custom gauge holder out of acrylic but I ended up breaking it when I went to drill the 4th hole. Good thing for me my wife is the shiznat with CAD and we have a laser cutter. It took me 2-3 hours to make a gauge holder that ended up breaking. It took my wife about 10 minutes, ain't that some bull shi!. Anyway hope you guys like as I've gotten tons on compliments on it even though we're still working out the kinks to get that perfect fit. I ended up moving my radio and taking out that coin tray that sits next to the radio to run all 4 gauges all the way across.

    Krylon Fusion crap, this is what you'll end up with:


    Get this instead:


    Remember this?


    Now (straight sex):


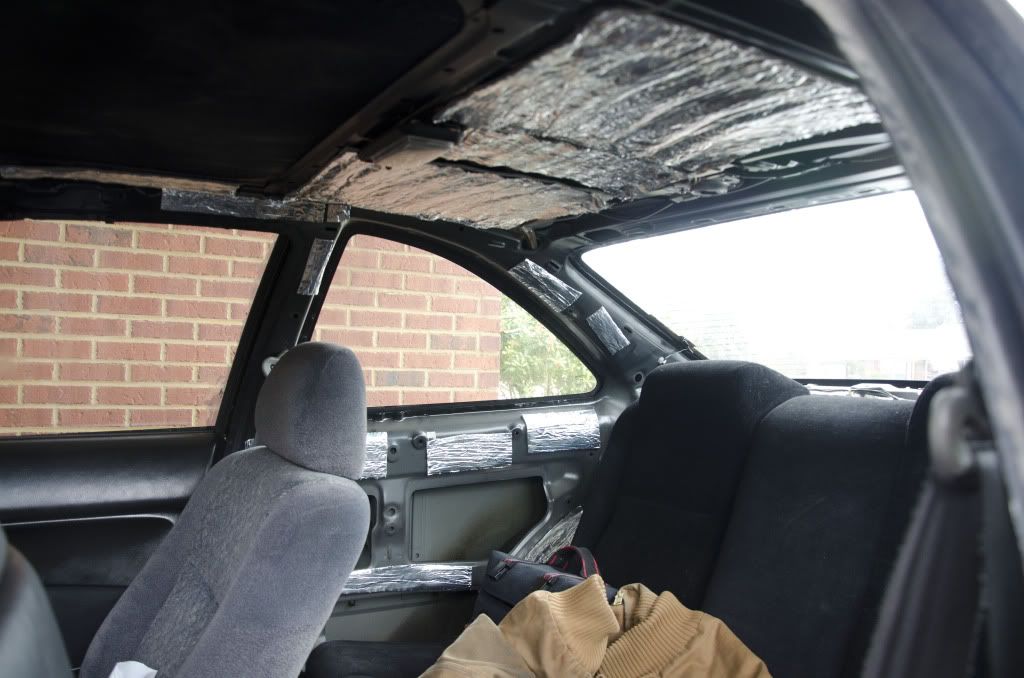
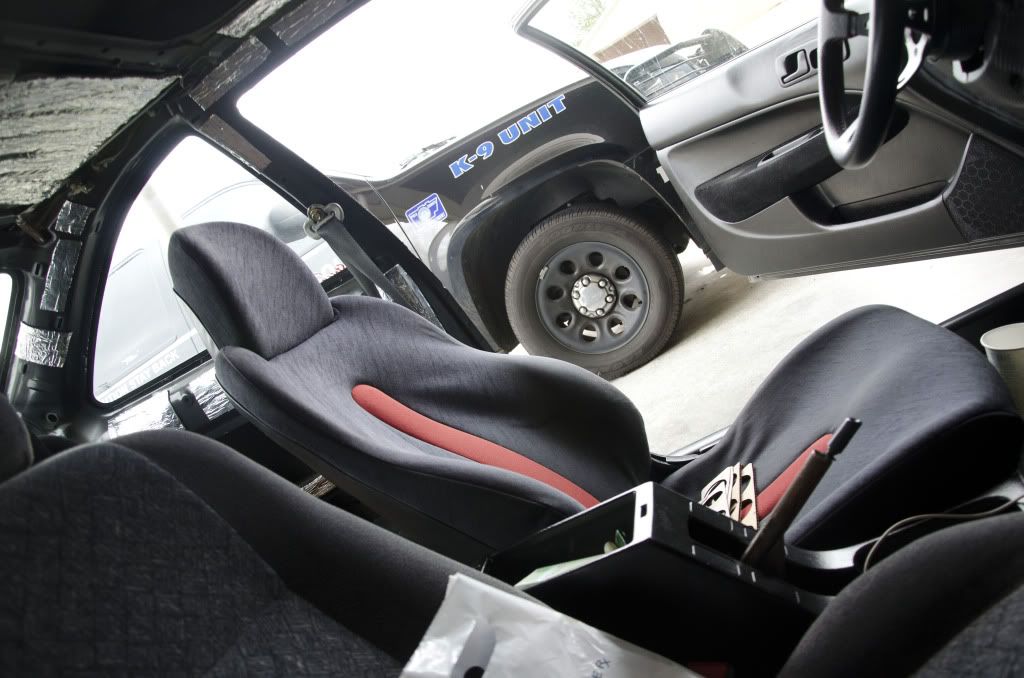
    Waiting on that headliner, cool shot of my frost king (STUFF WORKS) FTW!!:


    Picked me up a pair of Delsol seats that just need some touching up, I've pulled that fabric off of the passenger side seat so that I can re-attach the fabric to the foam with some 3M fabric adhesive!!


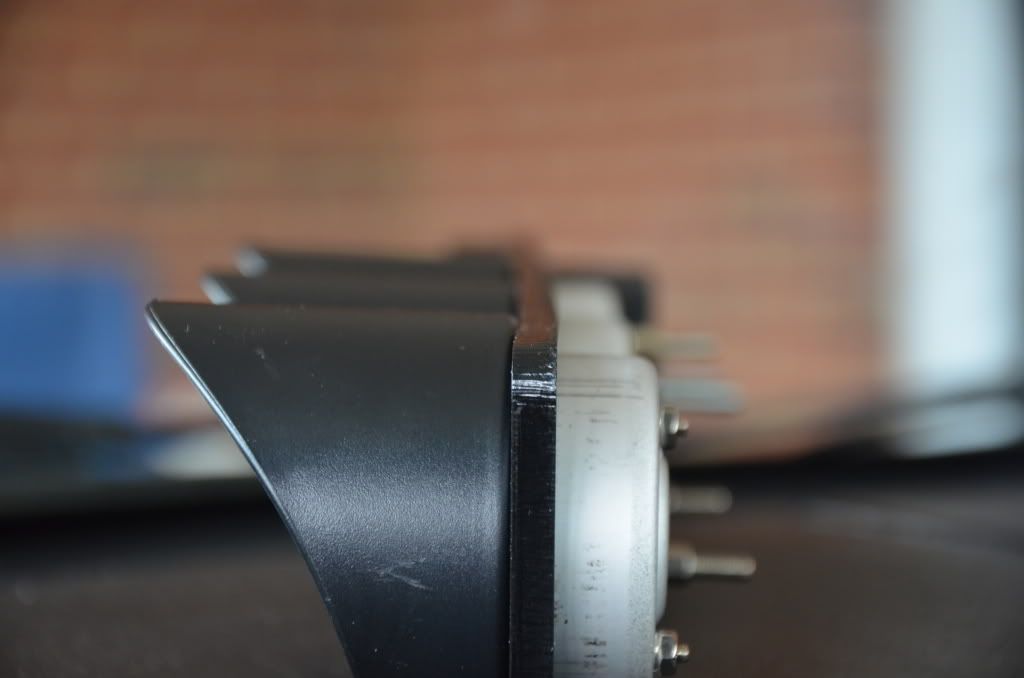
    More sex with the gauges!!:


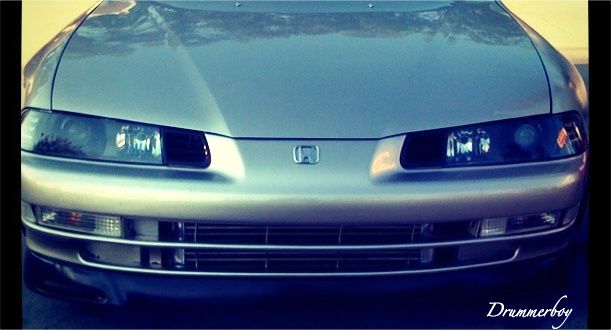
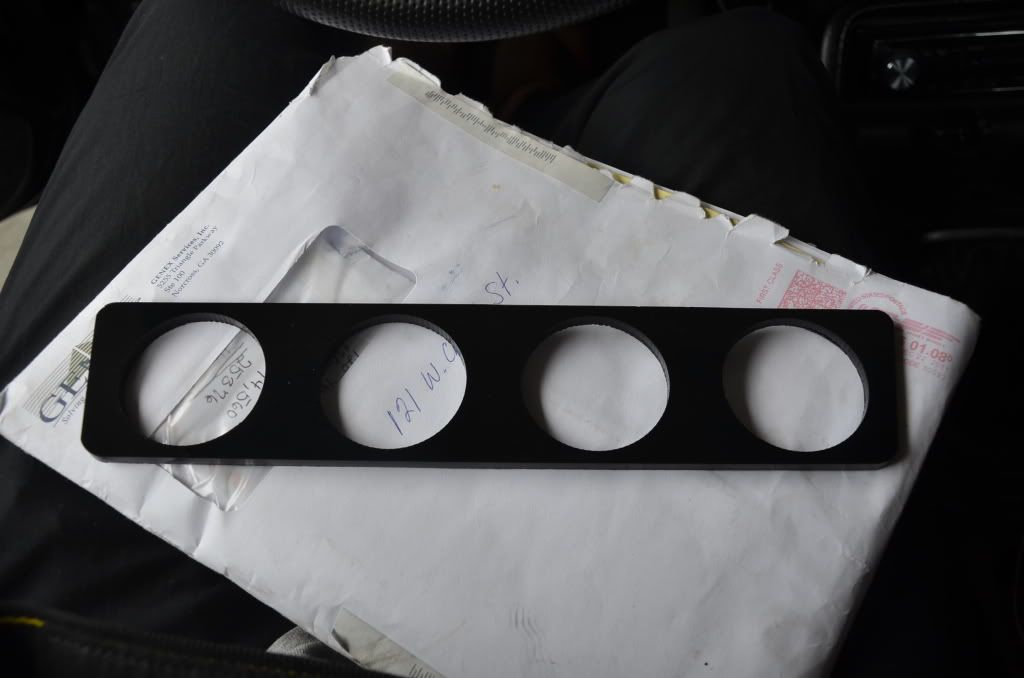
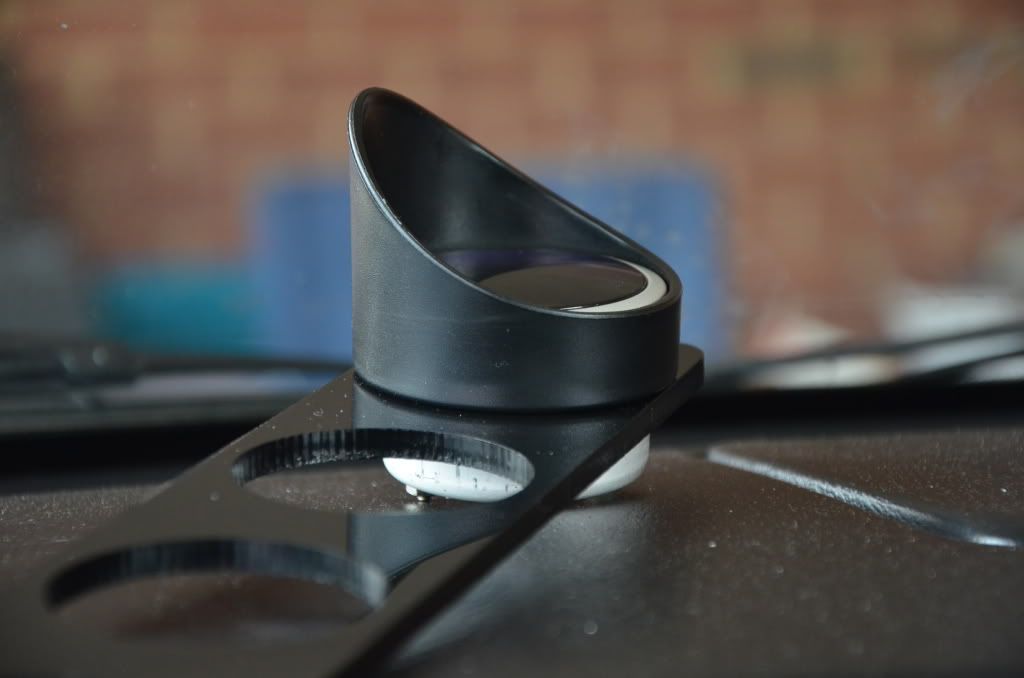
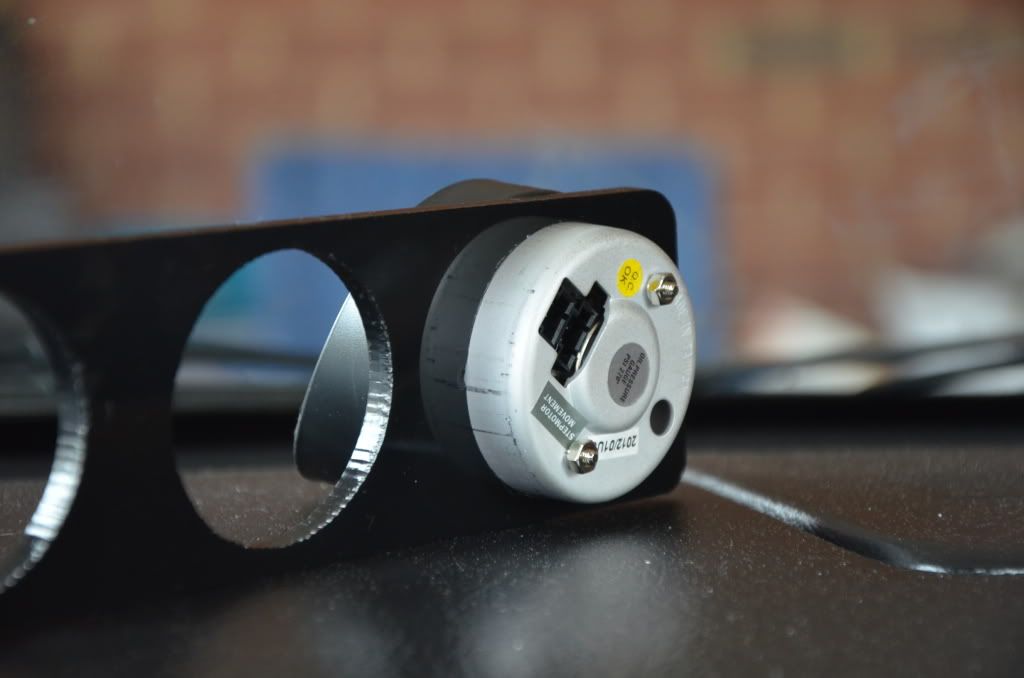
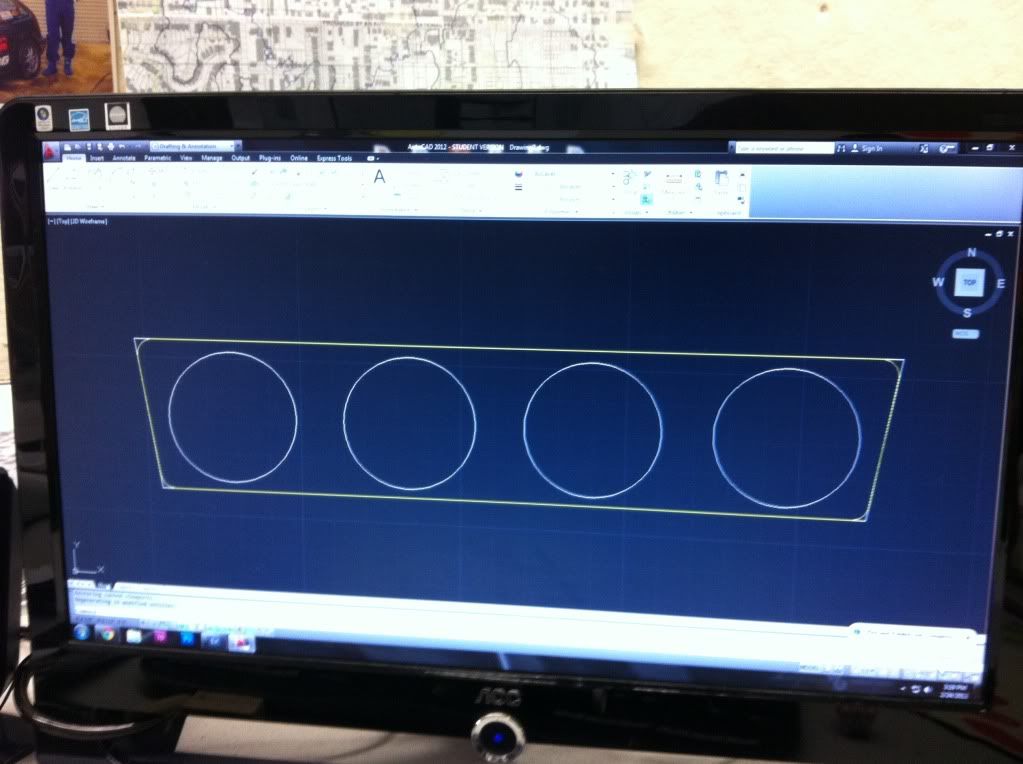
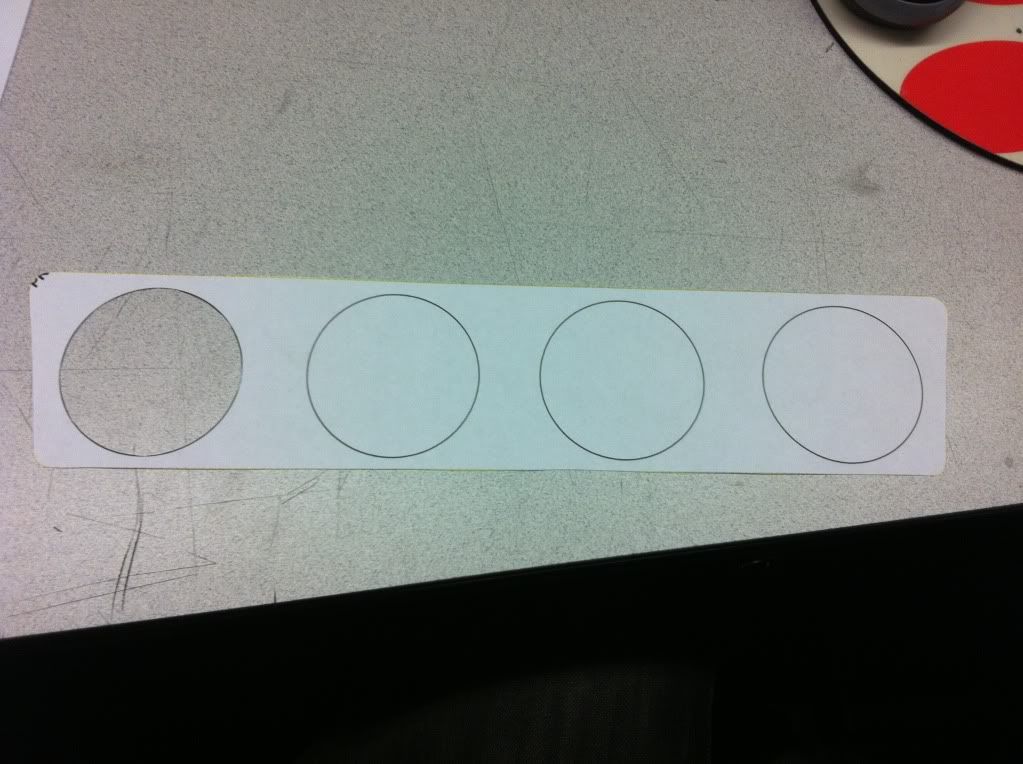
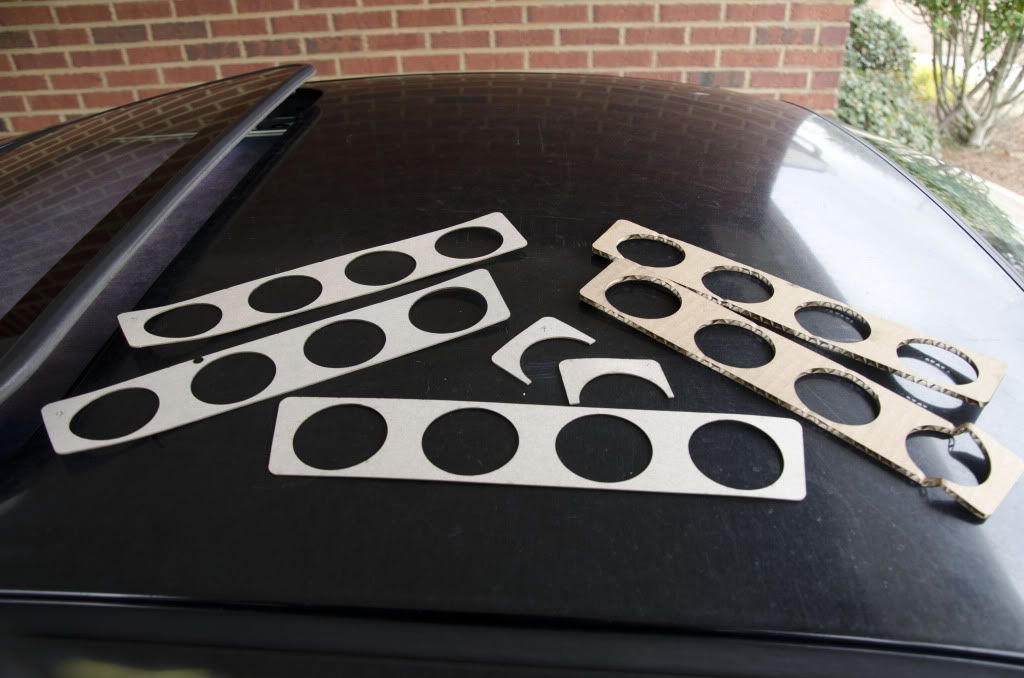
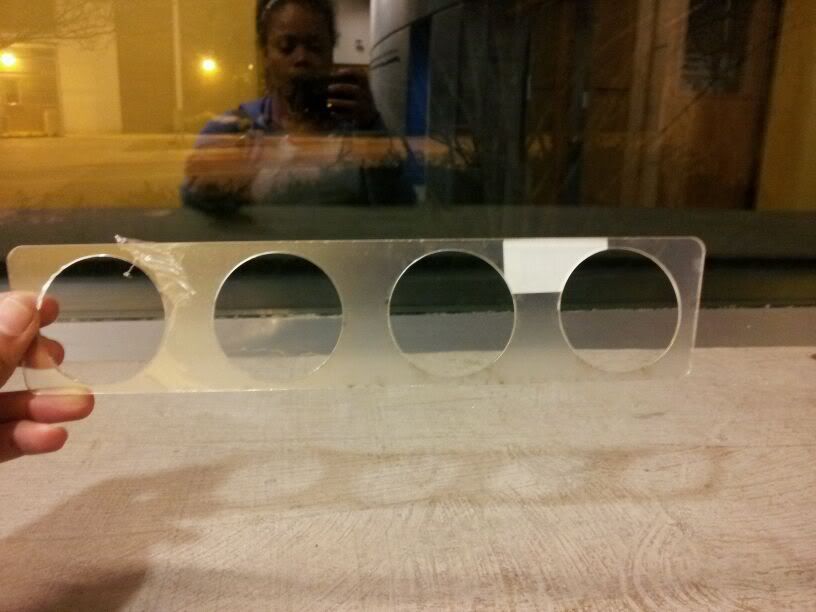
    Now if some of you guys are wanting something like this gauge holder that is made to fit perfectly for YOUR vehicle (not that egay universal crap) let me know. I've got several friends that are letting me use their cars to mock up these block off/gauge holders for their year civics. So far were making these for the 88-91 civic, 92-95 civic, 96-98 civic, 99-00 civic single and double din sizes, 94-01 integra single and double din sizes, 02- up RSX, Honda Prelude and others coming soon. And the best part is say you only want a holder that can hold one or two gauges, but your car is boosted and you can't find a good place to mount you electronic boost controller or turbo timer and such. I'm currently getting the dimensions for all the popular electronics to include Greddy, Apexi, HKS, etc, etc. After I get these dimensions I will be able to cut out gauge holders that can also accomodate your electronics for a very clean look. Best part is I'm going to be selling these anywhere from $20.00- $30.00!!! Let me know what you want, I've included some pics of some of the R&D thats going into these things to get that perfect fit. I also recorded a video of the laser cutter in action, it's pretty nice that I'll post up as well. I'm going to try and have some of these on hand this weekend as I may ride out to Barrett Pkwy, so if you want to see one in person or buy one I'll be there.

    Designed on CAD:


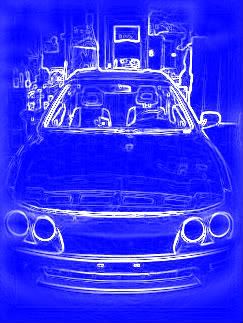
    Computer generated picture:


    Various pieces of cardboard (used for mock up), trying to get that perfect fit.


    Finished product:


    I just bought a huge sheet of black acrylic that I'll be using to make these, so the default color will always be black not clear lol.

    Hope you liked the car, stay tuned as there is a lot more to come!!
    Last edited by SRDFTITAN; 06-12-2012 at 11:17 PM.

  2. #2
    Certified Gearhead
    Join Date
    Dec 2010
    Location
    ATL
    Posts
    416
    Rep Power
    14

    Default

    This is awesome! Love how the interior turn out. Great job!

  3. #3
    Certified Gearhead jonbuice5591's Avatar
    Join Date
    Oct 2011
    Location
    Clayton county
    Posts
    279
    Rep Power
    13

    Default

    this is the BEST layed out thread i have ever seen on here. car looks good man. i cant wait to see what else is done. also where did you get the steering wheel?

  4. #4
    IA MEMBER jdm_eg8's Avatar
    Join Date
    Jan 2009
    Location
    Douglasville
    Age
    39
    Posts
    2,575
    Rep Power
    29

    Default

    I'm loving it

  5. #5
    god is my savior jdm eg6's Avatar
    Join Date
    Nov 2008
    Location
    lawrenceville,ga
    Age
    35
    Posts
    1,971
    Rep Power
    18

    Default

    very nice

  6. #6
    Certified Gearhead SRDFTITAN's Avatar
    Join Date
    Apr 2005
    Age
    40
    Posts
    246
    Rep Power
    20

    Default

    Got the steering wheel off of egay lol!! It was like 40 with hub. I'll probably end up buying a Nardi wheel if the interior turns out super nice!!! Other than that I'll keep it. Thanks for the compliments!! Gotta run real quick but I'm still going to post some vids.

  7. #7
    Senior Citizen Dylan's Avatar
    Join Date
    Nov 2008
    Location
    Milledgeville
    Posts
    1,885
    Rep Power
    19

    Default

    I really like the interior, and the power is nice too.
    twenty-two

  8. #8
    FUCKING BOSSS Rhys.'s Avatar
    Join Date
    Mar 2011
    Location
    canton
    Posts
    867
    Rep Power
    15

    Default

    awesome build man!!! cant wait to see the progress on this thing!!!
    DONT MAKE ME NOT EAT MY DAM CEREAL!!!! OR YOU WONT HAVE ANY FUCKING GAS!!!!!

  9. #9
    IA Member
    Join Date
    Dec 2009
    Location
    doraville
    Posts
    7
    Rep Power
    0

    Default

    nice!!!

  10. #10
    Senior Member C230K's Avatar
    Join Date
    Feb 2012
    Location
    Idk you tell me
    Posts
    1,191
    Rep Power
    0

    Default

    Are you doing anything special with the headliner?


    AFA HOLLYWOOD PREMIER LEAGUE EST. 1998


  11. #11
    BA8 Squad member #1 Drummerboy's Avatar
    Join Date
    Apr 2008
    Location
    Marietta
    Age
    33
    Posts
    4,202
    Rep Power
    23

    Default

    Where'd you get that carbon fiber stuff? what's it called?

  12. #12
    Certified Gearhead SRDFTITAN's Avatar
    Join Date
    Apr 2005
    Age
    40
    Posts
    246
    Rep Power
    20

    Default

    Yeah I'm getting the headliner, sunvisors and middle console done in black suede with red stitching. Thanks again guys for the comments.

  13. #13
    Certified Gearhead SRDFTITAN's Avatar
    Join Date
    Apr 2005
    Age
    40
    Posts
    246
    Rep Power
    20

    Default

    I got the carbon fiber stuff off of ebay. Its made by 3M and comes in rolls.

  14. #14
    Another Honda Boy 98blackcivic's Avatar
    Join Date
    Nov 2008
    Location
    GWINNETT IS GREAT!
    Age
    35
    Posts
    3,096
    Rep Power
    21

    Default

    hell yea dude...what wat was wife doing out @ 3 am before the head gasket blew??


  15. #15
    BA8 Squad member #1 Drummerboy's Avatar
    Join Date
    Apr 2008
    Location
    Marietta
    Age
    33
    Posts
    4,202
    Rep Power
    23

    Default

    Did you use a heat gun to apply the CF stuff? Also, my headliner,door inserts, tweeter pods and center console are all black suede, it's definitely a nice addition.

  16. #16
    Certified Gearhead oreign's Avatar
    Join Date
    May 2011
    Posts
    402
    Rep Power
    13

    Default

    I love the whole interior, but my favorite is the cluster. GIMMEEEEEEEEEEEEEEEEE


  17. #17
    i love my baby civic gsr's Avatar
    Join Date
    Jan 2009
    Location
    your moms house
    Age
    39
    Posts
    3,605
    Rep Power
    21

    Default

    O fak i want thst carbon fiber wrap shit is clean i want some aædo gopd job car looks decent
    (((((No more 4 door))))))

  18. #18
    Certified Gearhead SRDFTITAN's Avatar
    Join Date
    Apr 2005
    Age
    40
    Posts
    246
    Rep Power
    20

    Default

    Quote Originally Posted by Drummerboy View Post
    Did you use a heat gun to apply the CF stuff? Also, my headliner,door inserts, tweeter pods and center console are all black suede, it's definitely a nice addition.
    Yeah I used a heat gun to apply the vinyl, takes a lot of practice and I still can't do it right lol. Drummerboy I'm sure that suede its nice, I can't wait until I get mine back (they need to hurry)!!

  19. #19
    slob on my NOOB cactusEG's Avatar
    Join Date
    Jul 2005
    Location
    San antonio 210
    Posts
    20,538
    Rep Power
    39

    Default

    I like all the work you've done. Good build thread

  20. #20
    Seeing it in B&W Genji-Sama's Avatar
    Join Date
    May 2009
    Location
    We can do business, don't worry
    Age
    33
    Posts
    3,342
    Rep Power
    19

    Default

    Holy crap this car went from crap to sexy quick. Love that interior
    BUILT NOT BOUGHT .........

  21. #21
    Certified Gearhead dc2gs's Avatar
    Join Date
    Oct 2011
    Location
    cartersville
    Age
    32
    Posts
    202
    Rep Power
    13

    Default

    Seen this car in person, very clean. That cluster looks amazing!! Good build man. Def will look a lot better when you get the rest of the interior.

  22. #22
    Certified Gearhead SRDFTITAN's Avatar
    Join Date
    Apr 2005
    Age
    40
    Posts
    246
    Rep Power
    20

    Default

    Again thanks for the comments. I can't wait until this interior is done so that I can start on the outside. Quick question for everybody; my car is currently black and I'm torn between two colors when I do a all over paint job. The colors would be painting it back black (would be the easiest as I wouldn't have to paint the jams or engine bay) or paint it Ultrasonic Blue Metallic (Lexus ISF) paint color? What you guys think?

    Scott Racing & Development Factory (SCCA Auto X/NASA HPDE)
    Build thread:http://www.importatlanta.com/forums/...GAUGE-HOLDER**
    Titans member#0001

  23. #23
    Senior Member Boosting EG's Avatar
    Join Date
    Nov 2007
    Location
    Atlanta, Georgia, United States
    Posts
    1,641
    Rep Power
    18

    Default

    nice

  24. #24
    formerly mpaz
    Join Date
    Aug 2009
    Location
    Suwanee, GA
    Age
    32
    Posts
    174
    Rep Power
    17

    Default

    nice build. keep it black!

  25. #25
    Road to All Motor10s *EFilliated*'s Avatar
    Join Date
    Dec 2008
    Location
    Northside
    Age
    32
    Posts
    2,752
    Rep Power
    19

    Default

    looks dope
    11.3 @ 117
    Midnight
    Auto
    M
    ORRIS TUNING


  26. #26
    Newbie Photodude RBS's Avatar
    Join Date
    Dec 2006
    Location
    All Over U S A
    Age
    33
    Posts
    4,685
    Rep Power
    24

    Default

    good shit.

  27. #27
    Certified Gearhead SRDFTITAN's Avatar
    Join Date
    Apr 2005
    Age
    40
    Posts
    246
    Rep Power
    20

    Default

    So you think black, I've been going back and forth between these colors for a while now. Most likely black is what I'll end up sticking with, would be a hell of a lot easier. Also quick update:had a little issue while driving on the highway yesterday. Some of my bolts on my turbo manifold where it bolts to the turbo started to do the jig and decided they didn't want to stay for the after party lol!! Ok sorry about that anyway 3 of my 4 bolts unbolted themselves even though I had a decent amount of thread locker on them. Man did I get lucky, but after a trip to the hardware store my problem is fixed and gave me just enough excuse to just go ahead and buy a Slowmotion Ramhorn manifold. So hopefully by Tuesday I'll be sportin a new manifold and 3" down pipe FTW!! Also I'll be on the look out for some cams and valve train. As always thanks for the compliments!!

    Scott Racing & Development Factory (SCCA Auto X/NASA HPDE)
    Build thread:http://www.importatlanta.com/forums/...GAUGE-HOLDER**
    Titans member#0001

  28. #28
    Let the Motha burn Turbodude06's Avatar
    Join Date
    Jan 2006
    Location
    Where Am I
    Age
    36
    Posts
    4,403
    Rep Power
    24

    Default

    Car is sick man!!! Made some great power and your doing everything right so far, keep it up... I would stick with black too just cause it's so much easier.
    -If You Own A Honda And Say "Headers", Go Jump Off Bridge...........


  29. #29
    Certified Gearhead T34me's Avatar
    Join Date
    Apr 2007
    Location
    GA
    Age
    41
    Posts
    920
    Rep Power
    18

    Default

    strong work man, wish half projects on here turned out that well. going to look in to that interior paint, not bad at all

  30. #30
    Certified Gearhead SRDFTITAN's Avatar
    Join Date
    Apr 2005
    Age
    40
    Posts
    246
    Rep Power
    20

    Default

    Little quick update:

    My Ramhorn (Slowmotion Motorsports) just arrived in the mail yesterday. Looks pretty good, going to get in on sometime next week. Only reason why I'm waiting is because I just ordered a tweaked Precision t3 60-1 with a stage 5 wheel today and it won't be here until next week. Very excited about the turbo, Jesse and Usedturbo.net custom built the turbo for my particular setup. He is messing with the inducer wheels and stuff like that to give me a quicker spool up but also maintain a free flowing with very little back pressure for the high lift cams that are coming. With everything that he is doing to it, its going to flow closer to a GT35 with less back pressure than your typical 60-1. I'm going to do a complete write up on all of it. I also am going to have some cams and a complete valvetrain coming some time soon. I'm going to do a complete write up on all of that as well. Stand by for pics of the ramhorn, bought it used and got a good deal on it!!


    I just read a thread on how to clean and polish this mani, so I'm going to give it a try!! Stay tuned!!!

    Scott Racing & Development Factory (SCCA Auto X/NASA HPDE)
    Build thread:http://www.importatlanta.com/forums/...GAUGE-HOLDER**
    Titans member#0001

  31. #31
    Certified Gearhead bondo's Avatar
    Join Date
    Sep 2008
    Age
    37
    Posts
    550
    Rep Power
    16

    Default

    good work, cant wait to see finished product
    Sig Too Large - IA MGNT & Durty O

  32. #32
    Certified Gearhead SRDFTITAN's Avatar
    Join Date
    Apr 2005
    Age
    40
    Posts
    246
    Rep Power
    20

    Default

    Got the manifold put on today and even got a chance to clean up the engine bay a little. Was able to relocate some wiring, vacume lines and removed the cruise control. Found out yesterday that my turbo will be here next Thursday, but in the mean time check out a couple of photos.


    Scott Racing & Development Factory (SCCA Auto X/NASA HPDE)
    Build thread:http://www.importatlanta.com/forums/...GAUGE-HOLDER**
    Titans member#0001

  33. #33
    Accord->Evo EmminoDaGreat's Avatar
    Join Date
    Aug 2005
    Location
    Hiram
    Age
    39
    Posts
    10,412
    Rep Power
    31

    Default

    pictures well

    The EMPIRE

  34. #34
    Certified Gearhead SRDFTITAN's Avatar
    Join Date
    Apr 2005
    Age
    40
    Posts
    246
    Rep Power
    20

    Default

    I just took some pics of my gauge holder that is finally out of R & D (pics are in the first post). I'm very happy with it, took a while because there are two different angles on each side where the gauges are located. I think we were able to get it almost perfect. The holes in the gauge holders were cut to 52mm. After test fitting all the gauges in we were finally able to get a snug fit on the the gauges without having to use any shims or anything. I even turned it upside down and none of the guages moved or acted like they wanted to slide back out (very happy). Another important note was after installing the new holder in the dash there was an even amount of spacing between the dash and the gauge holder, each gauge and from top to bottom. As mentioned in the first post the default color on these holders will be black 1/4" acrylic. I went with the 1/4" because it needed to have enough depth and thickness to fit flush in the dash where the factory radio and coin tray were. When looking at the photos keep in mind that its installed in a 1997 civic ex, I have 4 gauges where a radio and coin tray used to be with plenty of room to spare. Also remember that if you wanted one of these I can do them in almost any configuration whether it's 1-4 gauges, 2 guages and a turbo timer and an electronic boost controller, etc,. I'm still working to get the exact measurements of all the popular boost controller, turbo timer and even apexi for there vafc/afc line. I'm doing this so that you can now have all your gauges and electronics in one central, clean location thats easily accessible with a quick glance while driving down the road. If you have any questions about any of it, shoot me a pm and stay tuned, got plenty in the works like (S2000 gauge cluster into ek/eg civic adaptor kit, other gauge holders for other cars and a whole lot more). And as always thanks for the compliments and feel free to offer suggestions that might make it better!

    Pics as promised:

    Pic of the gauge holder not installed yet. These holders are cut with a precision laser cutter so that duplication and a snug fit is effortless. Again this one was cut out of 1/4" acrylic, in the future I will also be offering holders that are 3/16" thick, as some applications won't need such a thick piece.


    Holder installed with no guages inserted, look at the space between the holder and the dash, doesn't really get any better than that. Ok it could have but dang this is the first one lol!!!


    With one gauge installed, achieved an almost perfect snug fit around the gauge itself.


    Another view.


    This pic is with all 4 gauges installed, look at how flush they all fit. Even with my particular gauges having a hood to block sunlight the gauges are all flush with the top of holder and not hanging off.


    Another view.


    Everything installed, check out the spacing between each gauge as it is an equal distance between them all. Also after achieving such a snug fit with the dash, only a couple of pieces of heavy duty velcro are needed to secure the entire holder. This holder will not budge!!! I've been using the same two pieces of velcro on 4-5 different prototypes and its still holding strong!


    Last one, hope you guys like it as I'm very proud of them!


    If you want one that will fit in a 96-98 Civic send a PM, only $20.00 + shipping for this piece!!

    All the other popular models are coming very soon!!

    Scott Racing & Development Factory
    For enthusiast, by enthusiast.......

    Scott Racing & Development Factory (SCCA Auto X/NASA HPDE)
    Build thread:http://www.importatlanta.com/forums/...GAUGE-HOLDER**
    Titans member#0001

  35. #35
    Certified Gearhead SRDFTITAN's Avatar
    Join Date
    Apr 2005
    Age
    40
    Posts
    246
    Rep Power
    20

    Default

    Quote Originally Posted by EmminoDaGreat View Post
    pictures well
    Thanks bro!!!

    Scott Racing & Development Factory (SCCA Auto X/NASA HPDE)
    Build thread:http://www.importatlanta.com/forums/...GAUGE-HOLDER**
    Titans member#0001

  36. #36
    Certified Gearhead SRDFTITAN's Avatar
    Join Date
    Apr 2005
    Age
    40
    Posts
    246
    Rep Power
    20

    Default

    Hell yeah for the new turbo, very excited!!

    Specs:

    It is a Precision 60-1, but it was put together with a stage 5 wheel and .82 a/r hot side with a 60 trim 60 a/r compressor side. I needed a combination that would be high flowing and relieve as much back pressure as possible because I'm going to be running high lift cams. I'm going to do a full review on it once its installed. I purchased it from Jesse at usedturbos.net (760) 721-7669, make sure you ask for him (Jesse). I was very pleased from the very beginning because they rebuild turbos and include a one year warranty on all of them. The best part is, is that I paid just over $500.00 for this turbo and it came with the same warranty that I would have gotten if I bought it brand new directly from Precision or one of their distributors but for alot less! So it was a pretty easy decision for me, plus if you have a question (I had plenty) Jesse was more than happy to answer them. Now I'm not saying that he will do this for everyone (because the man has to work lol) but I was on the phone with him for about 20 minutes talking about my particular setup and what I was trying to achieve. By the end of the conversation we settled on the 60-1 with the stage 5 wheel and .82 a/r turbine housing. A few days later and it shows up on my door step, can't wait till tomorrow so I can get this on!!! Here are some pics:


    Let me know what you guys think, check out their website. Their website is easy to navigate because you can select how much power you want to make and it will pull up the turbos that will work. Remember even after you pick one give him a call if you want to make changes or have any questions. Hope you like it and I will update this tomorrow with the in car driving impression video..........hopefully!
    Last edited by SRDFTITAN; 03-22-2012 at 11:39 AM.

    Scott Racing & Development Factory (SCCA Auto X/NASA HPDE)
    Build thread:http://www.importatlanta.com/forums/...GAUGE-HOLDER**
    Titans member#0001

  37. #37
    Certified Gearhead SRDFTITAN's Avatar
    Join Date
    Apr 2005
    Age
    40
    Posts
    246
    Rep Power
    20

    Default

    Well got the new turbo put on today, ran into a couple of issues but we got everything worked out and it turned out nice. Ended up having to make a downpipe flange (4 bolt), and then the rest of the downpipe. As far as the difference in how it drives is night and day. My previous setup was a cast iron log manifold with a t3t4 50 trim turbo and a 2.5" downpipe. I would see full spool at around 3500 rpm and because of the back pressure with this setup my torque curve was nice and broad. This setup is really nice for dd and for the person that wants to stay conservative with their tune and power goals (under 400hp). I liked this setup because it felt like there was always power on tap whether you were at 3000 rpm or in 5th gear cruising and you needed to pass somebody without having to downshift!!

    Now with the new setup I have a ramhorn manifold and a 60-1 turbo .82 a/r hot and 60 trim cold and a 3" dowpipe. I picked this setup because I'm wanting to run a higher lift cam and make the same mid 300hp with less boost= more effecient. Because of my want to run the higher lift cams I had to reduce the amount of back pressure after the exhaust cam. Going to a ramhorn manifold, a larger (.82 a/r) turbine housing and a 3" downpipe achieves this perfectly.

    First Drive:
    Like stated earlier the difference is night and day, instead of full spool at 3500 rpm, I'm at full spool around 5600 rpm (right at vtec engagement). I can tell that a little bottom end (torque) has been loss, but with the addition of higher lift cams I should be able to get some of that lag and torque back (closer to maybe 5000 rpm spool up). Even though I was expecting this drastic difference I was still thrown off a little, but I will tell you one really, really good advantage. Because I'm not reaching full spool until around 5600 rpm, I can stay out of boost when I'm just put putting around town which= better gas mileage. Just on one tank of gas I went from an average of around 24 mpg to 28.3 mpg. Another great advantage is when this turbo finally spools man oh man is it nasty, I have a 6lb wastegate spring in right now and it feels like when I was running at 10lbs of boost with the smaller turbo!!! Freakin Nasty!! Ok sorry back to the great gas mileage lol- I'm going to keep tabs on it but I was able to go a substantial amount of miles more than normal.

    A couple of things that I'm trying to keep in mind as far as the cams go is I'm wanting to make sure that the primary and secondary cam lobes are going to be a little larger than the current GSR cams that I'm running now. This will aid in reducing lag and hopefully getting my torque back up there a little. I'm trying to not just get tunnel vision on the max amount of lift (vtec lobe) that the cam is going to give me, I want it all!!

    I'm planning on trying to do some videos of some driving impression on Sunday, if I'm able to do it I'll try to edit it really quick and get them up. Then that way for some of the guys that prefer videos (like I do) you can physically see what I'm talking about.

    Stay tuned....pics:


    As always a big thanks to the guys at Mainstream Performance, there the only guys that I would trust!! www.mainstreamperformance.com


    Turbo comparison, t3t4 50 trim on left, 60-1 on right!!


    Undercarriage shot, had to modify a few things to get everything to fit propery.


    New turbo mounted:


    Close up (well kinda) of the downpipe.


    Thanks for watching!!
    Last edited by SRDFTITAN; 03-22-2012 at 11:40 AM.

    Scott Racing & Development Factory (SCCA Auto X/NASA HPDE)
    Build thread:http://www.importatlanta.com/forums/...GAUGE-HOLDER**
    Titans member#0001

  38. #38
    Accord->Evo EmminoDaGreat's Avatar
    Join Date
    Aug 2005
    Location
    Hiram
    Age
    39
    Posts
    10,412
    Rep Power
    31

    Default

    where is the dumptube?

    The EMPIRE

  39. #39
    Certified Gearhead SRDFTITAN's Avatar
    Join Date
    Apr 2005
    Age
    40
    Posts
    246
    Rep Power
    20

    Default

    I'm doing it today (Saturday) lol, didn't have enough time today, had to go look at a truck.

    Scott Racing & Development Factory (SCCA Auto X/NASA HPDE)
    Build thread:http://www.importatlanta.com/forums/...GAUGE-HOLDER**
    Titans member#0001

  40. #40
    Certified Gearhead SRDFTITAN's Avatar
    Join Date
    Apr 2005
    Age
    40
    Posts
    246
    Rep Power
    20

    Default

    As the title states I've gotten to a point with the rest of my build where I can take a break and start some much needed body work. DISCLAIMER: The last time that I did anything that was body/paint oriented was back in high school (12-13 years ago). So I'm scared as hell, but I'm going to go for it anyway.

    Anyway I'm still a little undecided on the exact color that I'm going to paint my car, and I'm going to leave it up to everyone on various forums to decide for me. I'm going to let you guys decide because I'm tired of thinking about it lol! Now on to the choices!!

    The stock color:
    Granada Black Metallic Clearcoat NH-503P


    OR

    Montego Blue Metallic (e90 BMW's)
    This color flip flops like a mother, so I posted more that one photo so you can see the many shades of this color.

    Direct Sunlight, nice mix of colors (light purple, light blue, dark blue, electric blue)


    Purple Tinted (around dusk)


    Close up:


    Low light:


    Night shot (artificial light):


    The Montego Blue Metallic happens to be my favorite color, however that would mean more work as in door jambs, trunk, etc. So those are the two choices, let me know what you guys think.

    Now I've already started on the car, I've included some photos of some of the supplies that I needed, as well as some sanding, body filler shots to be scrutinized. ATTENTION: calling all those who are experienced with body work!!! I'm going to need your help as I'm sure I'll have plenty of questions and I am open to advice/constructive critisism.

    This is not intended to be a diy or anything but I am going to list the things that I've done in order with pics.

    Ok on to the body work:
    The first pics show when I went around my car and identified every single ding, dent, crease, fold and fat person. In all I think I circled over 100 issues!! If I found a ding or dent I would circle it indicating a low spot, if I found a high spot I would still circle it, but I would also put an X over the high spot.


    Ok a little rundown on the supplies needed to sand and use body filler. First up is sanding, I needed a variety of different types of sand paper.
    40 Grit: for sanding around various dents and dings. This paper needed to be very coarse so that I could get all the way to the metal.
    80 Grit: used for after you use the body filler and now need to sand. Its basically so that you can knock down some of the high spots and roughly get the desired shape that your looking for.
    220 Grit: this one will be used after you got the rough shape that you were looking for with the 80 grit. I also used this grit to featheredge the edges so that it blends with the un-body filled areas.
    320 Grit: I used this to sand the rest of the body where no body filler was used. This is the grit that I'm going to use before applying my 2k filler primer.

    From left to right, 40 grit, 80 grit, 220 grit and 320 grit (really cheap, maybe $4 a piece)


    Now some sanding, again I used the 40 and 80 grit sand paper to get all the way to the metal. You'll notice that even though I had the dings and dents circled, after sanding to the metal it made the same dings and dents very apparent which helps!


    Other supplies:


    In this pic if you look towards the center of the circle you will see some very small ding marks. This is from where I had a high spot and I used a body hammer to lightly tap it below the surface of the hood so that I could use body filler to make is smooth.


    Now after the sanding I wiped down the entire hood really good with a degreaser, wax remover stuff. After it dried it was time for body filler. I would recommend that you follow the directions on the can of body filler as they will tell you the ratio of body filler to hardner and how long to wait before sanding!!


    Time for mixing:


    After mixing was complete:


    Now time for spreading which should come immediately after mixing is complete. According to my instructions on the can I only had about 3-4 minutes to get the body filler on the car before it started to harden up on me. I waited the suggested cure time of 20 minutes before applying more layers of body filler.


    Thats it for now, remember to leave your suggestion on what paint color I should choose!!

    Scott Racing & Development Factory (SCCA Auto X/NASA HPDE)
    Build thread:http://www.importatlanta.com/forums/...GAUGE-HOLDER**
    Titans member#0001

Page 1 of 4 1234 LastLast

Posting Permissions

  • You may not post new threads
  • You may not post replies
  • You may not post attachments
  • You may not edit your posts
  •  
About us
ImportAtlanta is a community of gearheads and car enthusiasts. It does not matter what kind of car or bike you drive, IA is an open community for any gearhead. Whether you're looking for advice on a performance build or posting your wheels for sale, you're welcome here!
Announcement
Welcome back to ImportAtlanta. We are currently undergoing many changes, so please report any issues you encounter with the site using the 'Contact Us' button below. Thank you!