


Here is a write-up for anyone here with a 1g DSM that isnt on GADSM. I did this a while ago and I cant believe is freakin awesome it is to have your alternator OUT OF THE WAY of everything else. Anyways, I'll get right to it.
On a scale of 1-10 it gets a 6.5. this write up is for 1g's. Sorry 2g folks - its a little different.
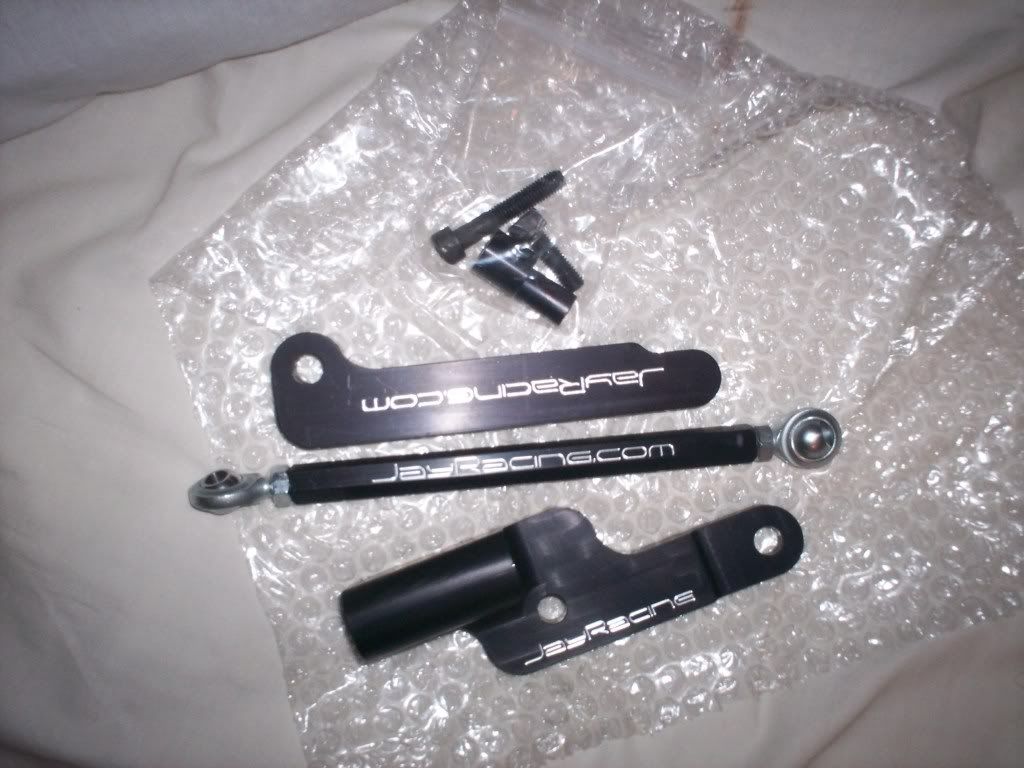
A short list of items you will need.
Here is the kit as I got it in the mail. New belt is included but not pictured.
- Metric size 6 hex key
- 14mm socket
- 10mm socket
- 13mm socket (if the nut that holds your long alternator bolt on is the same as mine)
- Solder
- Soldering iron
- Electrical tape
- Extra 12 gauge wire
1.) REMOVE THE INTAKE MANIFOLD
- - - I got lazy and did not, made my job so much harder, I would have rated this install much less had the IM been removed.
- If you do not remove the manifold -
(My AC was already removed, so this writeup does not include how to remove the AC components)
- remove plug wires
- remove vac line to the FPR
- unbolt and remove Power transistor (trust me)
2.) It is recommended that due to possible clearance issues that you grind down and remove some material from the cast motor mount bracket with a hand file. (pictured on the instructions included in the kit) I did not do this, time will tell if I should have or not. (update, I did end up filing it down)
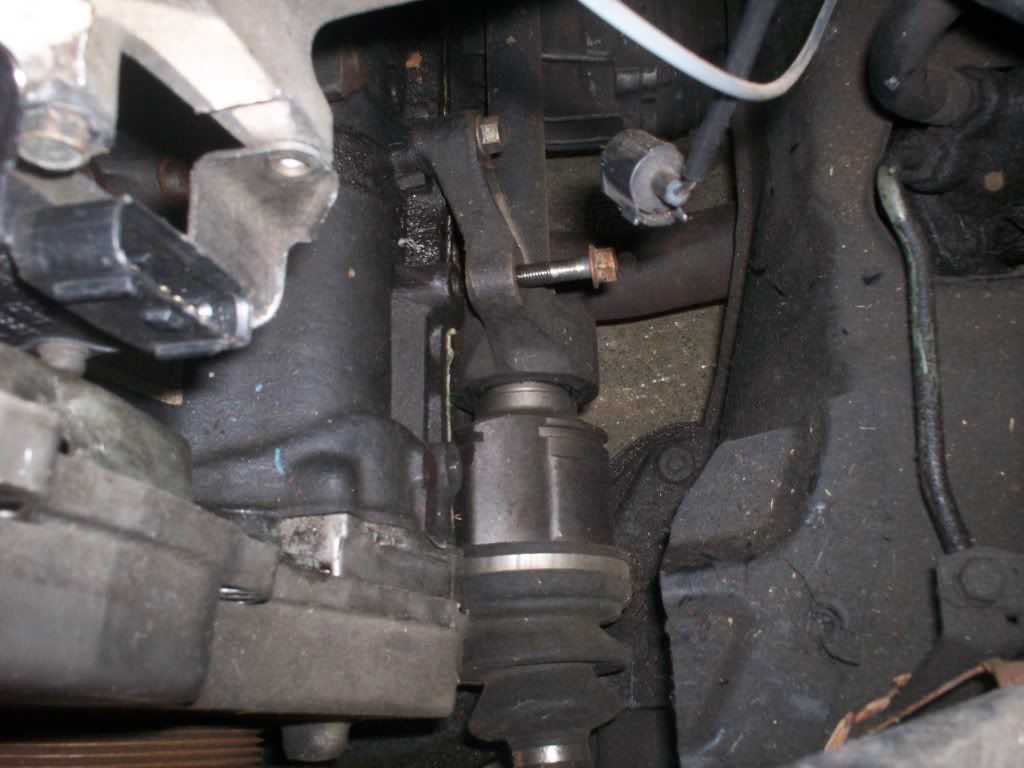
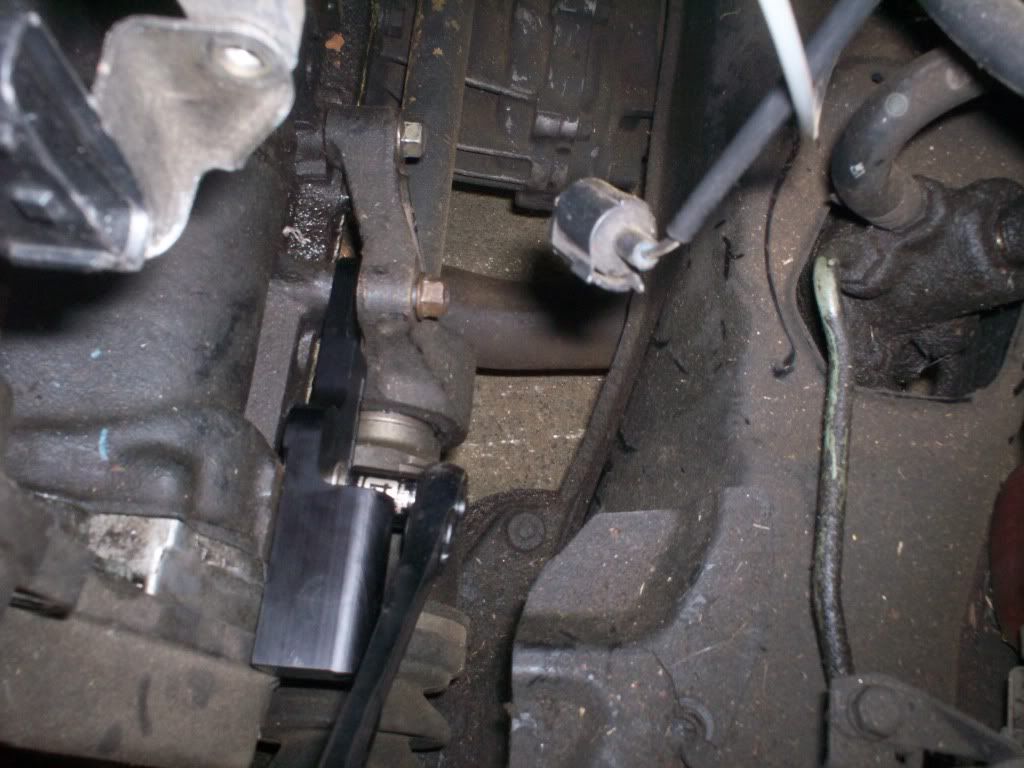
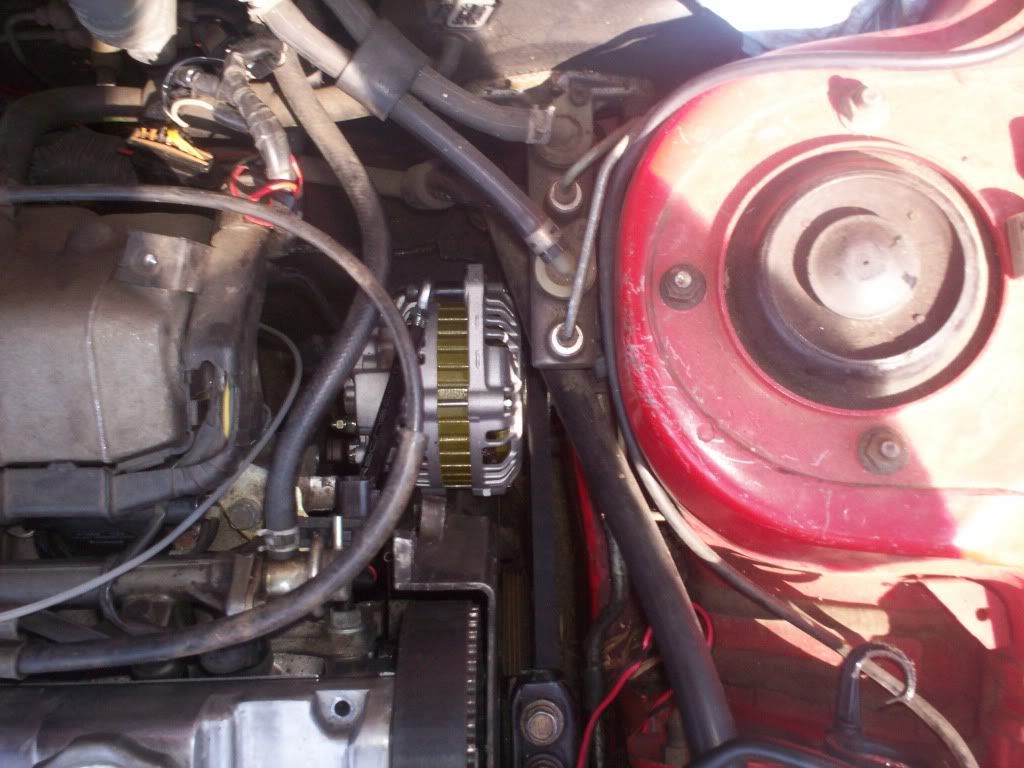
3.) Remove the 14mm bolt that is closest to driverside that bolts the carrier bearing and the AC bracket to the block. loosen the other one for some wiggle room. Install main alternator bracket.
Before -
After -
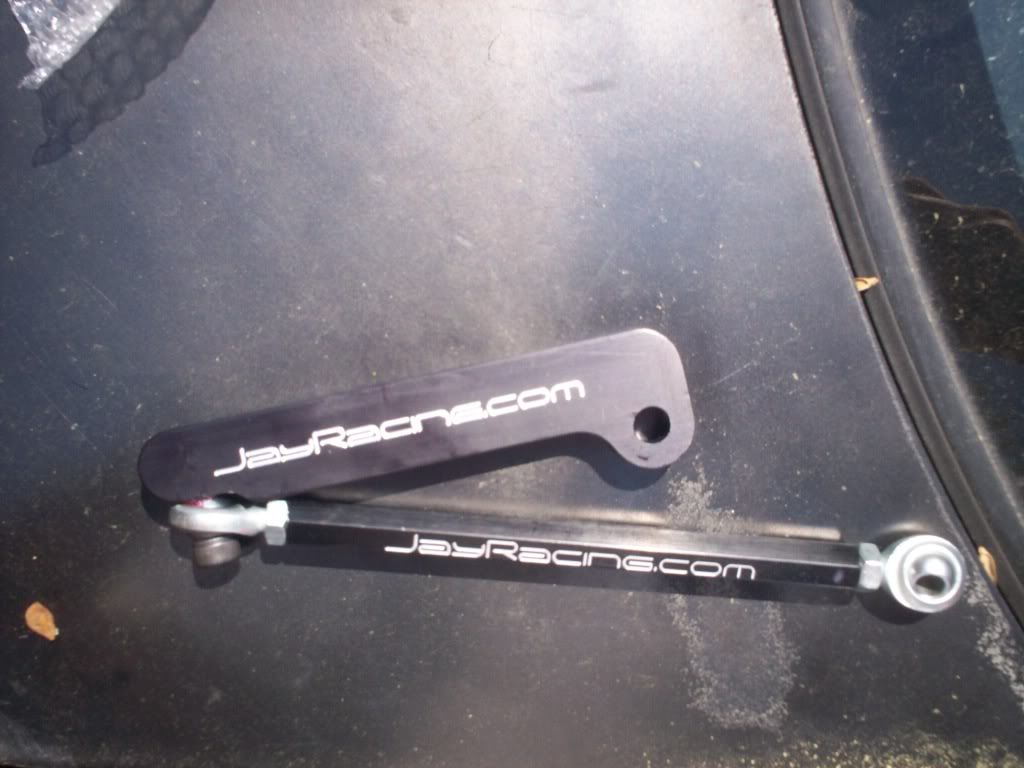
4.) Put tensioner assembly together using the SHORT hex screw supplied with the kit. Use blue locktite here.
5.)Locate the emply bolt hole on the block close to end shortly above the main bracket you just bolted down. Mount the bracket with the tensioner down using that empty bolt hole. (Not pictured due to angle issues with the camera, but you'll find it - use pictures in instructions for reference)
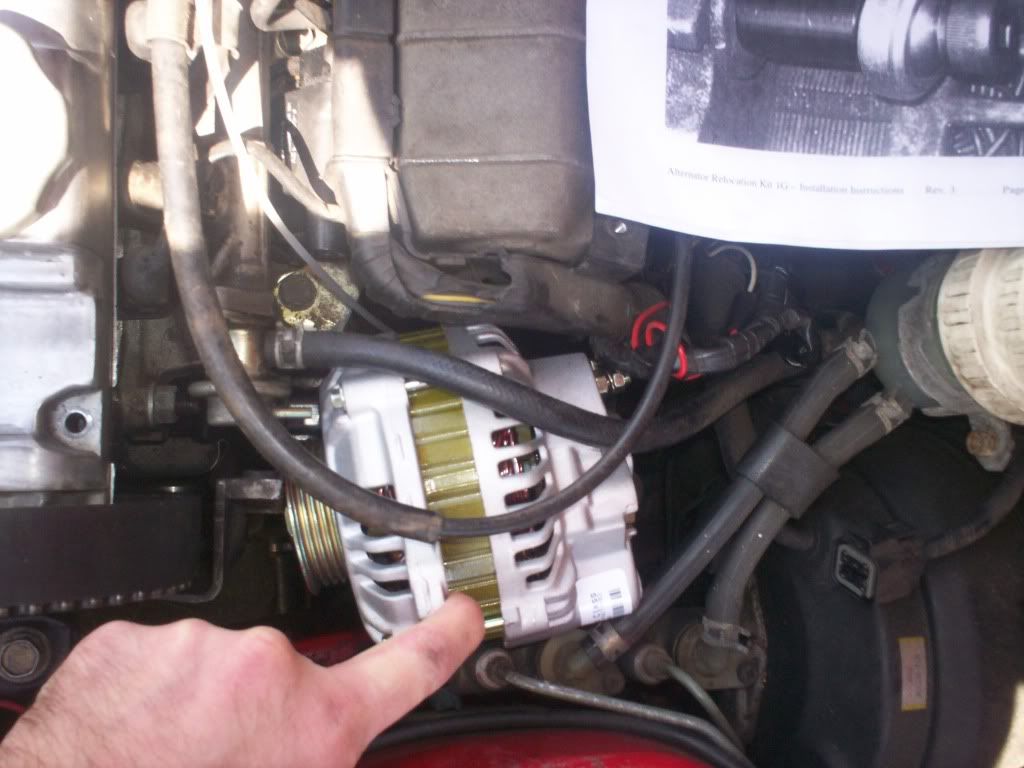
6.) If you did not remove your intake manifold look at this next picture. This is the only way I could angle the alternator to get it to fit and go down below.
7.)Bolt down the alternator to the main bracket using the factory long bolt and 13mm (in my case) nut. I used the outer ribs on the crank pulley so I installed the spacer on the driver side of the alternator. (simplest option to retain stock use of waterpump and PS pump! Other wise the waterpump wont have anything to spin it) DONT tighten it down all the way just yet!
8.)Already pictured above, use the smaller spacer and the long hex bolt to mount the tensioner arm to the alternator. Now enjoy the ease of tensioning the alternator MUCH faster and easier!
9.) install the included belt. This is why you dont want the alternator bolt tightened down all the way just yet. You're going to need to push the alt up some to manuver the belt around the pulley. Once the belt is around all 3 pulleys (Assuming you used the outside ribs on the crank pulley) then tension the alternator with the tensioning arm and tighten the nut and bolt on the bottom of the alternator. Tighten the jam nuts at each heim joint on the tensioner.
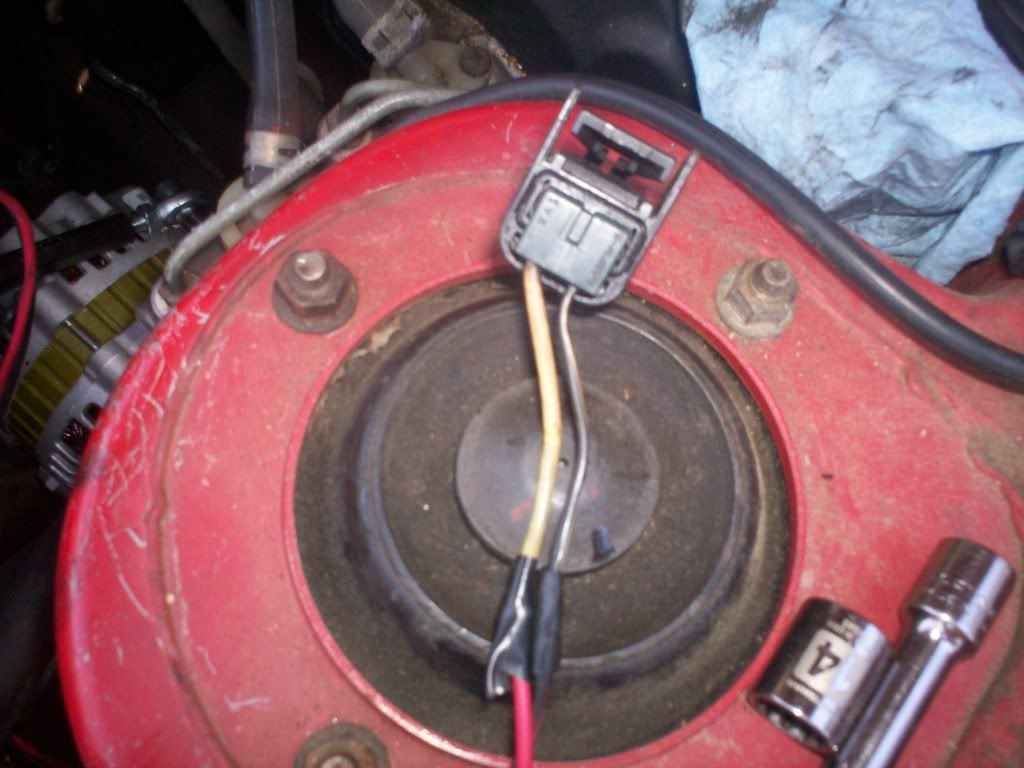
10.) Extend your alternator wires to the back. Use your 12 gauge wire here. Cut off the plug and simply solder it on the extended wires. I used red for power and black for ground. (Update - You;re going to have to get some 4 gauge wire and also attach to the 2 thicker wires that bolt directly to the alternator... I tried a different method and it didnt work out as planned, so this is the way to go)
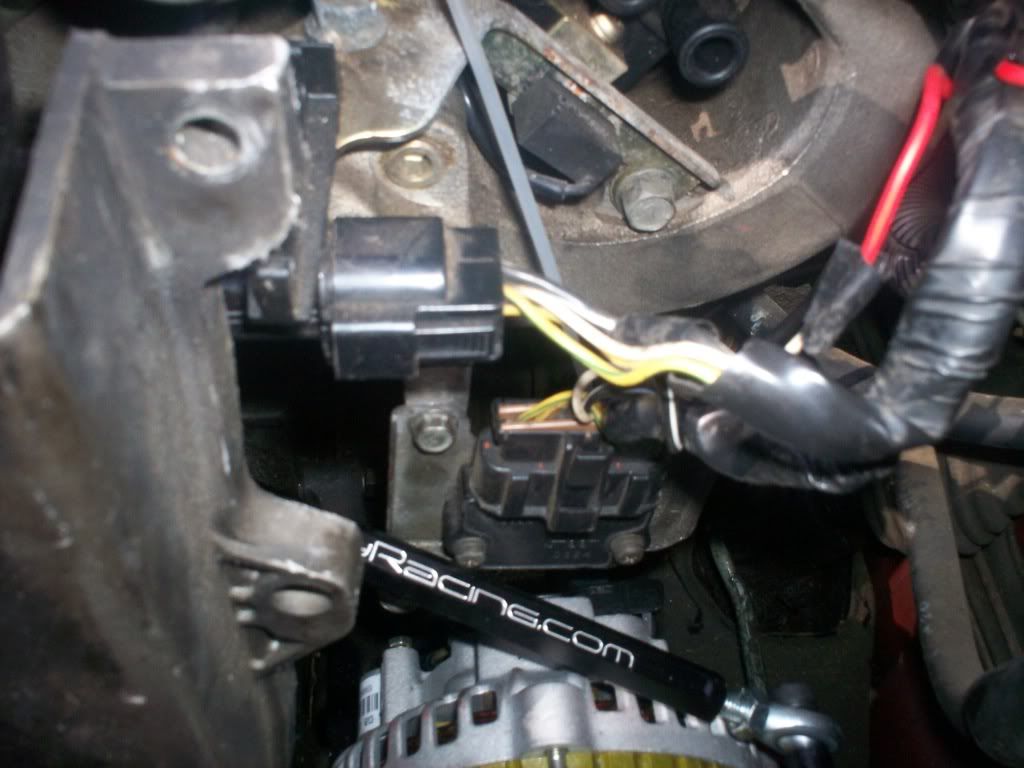
11.) What is not mentioned in the instructions provided is this. For me at least. The factory location of the Power transistor will not work anymore. It has to be slightly relocated. I just simply rotated it and used 1 10mm bolt and bolted it onto the intake manifol like so.
12.) dont forget to reinstall everything you removed and DONT forget about the vac line to the FPR!
Any questions, just ask me, and I hope this helps makes your install a little easier than mine. Remember, If you do not remove the intake manifold, be sure to have your cuss word memory bank ready to pull out all stops.


 Reply With Quote